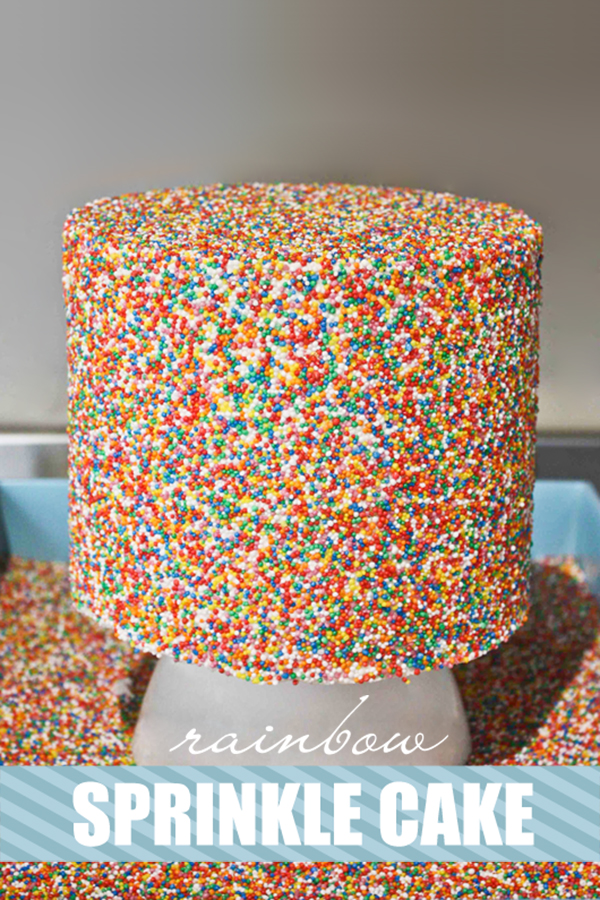
Oh how I love sprinkle cakes! These whimsical cakes are the ultimate treat for the ultimate sprinkle lover! And I’m pretty positive you’re smitten with them too. So I must warn you that today’s post might induce some squealing! Kate Wagner of The Greedy Baker is sharing a fabulous sprinkle cake tutorial! YES! Step by step instructions and photos to help you create your very own sprinkle cake. Kate’s method is super easy and most importantly nice and clean. Packed with great tips and tricks to save you time and heartache… and spilled sprinkle mayhem! The end result is one spectacular sprinkle cake! It’s a DIY Rainbow Sprinkle Cake Tutorial!!

SPRINKLE CAKE TUTORIAL
by Kate Wagner
Supplies:
8″ Round Layer Cake
Buttercream Icing
Rainbow Sprinkles (roughly 2 pounds or 1 kg)
Turntable
Angled Spatula
2 Cardboard Cake Circles (1″ smaller than cake size)
Cake Lifter
Large Shallow Tray
Small Bowl
Spoon
STEP 1: Stack and fill cake layers, building your cake on one of the cardboard circles.
STEP 2: Frost the sides of the cake with a reasonably thick layer of icing. Bring the icing over the top edge into the center of the cake and remove excess. We are not looking to frost the top of the cake at this stage.
STEP 3: Using the cake lifter, lift the cake off the turntable and chill in the freezer for 15 minutes.
STEP 4: While waiting for the cake to chill, pour the rainbow sprinkles into a large shallow tray.
STEP 5: Remove the cake from the freezer and place the other cardboard circle on top of the cake.
STEP 6: Using the cake lifter, lift the cake and gently lay on its side in the tray sprinkles. Supporting the cake with your hands on either side, roll until you have an even layer of sprinkles adhered to the buttercream.
STEP 7: Place the cake back on the turntable.
STEP 8: Spoon a generous amount of buttercream on top of the cake.
STEP 9: Smooth evenly with the angled spatula, removing any excess. Chill in the freezer for 5 minutes.
STEP 10: Place a small bowl upside-down in the center of the sprinkle tray.
STEP 11: Remove cake from freezer and place on top of the bowl, being careful to balance the cake correctly.
STEP 12: Spoon a large amount of sprinkles on top of the cake and smooth around to edges using the angled spatula, pressing gently as you go to make sure they adhere to the buttercream.
STEP 13: Neaten up any missed areas around the edge using the spoon and spatula as shown.
STEP 14: Admire your finished cake! This fun cake is sure to brighten up any day.
VENDORS & CREDITS
Tutorial : The Greedy Baker
YOU MAY ALSO ENJOY
Chocolate Funfetti Cake
Rainbow Petal Cake
Today Is Your Day Cake
Sprinkle NYE Cake
Banana Split Cake

