Today we’re excited to share the first post from one of our new contributors! Enjoy this great DIY cake project by Miso of Miso Bakes…..
I wanted this cake to be bold. I wanted it to be daring. I wanted it to scream for attention, but at the same time, be quite the shy-pie.
My inspiration for this cake came about when I stumbled upon Martha Stewart’s Coffee Filter Rose Tutorial. I love both baking and crafting, so I figured I would tie the two together. Also, with the increasing popularity of handmade-themed weddings, I hoped the simplicity of this cake would encourage and inspire brides to try and make their own wedding cake.
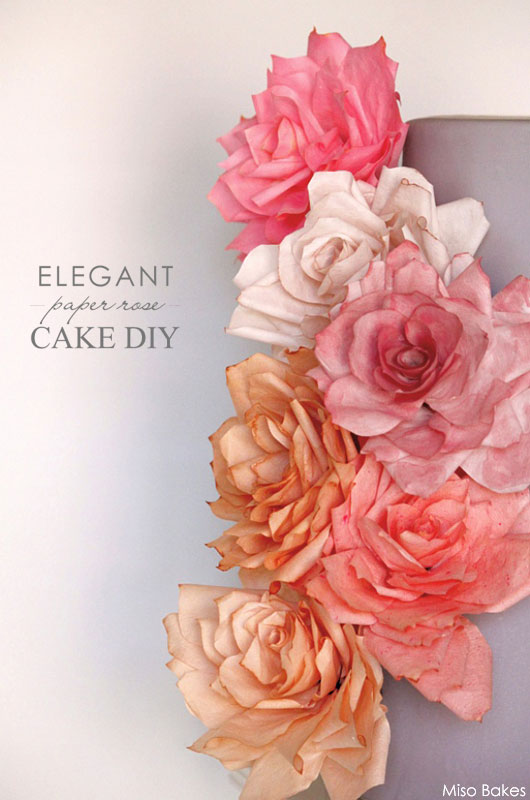
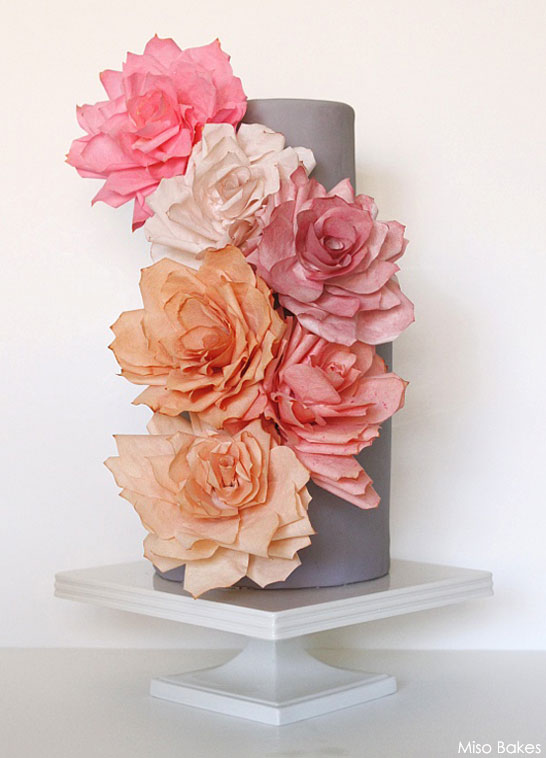
The colors and the oversized and exaggerated roses were influenced by recent fashion trends. Because I wanted the colors of the roses to stand out (but not be too overwhelming) I chose grey to be the base color of the cake. For a more elegant cake, I think a pale pink, ivory, or even a white base would work. For a more daring cake, I think a black base with hot pink flowers would do the trick. Technically, depending on the color scheme, this cake will suit most themes and occasions, so let your imagination run wild!
To make the roses more food safe, I used food coloring and tea to color them instead of using paint.
PAPER ROSE CAKE
a DIY by Miso Bakes
1. Make roses according to the instructions provided on the Martha Stewart Website. (If you prefer, you may make the roses on skewers instead of floral wire.)
2. Make sure that your floral tape is tightly secured around the blossom, and that it is not too bulky.
3. Dip a rose in a bowl of diluted food coloring or tea, slowly rotating the rose until the whole rose, including the center, is soaked. (This process will be easier if you gently tip the bowl.) Repeat until all your roses are colored.
4. Gently give the roses a shake over the sink, and stick the roses in a cup of rice or a block of styrofoam. (Place a paper towel below the styrofoam or cup as excess liquid may drip.)
5. The petals of each rose will be clumped together, but it is okay. Let it dry for an hour or so.
6. Using a blow dryer, gently dry the face of the rose on medium-high while supporting and cupping the whole blossom in one hand. The petals will separate as they dry. (The heat of the blow dryer may soften and slightly melt the floral tape, so be careful.)
7. After drying the rose, if you hold it by its stem, the larger petals will flop over. To resolve this, add an extra layer of tape to the back, taping higher up the petals for more support.
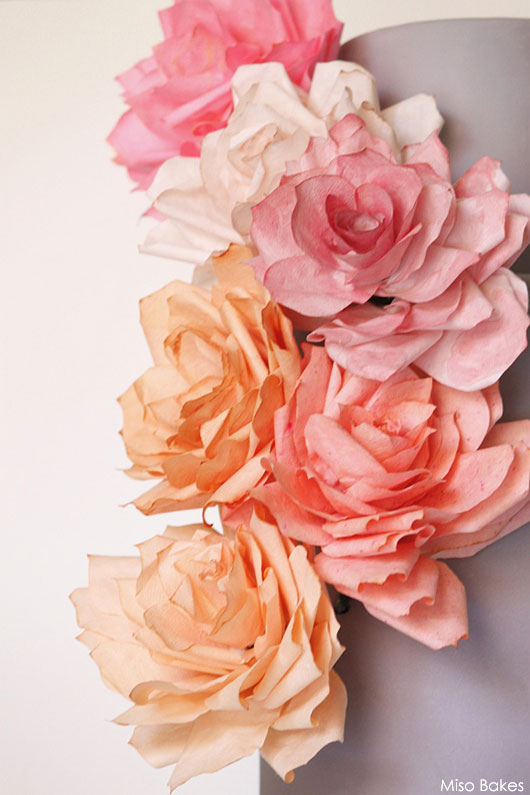
8. Gently curl the tips of the rose with a toothpick and fluff the petals for volume.
9. Cut the stems of the roses to an appropriate size. If using floral wire, tape the whole wire with floral tape before inserting it into the cake.
10. Insert the roses into the cake.
11. Curl the outer petals back to hide the floral tape and the bulk.
TIPS:
1. The color of the roses will look a lot darker when wet, so keep this in mind as the final color of the roses will be lighter.
2. If making roses a few days in advance store them away from direct sunlight, or the colors will fade.
3. To accent the tips of the roses, use food coloring gel slightly diluted with a bit of alcohol or clear extract.
4. If decorating a buttercream cake, stick a small ball of sugarpaste through the back end of the skewer or floral wire, stopping at the bottom end of the blossom. The ball will act as a stopper and will keep the petals from touching and soaking up the moisture from the cake.
5. If you would like, you may add piping or leaves to the cake.
Happy Caking!


What a beautiful cake. So pretty!
This is just gorgeous! Those roses are amazing!
GORGEOUS!
Oh my goodness! This is fabulous!
LOVE! If I was not already married, I would for sure do this!
I have been anxiously awaiting your first post here! WOW! What a gorgeous cake, those flowers are stunning! I love the colors you picked, great tutorial!
wow! amazing work!!
I {heart} this cake!
Sooooo pretty – and smart too! LOVES IT!
What a great idea! I could ‘maybe’ do this!
I love this cake! Too bad I’m at work or I would immediately play around with making those roses! Great post 🙂
WOW!!!! That is just beautiful! I am amazed!!!
Very pretty…I love using paper to decorate cakes and the idea of the coffee filters is such a beautiful outcome!!!
Love it! Congrats on your new gig with half baked, I am looking forward to seeing what’s next!
Thank you for posting this. I can’t wait to try making these flowers!
amazing work! the cake is so nice
Hi! I love the way your roses came out with the technique you used…my question is: before the roses are dipped, should the petals be opened and should the petal edges be crimped…or should the flower be left as a giant “bud” then dipped, dried and coaxed open and crimped?
Miso thank you sooo much for sharing, I love your originality and cant wait to recreate these…however I hasten to add..they will not come up as blooming as yours 🙁
Can i use wafer paper for these?
Is this wafer paper or coffee filters? It doesn’t specify.
These roses are made using coffee filters.
Hey,
I noticed your article and read it. I just loved the way you wrote.
Thanks for the given article.