Happy Monday! I’m guest blogging today over at The TomKat Studio. I shared a tutorial for for these adorable Jelly Bean Flower Cupcakes! And I’m sharing it here as well. These little treats are super simple and perfect for your upcoming Easter celebrations!
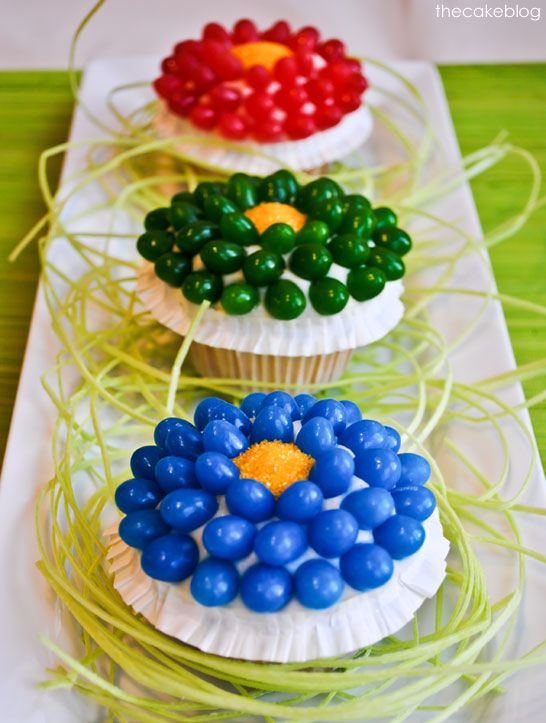
Today we’re taking the jelly bean from basket filler to the star of the show! In a few simple steps, your cupcakes will be blooming with beauty and ready for Easter! (Or any other springtime celebration.) So easy, even the kids can get involved. Just ice the cupcakes and then provide bowls of jelly beans to your little ones. They’ll love seeing the flowers come to life… and sneaking a few jelly beans along the way!
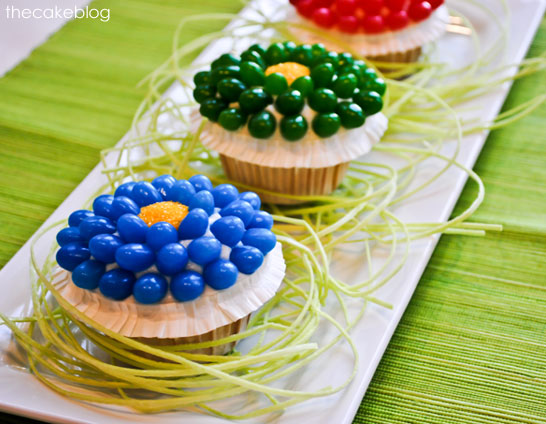
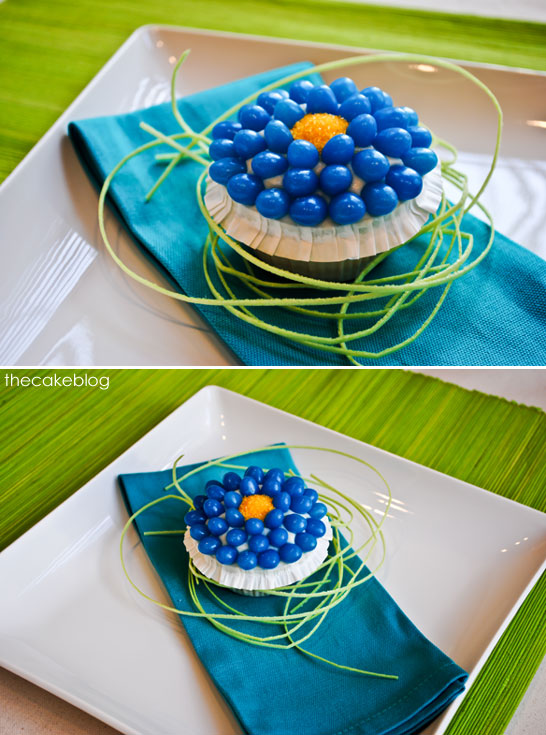
Group cupcakes on a large white plate or cake stand to create an edible centerpiece for your Easter table. Or let a single cupcake serve as a beautiful and unique place setting for each dinner guest.
JELLY BEAN FLOWER CUPCAKES
a DIY by Carrie Sellman
Supplies:
- Cupcakes
- White Buttercream Icing
- Jelly Beans
- Yellow Sprinkles
- Edible Easter Grass
STEP 1: Completely cover top of cupcake with a small mound of buttercream. Leave no cupcake exposed. Smooth slightly.
STEP 2: Create an outer ring of ‘petals’ by placing jelly beans side-by-side around the outside edge of the icing. Jelly beans will lay almost flat, sticking out of the side. Don’t worry about exact position or pushing in too far. We will adjust them again at the end.
STEP 3: Create a second ring of jelly beans inside the first. Start this ring so it alternates with the first ring, so beans are nestled tightly. This row will go in on a slight angle.
STEP 4: Create a third and final ring of jelly beans. This row will go in almost straight up. Leave a small opening in center as you position.
STEP 5: Gently push jelly beans in more, starting at the bottom row and moving up. Gently position until you like the final shape of your flower.
STEP 6: Put sprinkles into a small ziplock bag and trim off the tip. Use to pour a small mound of sprinkles in center of flower.
STEP 7: Plate with edible Easter grass beneath cupcake.
TIPS: If your jelly beans are not all the same size, use the largest ones in the outside ring of petals. Save the smallest ones for the center.
I hope my Jelly Bean Flower Cupcakes provide a fun activity for your family and a delicious dessert for your Easter celebration!

so cute! i love the vibrant colors!
gotta love a bright coloured jelly bean! how fantastic they’d look great on my cake stand….got a few spares? 🙂
Where did you get your cupcake liners?
Fantastic, i love the colors!!
What a great idea! These are so adorable!
Will you please tell me how I can get the recipes for the spring cookies and cupcakes and jelly bean cupcakes. Thanks in advance:) Ilove your blog:)
Ranya – the cupcake liners are Ruffled Baking Cups from Wilton. You can find them in most craft stores or cake supply stores. I purchased these at Michael’s.
Too cute! Very creative!
Thanks Carrie – I appreciate the link. I’ve seen a few comments/questions regarding these cups if you don’t mind – Are they standard size? Can they stand alone during the baking? Are they greaseproof or does darker batter “bleed” through?
Thanks again!
Ranya – the baking cups are standard size. I do not believe they can stand alone. I use them in a regular cupcake/muffin tin. They are regular paper, not greaseproof.
Hope that helps!