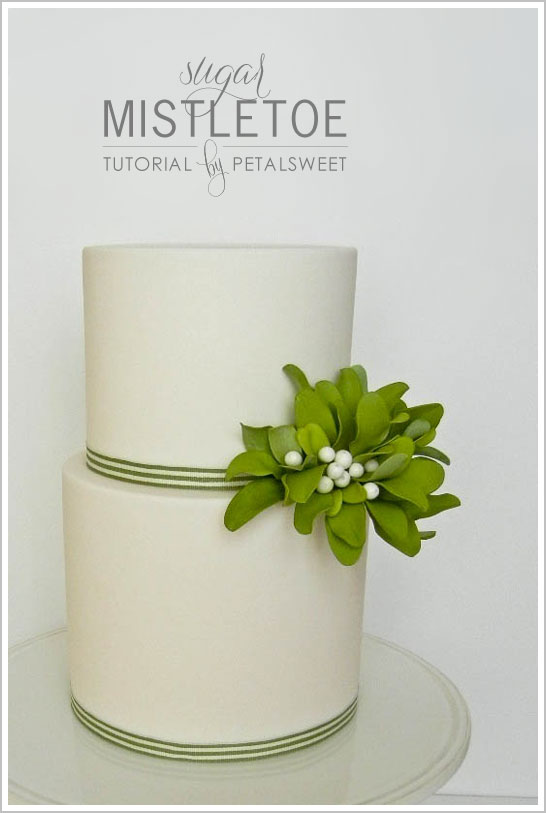
An entire month of holiday inspiration would not be complete without a DIY or two! Now that we’re officially in the Christmas spirit and inspired to bake, we have a spectacular tutorial for you today. A DIY that is modern and sophisticated and just a touch of whimsy. It’s one part festive and two parts fabulous! And it comes to us from the insanely talented Jacqueline Butler of Petalsweet!
Jacqueline is an award-winning sugar artist, well known and loved for her meticulous sugar flowers. Students across the globe seek out classes with this talented sugar crafter, eager to learn her techniques. Yep, she’s that good! Featuring Jacqueline’s tutorial is not only a highlight for this site, but it has been a long time coming! And I cannot think of a better time than right now. As a little gift to you… a free lesson from the best. Today we’re learning how to make gorgeous Sugar Mistletoe with Jacqueline Butler of Petalsweet!!
Oh for the love of stealing kisses under the mistletoe! Jacqueline’s sugar mistletoe is magical… and she’s going to teach us how to make it! I love learning. And I know you do too. So let’s skip ahead to the good stuff… one spectacular arrangement of mistletoe coming up!
HOLIDAY MISTLETOE
a DIY by Petalsweet
Flower-making Tools and Supplies:
• Groove board
• Foam pad
• Rolling pin
• Cornstarch
• Shortening
• Sugar glue
• Styrofoam
• Wire cutters
• Ball Tool
Mistletoe Berries:
• 30g white wire (3” lengths)
• White Gum Paste
• Confectioners Glaze (with brush)
• Glaze Thinner or alcohol
• White Pearl Dust (optional)
Mistletoe Leaves:
• 28g green or white wire (3” lengths)
• Moss green and yellow-green gumpaste
• Leaf Veiner (optional)
• Mistletoe leaf cutters
• Moss Green Petal Dust
• Daffodil Petal Dust
• Confectioners Glaze (with brush)
• Acoustic foam OR apple trays OR scrunched foil for drying leaves
• Green floral tape
STEP 1 : Roll a small (pea-sized) ball of white paste until smooth.
STEP 2 : Dip end of 30g white wire into sugar glue and insert wire through ball until the tiniest tip barely pokes out the top of the ball. Place in Styrofoam to dry completely. Make as many as desired, varying the size of the ball, but keeping them small and dainty.
STEP 3 : Finish the berries with a thin coat of 50/50 Confectioner’s Glaze if desired (half glaze and half thinner or alcohol. If a high gloss effect is desired, use the glaze full strength). Let berries dry completely. If you don’t want glossy berries, you can just finish them with a light dusting of white pearl dust.
STEP 4 : Roll moss green paste over groove board until thin and the groove is visible.
STEP 5 : If using a single-sided leaf veiner, press the veiner gently but evenly into the surface of the paste, lining up the center of the veiner with the groove.
STEP 6 : Remove the paste from groove and cut the leaf shape, centering the cutter over the veining.
STEP 7 : Dip end of 28g wire into sugar glue, and then insert into the groove of paste on the back of the leaf about ½ inch. Gently pinch paste around base of wire to secure neatly.
STEP 8 : With the underside of the leaf facing up on the foam pad, lightly thin edges with ball tool, being sure to keep the ball tool ½ on your paste and ½ on the foam pad. Use firmer pressure with the ball tool to add movement to the edges of the leaf.
STEP 9 : Lay on foam or apple tray or scrunched foil to dry. Make as many leaves as desired in several different sizes, some dried facing up, and some dried facing down. I made the larger leaves with the moss green paste, and smaller leaves with a yellow-green paste for a little bit of contrast.
STEP 10 : Blend petal dusts with a bit of cornstarch to create desired colors. Dust topsides of the large leaves with the desired shade of moss green petal dust. Dust the topsides of the smaller leaves with a mixture of yellow and moss green petal dusts.
STEP 11 : Gently steam leaves for just a few seconds to get rid of the dustiness and to set the color. Let dry before using. Steaming will give your leaves a soft, velvety finish (which I preferred for the look of my mistletoe leaves). If a glossy look is desired, dab a thin coat of Confectioner’s Glaze on the topsides of the leaves once they are dry from steaming. Let dry completely before using.
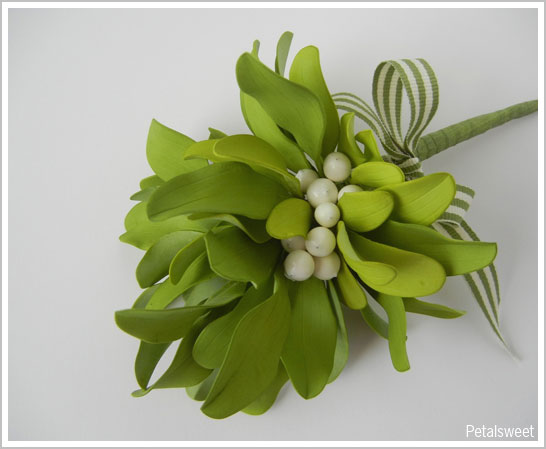
STEP 12 : To make a small topper, tape the berries together in small groups of 3 or 5. Gather the leaves into several small bunches and tape together into a bouquet. Add a few of the berries, and finish with a ribbon and bow if desired. If using on a cake, arrange leaves and berries in a small fondant-covered Styrofoam ball to create a nice round bouquet. Attach the ball to the cake with a wooden skewer or a tape-covered wire inserted into a straw.
Thank you, thank you to Jacqueline Butler of Petalsweet for sharing her tips and techniques with us today. It’s enough to make a girl giddy! And inspired to hang sugar mistletoe on every cake in sight. Perhaps your kitchen should have a mistletoe bouquet too… ready and waiting for a Christmas kiss!
VENDORS & CREDITS
Mistletoe Tutorial & Photography : Petalsweet
Learn From This Artist : Jacqueline Butler’s Online Class
Find more projects, tutorials and recipes in the Christmas Gallery!


Jacqueline, you never sease to amaze me with your talent. Can’t wait to try these. The mistletoe is absolutely stunning. If you are ever going to be in the Southeast please let me know.
She is always so amazing and flawless!!! Big fan!!!
Excellent!!! Yes she is AMAZING! I am not happy with myself for missing out on a class offered near me soon…not happy at ALL! Merry Christmas Carrie!
Beautiful!
Thank you! I’ve been wanting to try mistletoe, and to have Jacqueline Butler show me how… Thank you 🙂
Great tutorial and I love Jacqueline Butler. 🙂
Lovely! Never really delved into making sugar paste flowers, but I definitely learned lots with this tutorial. Very well done. Thanks!
Thank you so much Carrie for the opportunity to share with your lovely readers! And many thanks to you all for leaving your very kind comments! Happy Holidays! x
Wow, these are beautiful!
I really like the photography too. The colours are really sharp.
I’ve been dying to take a class from Jacqueline! Thank you for this!
I was wondering what exactly was sugar glue? or where I can get it? and is it good for other flowers too? Thanks a lot!
This is just perfect! I love mistletoe!
Beautiful and interesting tutorial, I will follow you with pleasure. I use these veiners for the flowers and leaves: http://www.italiansugarart.it
Very interesting and perfect tutorial. Welldone !