Our contributor, Miso of Miso Bakes, is here with a new tutorial for St. Patrick’s Day …
As many of you know, four-leaf clovers symbolize luck. However, did you know three-leaf clovers (shamrocks) symbolize happiness? Many years ago, I stumbled upon a quote pertaining to the two clovers that read something like this, “People step on happiness to find luck.” So true.
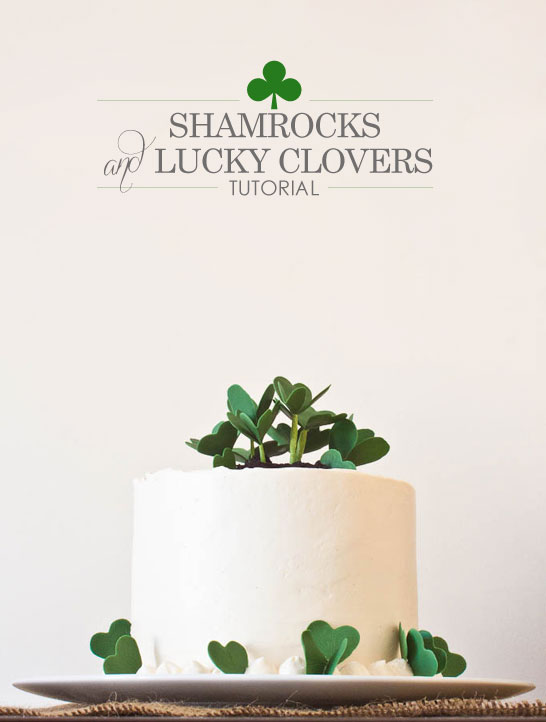
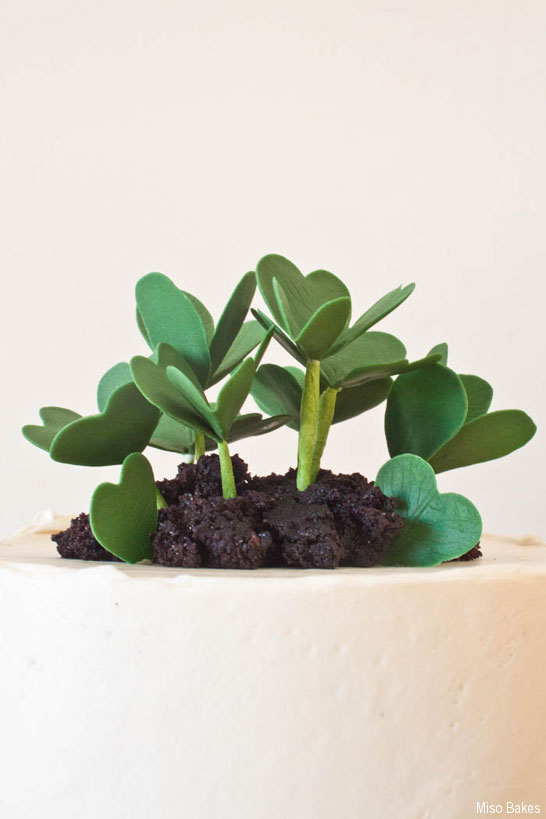
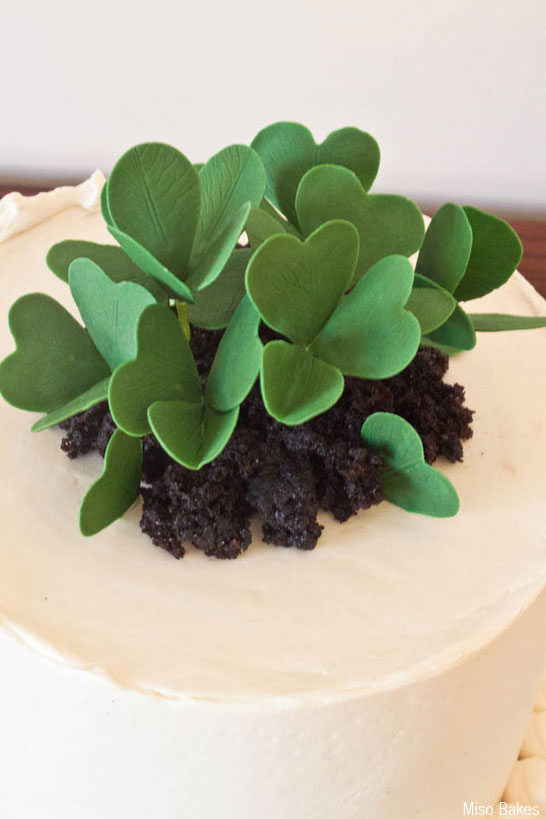
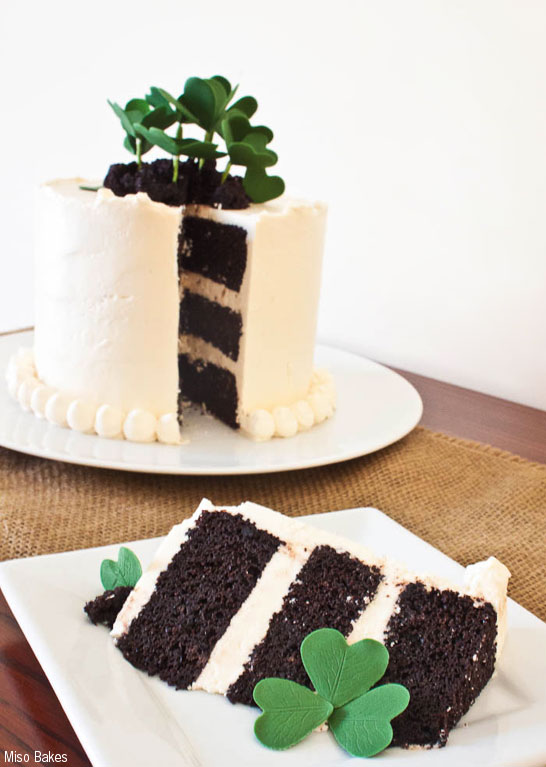
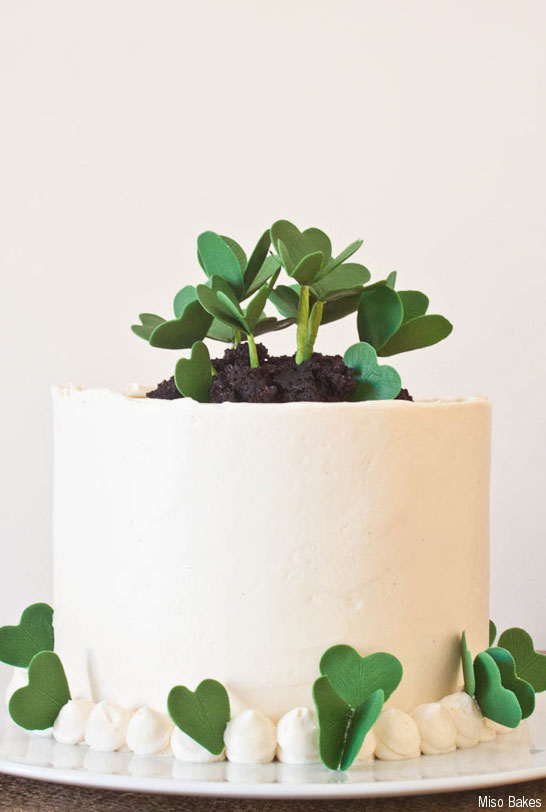
For St. Patrick’s Day this year, I created a cake that represented both happiness and luck! I made shamrocks and four-leaf clovers out of sugarpaste and used them, as well as crumbled cake scraps, to decorate a cake. Liking the rustic feel of the cake, I decided not to clean and smooth the top edges of the cake.
Here is my tutorial on how to make the shamrocks and lucky clovers…

SHAMROCKS & LUCKY CLOVERS CAKE
DIY by Miso Bakes
Supplies:
- Green gumpaste
- Small heart shaped cutter
- Rolling pin
- Floral wire (I used 26 gauge)
- Ball tool
- Floral tape
- Leaf veiner
- Toothpicks
STEP 1: Cut three green hearts out. Using balling tool thin the curved, top half of the hearts. If your edges are too ruffled, gently flatten out with you finger. You want the bottom half of the hearts to be thick enough to insert wires in them.
STEP 2: Gently press your hearts (face down) onto the veiner. I like to do it this way so that the center vein of the leaf lines up with the center of the heart.
STEP 3: Dip one tip of your wire in water and insert into heart. Pinch the seal. Let dry completely. Dry flat as shamrock petals are not really curved.
STEP 4: Using floral tape, tape the three hearts together. Trim a bit of the wire so it looks like this. You will be taping a toothpick to elongate the stem so that you may insert the toothpick into the cake rather than the wire.
STEP 5: Tape toothpick onto the stem.
STEP 6: Your three-leaf clover / shamrock is complete!
To create a lucky clover, simply follow the steps above creating four petals instead of three.
You may use these to decorate a cake or cupcakes. I think it would be fun to hide a four-leaf clover in the midst of shamrocks and see who ends up with it on their slice of cake! Perhaps they can win a prize!
Happy St. Patrick’s Day! May you all be blessed with much happiness and luck!


That is a really lovely cake – I love the contrast of the white/green outside and the chocolate cake inside – it really makes me think of a garden! I never heard that quote before, but it’s good one 🙂
I agree with Elle – it IS very reminiscent of a garden, but a particularly well-tended, well-manicured garden. Looks gorgeous!
What did you use to make the dirt at the top? Thanks
Sally C.– I saved the cake scraps from leveling the cakes and crumbled them! : )
Great tutorial. I like how the clovers are easy to create. Thanks for sharing.
If by chance my cake were to come out perfectly level and I had no crumbs left, I wonder if it might work to frost the top leaving a bare circle in the middle. Then I could use a fork to slightly ‘stir’ it up. Not perfect, but in a pinch…
This is beautiful! Really creative use of the heart-shaped cutter and leaf veiner to make the shamrock leaves. The cake at the top looks like real dirt…so cool! 🙂
Gorgeous. Love the soil on top of the cake. So much detail in such a simple-looking cake. Beautiful 🙂
Oh my goodness, this is utterly lovely!! I adore shamrocks, so I made some shamrock sandwich cookies last week, but these are just really special. I’ll have to give it a whirl next March! Beautiful job. 🙂