Around here, we’re kinda obsessed with pretty cakes. Straight sides and smooth icing makes our heart jump a few beats, because from first glance you know that sweetness is just a slice away. Your knife glides down through the frosting and a wedge of pure bliss is pulled out, destined for your plate. It doesn’t get much better than this. Except, of course, when the inside of the cake is just as gorgeous, or perhaps even more gorgeous, than the exterior. A little something extra on the inside, waiting to surprise you! This is the phenomenon known as Surprise-Inside Cakes.
Today’s featured tutorial comes to us from the surprise-inside-cake-genius, Amanda Rettke! Many of you already know and love Amanda, her mesmerizing cakes, and her inspirational blog, I Am Baker. We’ve been a fan of Amanda for years, ever since her very first appearance here on The Cake Blog back in 2010. And whether you realize it or not, you’ve been loving on her buttercream rose technique for years now too, with Amanda being the original creator of this technique which is now such a staple in today’s buttercream scene. So needless to say, we’re thrilled to have Amanda joining us today.
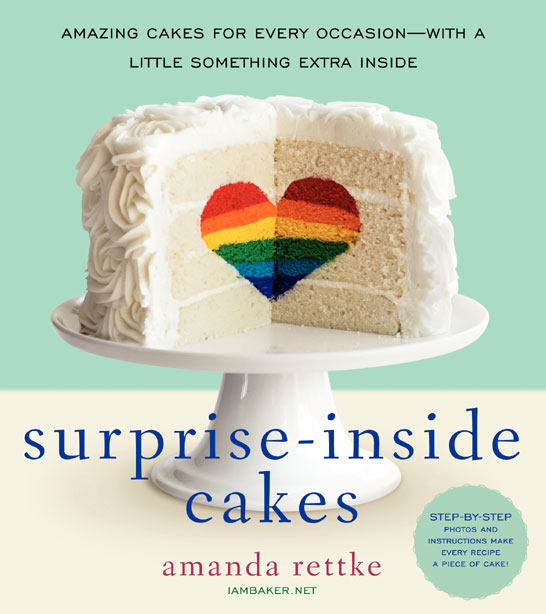
Amanda is here to teach us how to design a cake from the inside out, with a step-by-step tutorial that will have you thinking about cakes a little differently. It comes to us from her new book, Surprise-Inside Cakes, an incredible resource filled with 40 new cake projects, all imaginative and uniquely creative. If you’ve been amazed by the beauty within Amanda’s cakes but completely baffled on how they are made, this book is calling your name. I’ve been pouring over it for days now, in awe of how each creation comes together. Just wait, you’ll soon see! Let’s take a little peek into the world of Surprise-Inside Cakes with today’s fabulous ring cake tutorial.

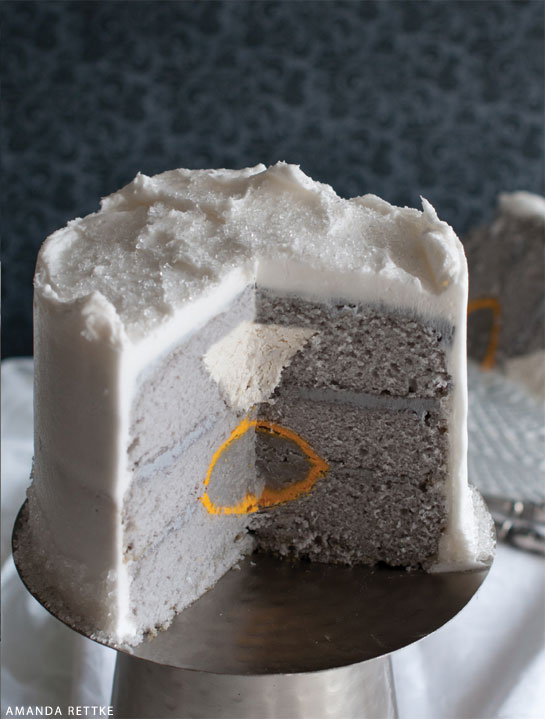
Yes, hiding inside this beautiful cake is a gigantic engagement ring, made of more cake! Just imagine slicing into this cake to reveal a sparkly ring inside. It would the perfect dessert for an engagement party or bridal shower. Or an awesome way for a guy to propose! Talk about a clever way of hiding the ring in your dessert. How could you say no to that? Let’s learn how to make this Surprise-Inside Ring Cake, shall we?


SURPRISE-INSIDE ENGAGEMENT RING CAKE
a tutorial from Surprise-Inside Cakes, by Amanda Rettke
Supplies:
2 recipes White Cake
1 recipe Basic Buttercream
Black, white, and gold (or yellow) gel food coloring
1 small jar of white sparkling sugar
Special Equipment:
4 6-inch round cake pans
small, sharp knife
rotating cake stand (optional)
rolling pin
2-inch round cookie cutter
3-inch round cookie cutter
offset spatula
STEP 1: Prepare the batter for the white cakes. Remove 2 cups and set it aside in a small bowl. Add a couple drops of black food coloring to the remaining 6 cups of the batter to make it gray. If you like, you can make the 2 cups of batter a brighter white by adding white food coloring.
STEP 2: Bake 3 layers of gray cake and 1 layer of white cake in 6-inch pans. (You may need to extend the recommended cooking time when using 6-inch pans). Cool the cakes to room temperature, then freeze the gray layers for no less than 6 hours, but preferably overnight.
STEP 3: Prepare the buttercream.
STEP 4: Remove any hard bits of crust from the 6-inch white cake and crumble three-quarters of it into a large bowl.
STEP 5: Mix in 2 teaspoons of the buttercream and 1 or 2 drops of white gel food coloring, as needed to reach the desired color.
STEP 6: In a separate bowl, crumble the remaining white cake and combine it with about 1 teaspoon of buttercream and a drop or two of yellow or gold food coloring, to approximate the color of a gold ring.
Making the Surprise
STEP 7: To make the diamond portion of the cake, place a gray layer flat on parchment paper (using a rotating cake stand here is a great idea). Mark the center of your cake with a toothpick.
STEP 8: Insert a small, sharp knife at a 45-degree angle about halfway between the toothpick and the edge of the cake. Aim for the toothpick as you cut. Once you hit the toothpick or the bottom of the cake, start slowly moving the knife around the cake in a circle to cut out the shape of a cone. If you’re using a rotating cake stand, use one hand to guide the knife and the other to slowly turn the cake.
STEP 9: Pick up the toothpick to remove the cake cone. Set it aside in a safe place—you’ll need it later.
STEP 10: Lay the remaining gray layers on a sheet of parchment paper. Center the cookie cutter on top of one cake layer and gently press a circle as a guideline for where to cut. Repeat on the other gray layer. I thought it would be fun to have an exaggerated diamond on a small ring, so I chose a 2-inch round cookie cutter for my cake.
STEP 11: Use a soupspoon (or any small spoon) to cut out circular shapes. Move the spoon around the line created by the cookie cutter and cut a halfmoon shape from the cake. If you don’t scoop out enough the first time, or if there is an abundance of crumbs, simply clear out more cake. Reserve the cut-out cake in a small bowl. If your cake seems crumbly or too soft, return it to the freezer for 15 minutes.
STEP 12: Repeat to carve a well in the second gray layer, making sure it matches the first.
STEP 13: Using a sheet of parchment, roll out a thin layer of the gold cake mixture.
STEP 14: Use a 3-inch round cookie cutter to cut out 2 circles, then make a slit halfway through.
STEP 15: Gently place the circle into the cavity of one of the gray layers, filling the entire space. Use a knife to remove any excess gold cake mixture. Repeat with the other gold circle and gray layer.
STEP 16: Mix a scant drop of buttercream into the reserved gray cake to make cake mixture. NOTE: The cone of cake on the toothpick should still be reserved separately.
STEP 17: Fill both gold cups with the gray cake mixture. Pack it carefully, but really get it in there—if you do not use enough, the ring could collapse when you cut the cake to serve it.
STEP 18: Place 1 cup of buttercream in a separate bowl and tint it gray to match the cake using a drop or two of black gel food coloring.
STEP 19: Using an offset spatula, spread half the gray frosting around the top perimeter of one of the gold ring layers (don’t get any frosting on the gold or inner gray parts). Turn over the second gold ring layer and lay it carefully on top, so that the ring sides touch each other. Go slowly and make sure the ring parts match!
STEP 20: After icing the last layer, set the final single layer on top of the cake and freeze the cake while you work on the diamond.
STEP 21: Mix a couple of tablespoons of sparkling sugar into the white cake mixture. The sugar seems to lose a little of its sparkle when mixed into the cake mixture, but I like the overall effect!
STEP 22: To make the diamond, look at the cone of cake you removed with the toothpick and make a white sparkly cone to match that shape and size. Place the diamond into the cavity on top of the cake and see how much it fills the space. It should not go as high as the top of the cake, so cut off enough to leave 1/2 inch or so of space.
STEP 23: Remove the toothpick from the gray cake cone and slice off 1/2 inch or so from the top. Place this cap on top of the diamond. Gently cover the top of the cake in gray buttercream.
STEP 24: Crumb-coat the whole cake with white buttercream and chill for at least 1 hour in the refrigerator or 15 minutes in the freezer.
Frosting and Decorating
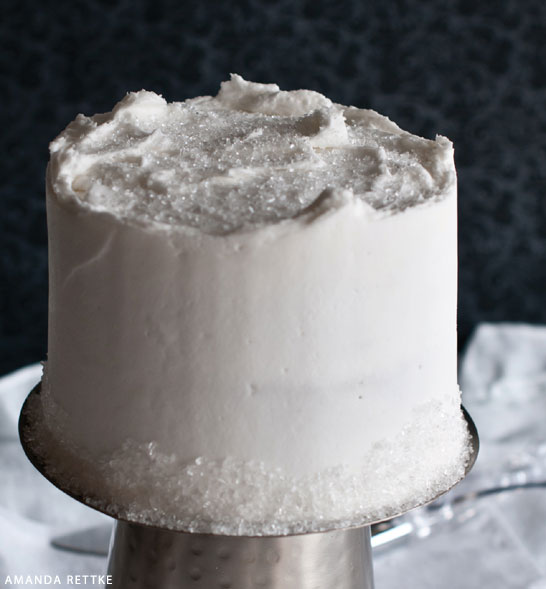
STEP 25: Place the cake on a cake stand. Frost the cake with a smooth layer of white buttercream, focusing on making the sides very smooth. Leave the top rough. Dust the top of the cake with sparkling sugar, taking care not to spill it over the sides.
STEP 26: Place the cake stand on a clean baking sheet. Pour sparkling sugar into your hand and gently press it into the lower part of the cake. You can reuse the sugar that falls onto the baking sheet.
STEP 27: Chill the cake until serving.
Excerpted from Surprise-Inside Cakes, Copyright © 2014 by Amanda Rettke. HarperCollins Publishers. Used by permission of the publisher and author. All rights reserved. Designed by Lorie Pagnozzi. Photography by Susan Powers.
RESOURCE LINKS
Blog : I Am Baker
Book : Surprise-Inside Cakes
Online Instructional Class : Decorating from the Inside Out, with Amanda Rettke on Craftsy


So cool! Looks amazing!
The idea of this is great and very clever but a gray cake…. very unappetizing.
If you’re not loving the gray, simply go for a different color. The concept will still be uniquely creative and the tutorial completely helpful. And free!
Thanks to Amanda for sharing it with us today!
Amanda is very talented, but she did not invent that butter cream rose technique. Bakers, myself included have been decorating cakes like that since before she was born. Cakes with swirled butter cream roses have been photographed in magazines going all the way back to the 1950’s. Her surprise inside cakes are genius and I hope her book does well, but she and all of her fan girl bloggers really need to stop insisting that she was the first person to completely cover a cake with swirled roses.
Sorry Pam… but we try to be positive and supportive around here. This blog is a place to recognize talent, skills and creativity.
Since I was not alive in 1950, I will let you debate the buttercream rose technique elsewhere. I’d much rather celebrate this creative tutorial and Amanda’s beautiful new book. I’ve personally never made a surprise-inside cake… and wouldn’t even know where to begin. But I’m inspired to give it a try! And I hope other readers will be as well.
Well, I tried to be complimentary while correcting a misconception that has been going around the baking blogs as if it were gospel. There really isn’t anything to debate. The rose technique is a classic, and while Amanda may have been one of the first to put it on the internet, she most certainly wasn’t the first to put it on a cake.
Hi Pam! Thanks for *trying* to stay positive! It was such an honor to be visiting the Cake Blog today as I am such a huge, huge fan of all they do and the creativity they share!
As far as the Rosette Cake technique, I was the first to cover a cake in rosette’s. In fact, the 1M tip was not invented until 1985 by Marie Kason, so I don’t think they are any cakes photographed by it in the 50’s. Maybe you are thinking of the fully piped buttercream rose? That I will most certainly not claim any credit for!! 🙂
But as for my cake covered in rosettes, which I call my Rose Cake, that I can claim credit for. The first one was photographed in January of 2011.
I hope that clears things up for you! If you have any further need to discuss the issue I would be happy to. My email is [email protected] and I am happy to provide you with any further proof you may need. Thanks!
Can you put a real ring inside!? 🙂
The one with a heart is so beautiful 🙂
Maybe I will surprise my wife with the real ring inside. Lately she is speaking about marriage. This lovely cake with the ring inside would really surprise her 🙂
I made this cake last night for an engagement party. I will be totally shocked if it looks like a ring inside! I used to be a Wilton cake decorating insructor, and I still thought it was sooo hard to make and very time consuming. Crossing my fingers that it looks cool when we cut into it at the party!
It worked!!!!!!!!!!!!!! It was totally a hit at the party. Thanks for the great tutorial!
That is GREAT!!! I am so excited for you!!! I know they can be time consuming.. but once you see someone’s faces it’s all worth it, right? 🙂
This so great idea of surprising my wife. Will definitely try this 🙂 But will have to ask someone else to make it for me I am not good in that 🙂
This is beautiful and amazing. I wish I had the patience (and the appropriate event) to make something like this. I think I will start with a simpler surprise cake for my husband’s birthday.