Mod Polka Dot Cake – how to make colorful polka dot toppers for cakes and cupcakes using chocolate candy coating. A new tutorial by our contributor Erin Gardner.
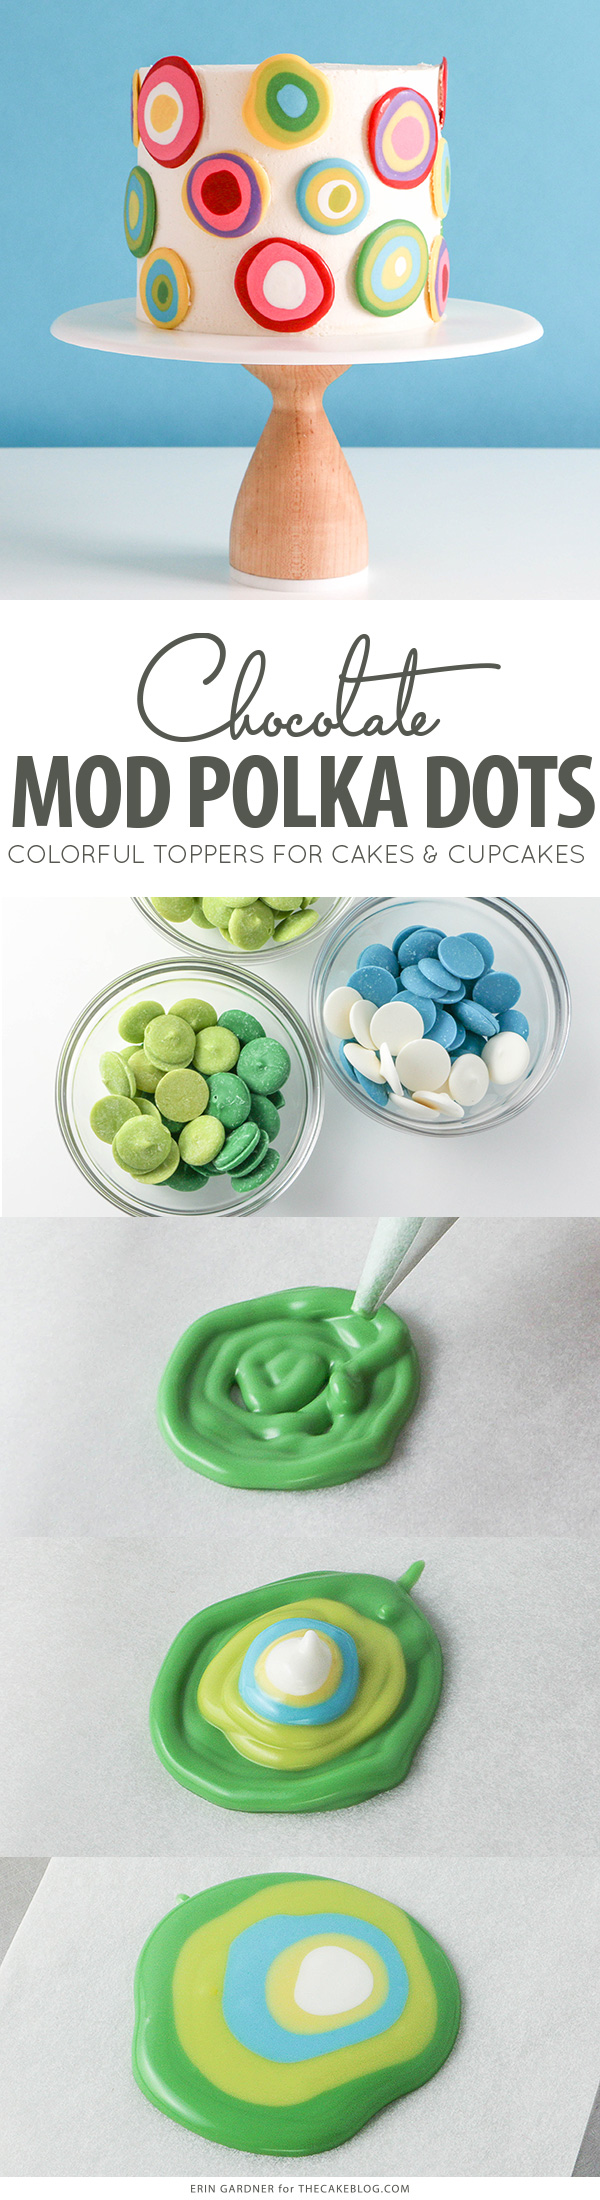
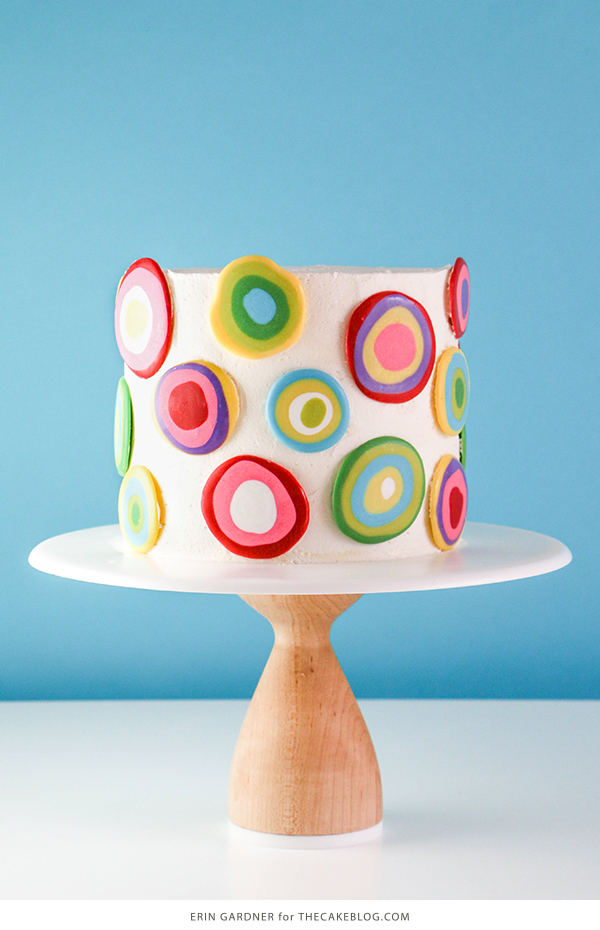
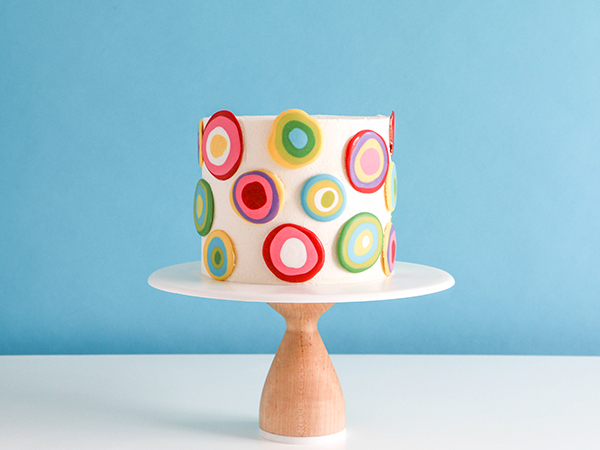
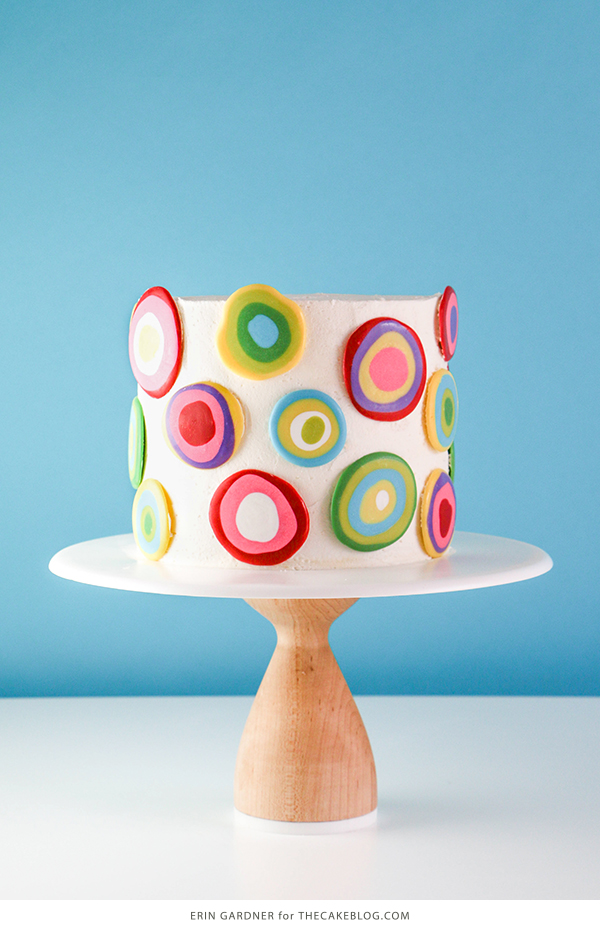
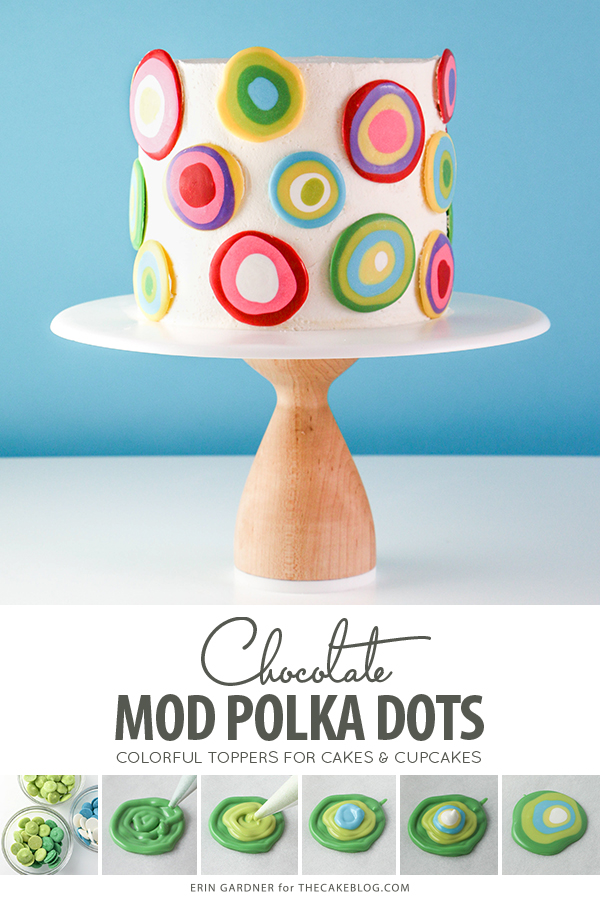 These bright and cheery mod dots are sure to bring a smile to anyone’s face! They’re a fun, simple, and delicious way to bring color and design to any cake in any season. I went with a cool combination of spring brights, but this design would work with any color palette.
In all of my chocolatey, candy-coated projects around the web, one of the most frequently asked questions is how to keep chocolate or coating chocolate fluid while you’re working with it. My secret – a heating pad! Yes, the same heating pad you use to soothe that achy back after hours of caking. It keeps melted coating chocolate at the perfect runny consistency for as long as you need to use it. If you’re working with regular chocolate (couverture) be sure to check your chocolate frequently to make sure it hasn’t fallen out of temper.
Here’s a video of the process, followed by the detailed instructions below. Enjoy!
MOD CHOCOLATE POLKA DOTS
a tutorial by Erin Gardner
Supplies:
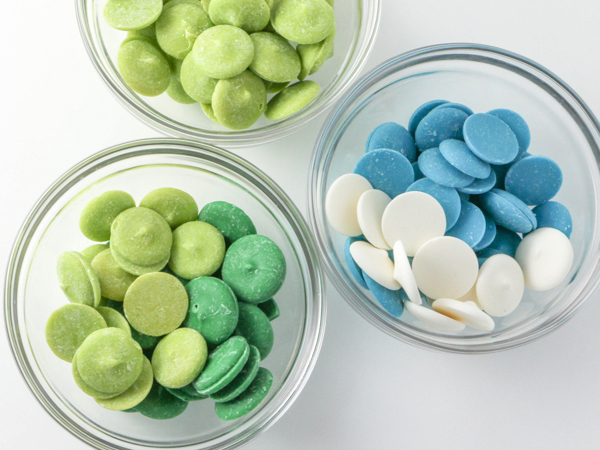
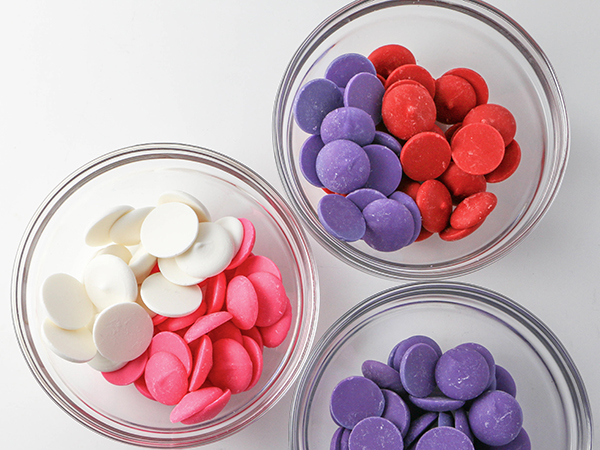
Coating chocolate in assorted colors (dark green, light green, teal, red, purple, pink, yellow, and white)
Paper cones or piping bags
Parchment paper
Scissors
Cookie sheet
Heating pad, optional
Paper towels, optional
Aluminum foil, optional
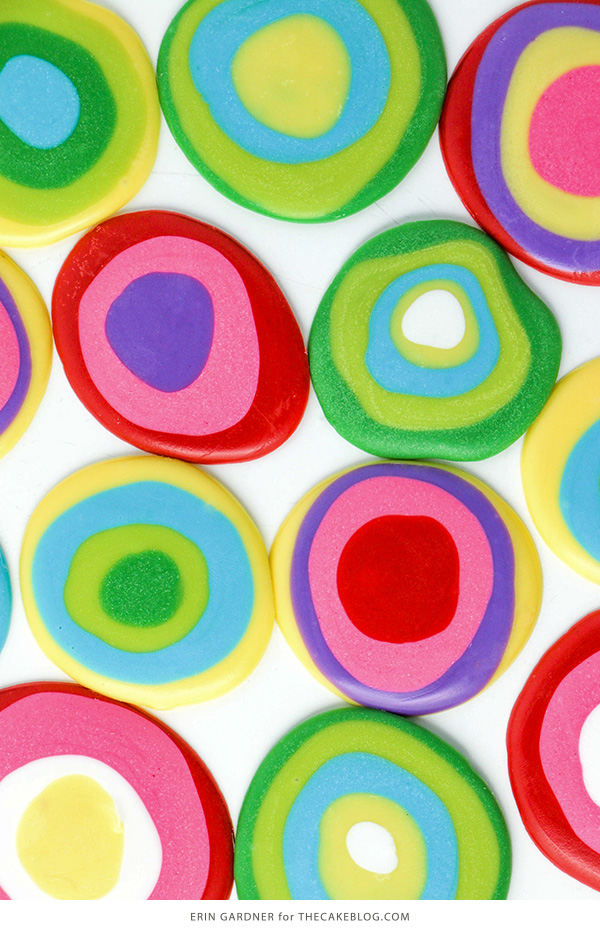
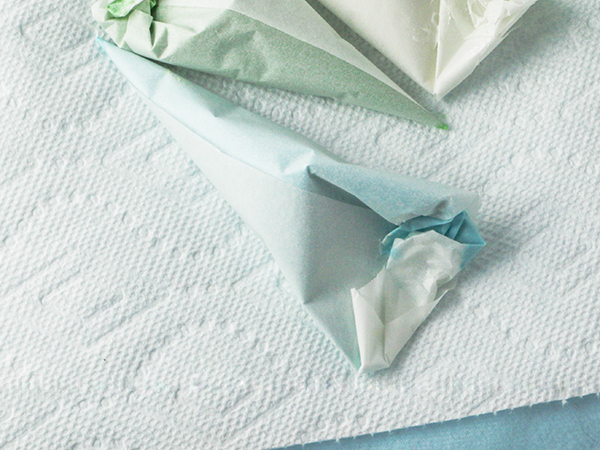
Melt the coating chocolate according to the package directions and fill paper cones or piping bags with each color. Use colors straight from the bag or make custom hues by combining coating chocolate chips before melting. I made the darker green by adding 1 part light green to 2 parts dark green chips. To lighten the pink and blue, I combined each color with an equal amount of white chips. The wine shade of red was created by combining 1 part purple chips to 2 parts red.
If you’re using the heating pad, plug it in and turn it up to high. Place a paper towel on the heating pad and lay the filled cones on the towel. Cover them with a piece of aluminum foil, so they stay nice and cozy warm.
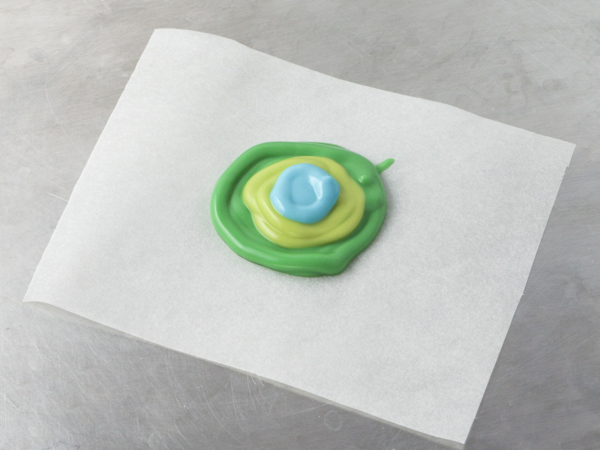
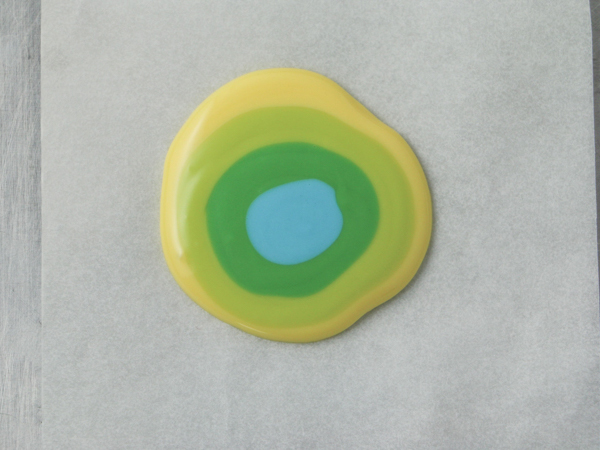
Cut parchment squares a little larger than the size you’d like your finished dots to be. Place a square on a cookie sheet. Pipe a circle of chocolate on the piece of parchment paper a little smaller than you want the finished dot to be. The chocolate is going to spread in a somewhat controlled, but organic way. The exact size of each dot will vary.
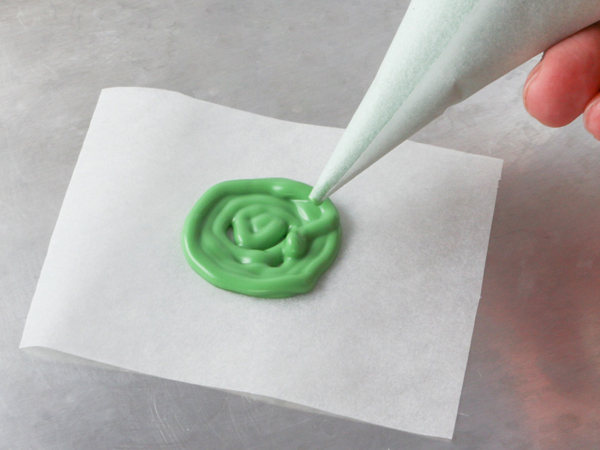
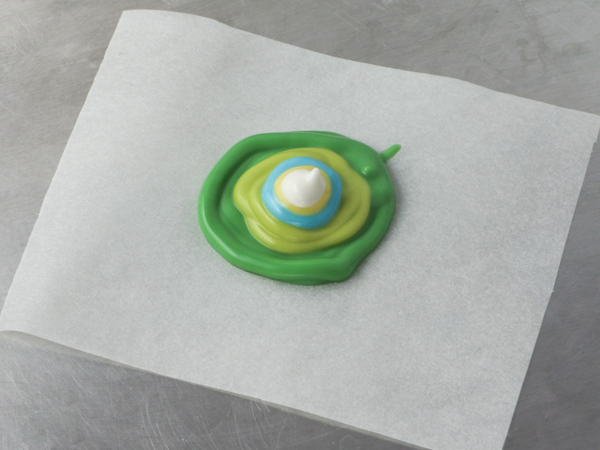
Return the cone to the heating pad and choose your next color. Be sure to keep the foil cover on the filled cones as you work, so that the chocolate stays fluid. Pipe a smaller circle on top of the first chocolate circle. Repeat this process with as many colors as you like.

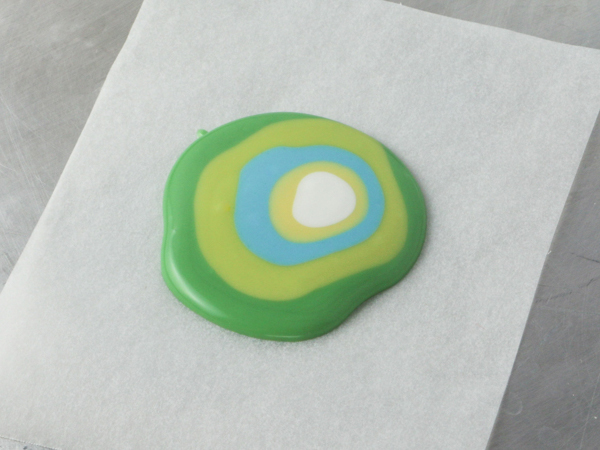
Give the cookie sheet a few gentle taps against your countertop and watch the magic happen! As the chocolate spreads your mod dot will take shape. Leave the dot on the sheet to harden (about 10 minutes) or slide the paper off and set it aside while you work on more dots.
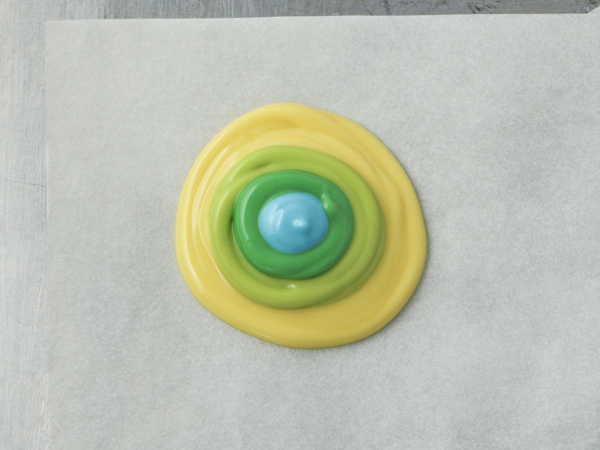
Repeat the process in as many color combinations as you like!
Use your mod dots to decorate a cake that’s been freshly iced with buttercream or use them to top cupcakes. Store dots in an airtight container layered between parchment paper at room temperature until the chocolate’s expiration date.
YOU MAY ALSO ENJOY:
Chocolate Flower Cake
Chocolate Cake Gems
Chocolate Daffodils
Chocolate Wrapped Cake
Marble Chocolate Hearts


Hieee….so colorful cake recpie.will definately try this one.
Thanks for sharing it.
Do these adorable dots attach securely with the buttercream?
Yes! They do!
Where can I find the coating chocolate in assorted colors? A Google search came up empty. I’m in the U.S., in case that makes a difference.
Wilton Candy Melts are a coating chocolate and you can find them in craft stores, cake decorating stores, etc. There is also a link in the supply list above if you’d like to purchase online. I made it bold so it’s easier to find. Hope that helps!