• SIGN UP FOR OUR NEWSLETTER ➝
    • Facebook
    • Instagram
    • Pinterest
    • RSS
    • Twitter

The Cake Blog

  • HOME
  • RECIPES
  • TUTORIALS
    • DIY PROJECTS
    • BAKING TIPS
  • HOLIDAYS
    • CHRISTMAS
    • VALENTINE’S DAY
    • ST. PATRICK’S DAY
    • EASTER
    • MOTHER’S DAY
    • GRADUATION
    • FATHER’S DAY
    • FOURTH OF JULY
    • SUMMER FUN
    • FALL
    • HALLOWEEN
  • INSPIRATION
    • CAKES
      • WEDDING CAKES
      • BIRTHDAY CAKES
      • BABY SHOWER CAKES
    • BAKERY TOURS
    • BIRTHDAY PARTIES
    • BABY SHOWERS
    • BRIDAL SHOWERS
    • REAL WEDDINGS
    • DESSERT TABLES
  • ABOUT
    • MEET THE EDITOR
    • MEET THE CONTRIBUTORS
    • CONTACT

Guest Post: DIY Felt Acorns

September 22, 2010 by Jessica Kirkland

Hi! It’s Jessica from Pen N’ Paperflowers Studio & Design.  I’m thrilled to be guest blogging today for Carrie at Half Baked!!  I’ve been fortunate enough to have had one of my parties featured here and I was flattered when Carrie invited me to do a little guest blogging.

With the Fall holidays quickly on our heels, I thought now would be the perfect time to share with you – (and to find out for myself) – how to make those adorable felt acorns we’ve been seeing displayed on “Woodland Fairy” dessert tables around the web.
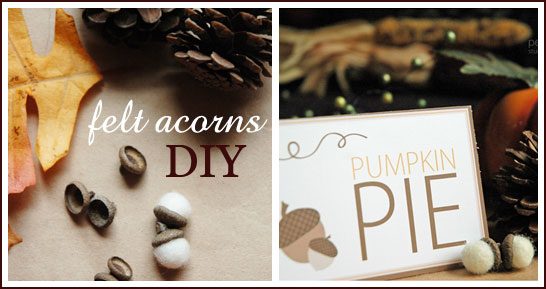
DIY Felt Acorns Tutorial

Adorable…aren’t they?!  I have to admit. The choice to do this particular tutorial was a selfish one. I’m hosting Thanksgiving Dinner this year and I’m already gathering ideas for table decor and…yep…you guessed it…a dessert table. I’ve been itching to find out how to make these acorns since I’m planning on incorporating them into the decor.  So…with that said, I’d love for you to accompany me on my journey into the world of   “needle felting”…

After searching the web & craft stores for information on needle felting, (and ultimately trying two different techniques – one WITH special tools and one WITHOUT), I’ve settled on sharing the version that includes the tools. I felt I was able to achieve more consistent results with the tools – but they aren’t necessary. (At the end of the post, I’ll share the link to the tutorial NOT requiring special tools.)

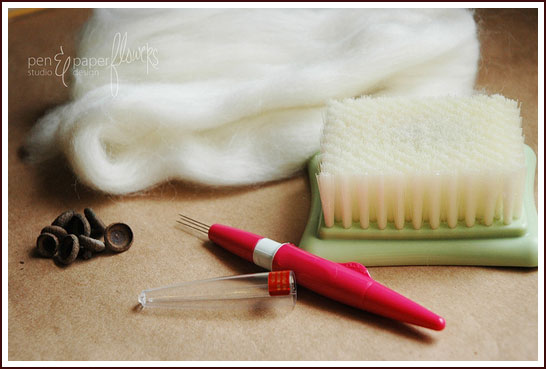
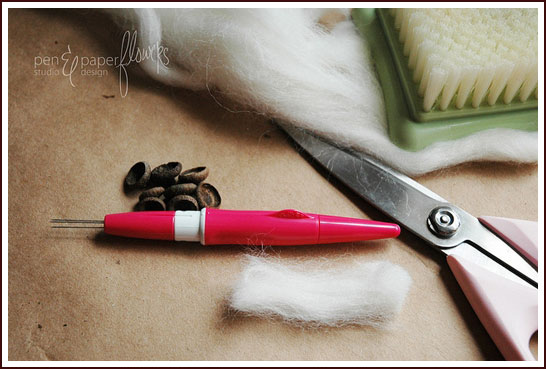
Here’s what you’ll need…
DIY Felt Acorns Tutorial

Supply List:
  • wool roving (in whatever color(s) you prefer)
  • “pen-style” needle felting tool (VERY sharp – be careful
  • Needle Felting Mat
  • Empty acorn cupules (if you have oak trees nearby, grab your children and head outside like I did…)
  • Scissors
  • Glue (hot glue or your favorite)

Remove bundle of wool roving from packaging and unroll. (it’s quite long).  Using scissors, cut a small strip of wool roving from one of the ends of the bundle. (approximately 2 inches long and 1 inch wide.) For these small acorns, you don’t need much roving.
DIY Felt Acorns Tutorial

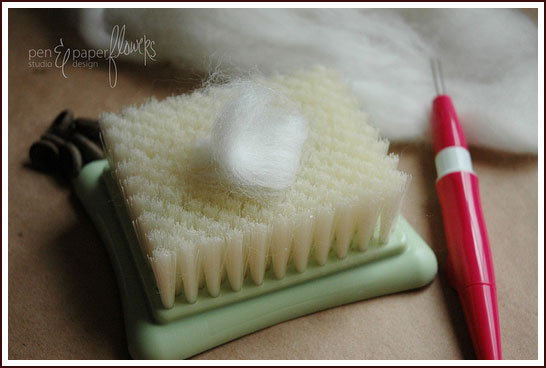
Wad up the cut piece of wool roving and place it on the needle felting mat.

DIY Felt Acorns Tutorial

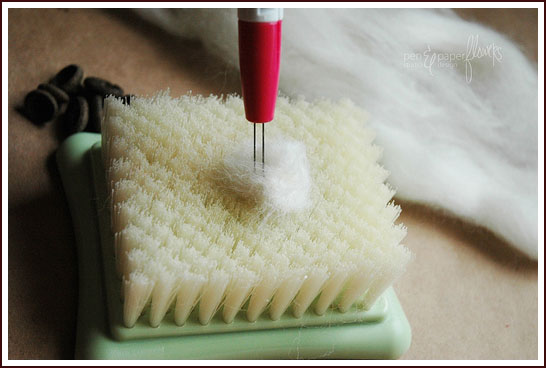
Hold the needle felting tool in an upright position with one hand. Hold the wad of wool down on the needle felting pad with the fingertips of your other hand. Begin puncturing the wool with quick up-and-down motions. AND BE CAREFUL!!! THOSE NEEDLES ARE SHARP!! The bristles of the needle felting mat help to hold the wool down as well as provide a means for the needles of the felting tool to safely puncture completely through the fibers without damaging the tips of the needles.

DIY Felt Acorns Tutorial

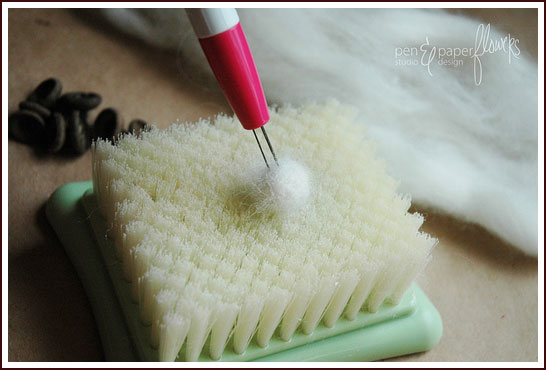
After 10-12 “stabs” with the needle felting tool, reposition the wad of wool and fold in the sides towards the middle. (almost the same technique used when you are kneading bread dough). Begin puncturing again. After repeating this process several times, you should begin to feel the fibers of the wool becoming thicker as they start to mesh together. Continue repositioning, folding and puncturing the wool until you end up with a round fuzzy ball.

DIY Felt Acorns Tutorial

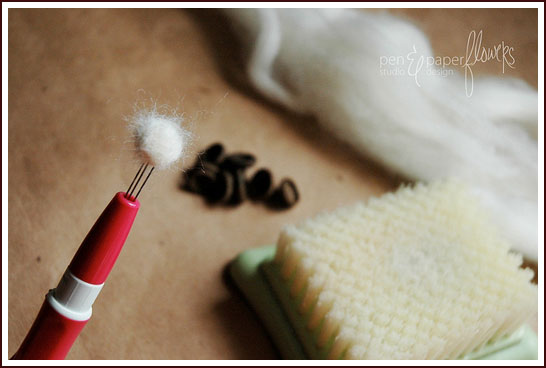
Continue to puncture the round ball to ensure the fibers have been tightly woven together. The wool ball should be somewhat firm.

DIY Felt Acorns Tutorial

You are now ready to move on to the next step.

DIY Felt Acorns Tutorial

Place the fuzzy ball into a bowl of piping hot water and gently roll it in your fingertips. You’ll feel it start to contract and get smaller. Remove from the hot water and gently roll the ball in the palm of your hands to encourage a nice round shape. Re-dip into the hot water and continue the process until the ball feels harder and the shape is more defined. When you are satisfied, run the ball under cold water until the entire ball has absorbed the cold water. Resist the temptation to squeeze the excess water from the ball when you have finished. Let the ball air dry for a good 24 hours. (I’ve heard you can insert the wet balls into a stocking and throw them into the dryer to avoid the 24-hour waiting period. I haven’t tried it but I’m sure it would work great – if I had to guess, I believe the heat from the dryer will continue to shrink the ball – so be careful).

When your felt balls have dried completely, they are ready to be inserted into the empty acorn cupules.
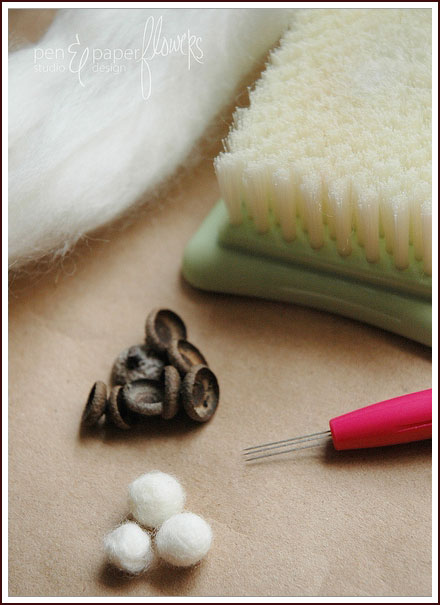
DIY Felt Acorns Tutorial

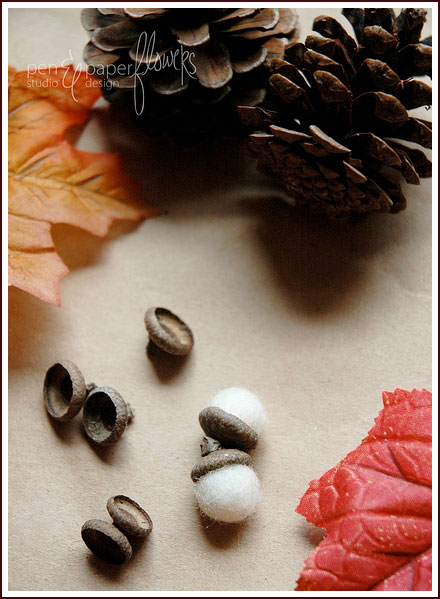
Because I haven’t been able to find my felt gun since our move into the new house, I chose to use a glue I had on hand, specifically for felt. Simply squeeze a small amount of glue into the empty acorn cupule and insert the wool ball. The drying time will vary depending on which glue you use.

They are SO adorable when they’re finished…aren’t they??!!
DIY Felt Acorns Tutorial

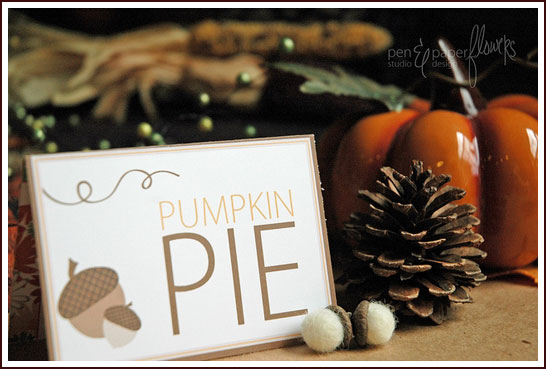
And look how cute they’d be on your Fall Dessert tables…

DIY Felt Acorns Tutorial

I hope you enjoyed the tutorial as much as I enjoyed learning a little bit about the art of needle felting. If you decide to make some of your own – I do hope you’ll come back and share with all of us… Enjoy!!

As promised, here is the tutorial not requiring any special tools…

{I cannot thank Jessica enough for this amazing guest post!  Who’s ready to try needle felting?  I know I am!  Coming up tomorrow, another great guest post featuring another Fall DIY project!  ~Carrie}

September 22, 2010 by Jessica Kirkland

Jessica Kirkland , CONTRIBUTOR

Jessica Kirkland is the face behind Pen N' Paper Flowers; a creative lifestyle blog focused on inspiring others through Making + Baking + Photo-taking. She's a professed cake plate addict and loves charming baking books and cupcakes. Read more about Jessica on her bio page.

connect with Jessica :

Start feeling the fall vibes with our Fall Baking Gallery!

« Our Little Lady!!
Fabulous Cake Friday: Carrie’s Cakes »

Comments

  1. postcards and pretties says

    September 22, 2010 at 8:32 am

    very cute & do-able diy!!

  2. Lindsey {Bella Grace Party Designs} says

    September 22, 2010 at 8:36 am

    This is soooo great!

  3. Shannon {twirlie whirlies} says

    September 22, 2010 at 8:56 am

    This is a fantastic tutorial! I’ve always wanted to try making these, especially since my mother-in-law has a fantastic oak tree in her yard and is always complaining of the mess the acorns make. I think once she has a basket of these, she would change her mind.

    Thanks for sharing!

  4. Renee J. says

    September 22, 2010 at 11:50 am

    Jess, it is so nice to see you featured! ‘Love this project. Thanks so much for sharing!!

    Happy Autumn,

    Renee

  5. Heather from WhipperBerry says

    September 22, 2010 at 6:56 pm

    Wonderful tutorial!! I love the little acorns and your photography, top notch!

    Kisses from the WhipperChicks

  6. April says

    September 22, 2010 at 8:39 pm

    Thanks so much for posting this tutorial! I have had this exact project on my mind for days now and can’t wait to give it a try 🙂

  7. Lisa says

    September 23, 2010 at 1:13 am

    Ohhhh! These are so cute! lol

  8. Kim @ The Celebration Shoppe says

    September 23, 2010 at 3:07 am

    These are so pretty and I love, love, love the pictorial. Great job Jessica!

  9. Jess @ Pen N' Paperflowers says

    September 23, 2010 at 5:44 am

    Thanks everyone! Thanks especially to Carrie for the opportunity to guest blog!
    I do hope you’ll come back and share your results if you try it out!!

  10. Carrie Sellman says

    September 28, 2010 at 10:26 am

    Thanks again Jess for sharing this with our readers! You’re the best!

Trackbacks

  1. Half Baked – The Cake Blog » Fab Find: Pastry Pedestals says:
    May 10, 2011 at 11:37 am

    […] featured lovely parties created by Jessica Kirkland of Pen N’ Paperflowers…. and even a tutorial guest post.  Today we just had to share her latest creation…  The Pastry […]

  2. Fall is coming I swear! Fall felt craft roundup. « American Felt and Craft- The Blog says:
    August 29, 2011 at 2:00 pm

    […] https://thecakeblog.com/2010/09/felt-acorns-diy.html […]

  3. Half Baked – The Cake Blog » DIY: Halloween Cupcake Centerpiece says:
    October 28, 2011 at 5:48 am

    […] for another little bit of guest blogging for Carrie here at Half Baked.  (You might remember the needle felted acorn tutorial I shared here last […]

SEARCH

The Cake Blog is a community of bakers and cake lovers. If you’re looking for beautiful cake inspiration, projects, tutorials and recipes -- you’ve come to the right place. MEET OUR TEAM ➝

LET’S CELEBRATE

SIGN UP FOR OUR NEWSLETTER

BAKING RESOURCES

  • How To Build a Cake Like a Pro
  • Is Your Oven Accurate – And Why It Matters
  • Can You Overmix A Cake
  • Egg Free Baking

HOME   |   ADVERTISE   |   PRIVACY POLICY

Copyright © 2023 · The Cake Blog