Well hello there again everyone! This is Jessica Kirkland from Pen N’ Paperflowers Studio and Design… back for another little bit of guest blogging for Carrie here at Half Baked. (You might remember the needle felted acorn tutorial I shared here last Fall?)
I’m honored to have been asked by Carrie to put together a post for you showcasing The Pastry Pedestal™ – a patent-pending mechanism I designed to creatively display petite pastries of all types. Since launching The Pastry Pedestal™ in May, we have shipped them to over 12 different countries and have sold out completely on two separate occasions. It’s been an exciting adventure to say the least and I’d like to share with you today just what they are all about and how easy they are to use.
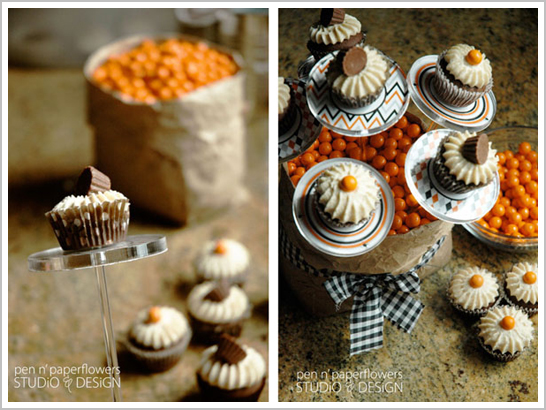
My very favorite component of The Pastry Pedestal™ is the fact that you can personalize them for ANY event you are having simply by adding a 2.75″ round decorative paper to the underside of the lucite round. Not only that…you can also get even more creative by adding decorative beading or trim to the edge of the round for added dimension and that extra “wow” factor.
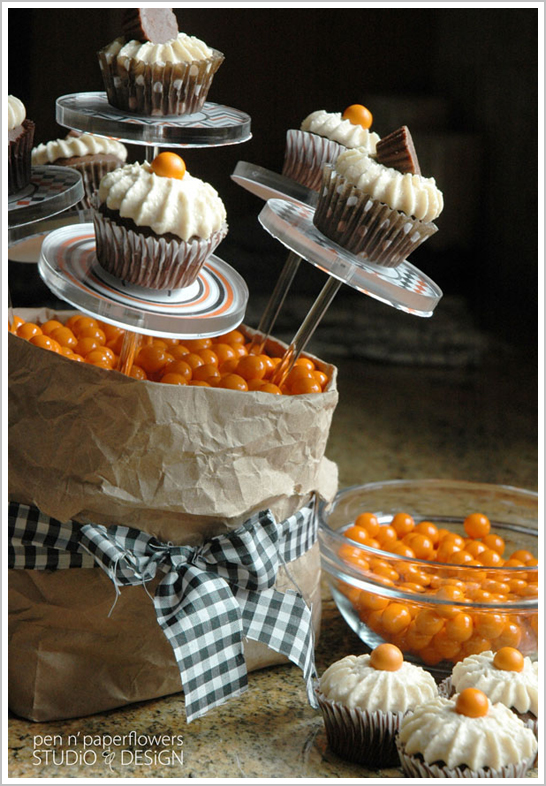
Today, I chose to show you a super easy way to create a centerpiece using The Pastry Pedestal Starter Kit™.
Here’s what you’ll need:
- brown paper bag
- sugar
- 2.75″ round circle punch (if you want a to personalize The Pastry Pedestal™)
- Decorative Paper Rounds (Halloween printables found here or just use scrapbooking paper, cardstock or wrapping paper you have on hand)
- 1 Small Bag of orange Sixlets (I picked mine up from JoAnn Fabric & Crafts)
- fabric or ribbon of choice
- cupcake or pastry of choice
- The Pastry Pedestal™ Starter Kit
Instructions:
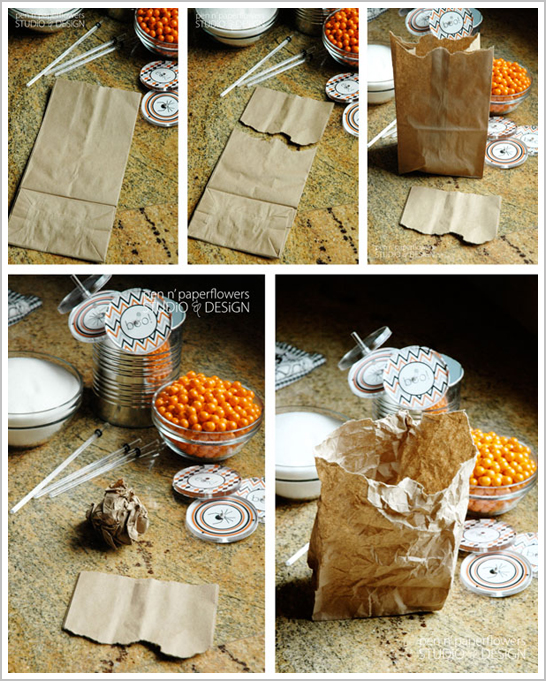
- Take your flat brown paper bag and rip the top portion of the bag off. (approx. 2.5″ piece) No need to be careful.
- Open your torn brown bag
- Crumple the torn brown bag into a tight small ball. The more wrinkled it looks – the more old it will appear and we are going for a vintage-creepy Halloween look for this centerpiece.
- Open the now-wrinkled bag and fold over the top edge of the bag about 1 or 2 inches.
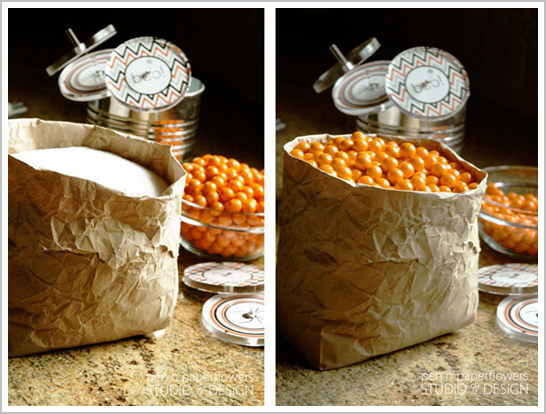
- Fill wrinkled brown bag with sugar almost to the top. (leave about 1 inch for step 6)
- Top sugar with orange sixlets to cover sugar completely.
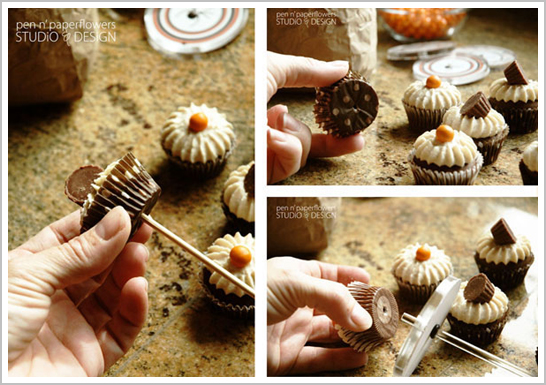
Now you need to prepare your pastries for placing on The Pastry Pedestal™. {TIP: Chilled pastries are easier to work with.} I chose to use mini chocolate peanut butter cupcakes (go here for the recipe).
- Pierce the bottom of the cupcake or pastry of choice using a toothpick or wooden skewer. You’ll only need to insert it about one 1/2 inch into the bottom and then remove.
- With The Pastry Pedestal™ already assembled, the pre-pierced cupcake is ready to be mounted onto the The Pastry Pedestal™ where it will sit securely.
- With the cupcake in place, insert the rod of The Pastry Pedestal™ into the sugar filled, candy-topped brown bag.
- Repeat this process until you have a “bouquet” of mini cupcakes.
- Finish the centerpiece off by tying a decorative piece of fabric or ribbon around it.
It’s super cute and SO easy.
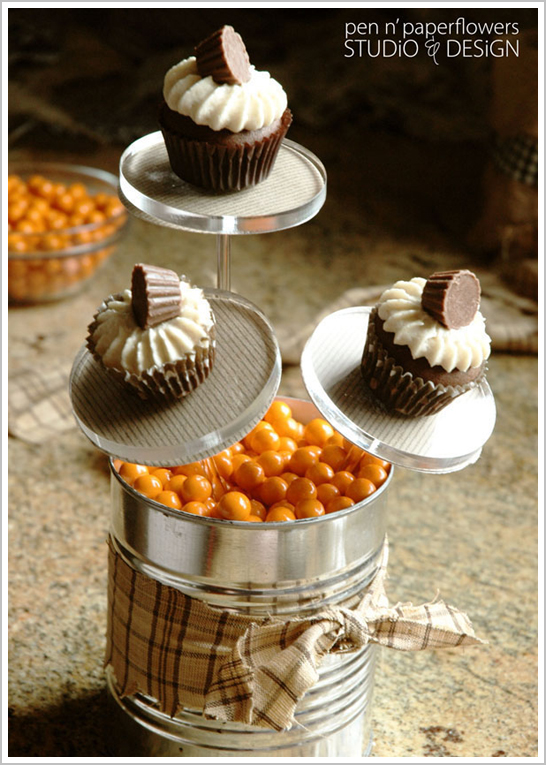
Don’t have a brown paper bag at home? How about recycling a tin can and using the same process. (I used a large recycled crushed tomato can).
You can also switch up the decorative paper rounds underneath to change up your theme. I decided to use some lined kraft-like wrapping paper I already had from a previous Rustic Popcorn Bar photo shoot in which I had displayed popcorn balls on The Pastry Pedestal™. Changing up the paper gives the overall display more of a Fall-feel and then I simply wrapped my tin can with a strip of burlap.
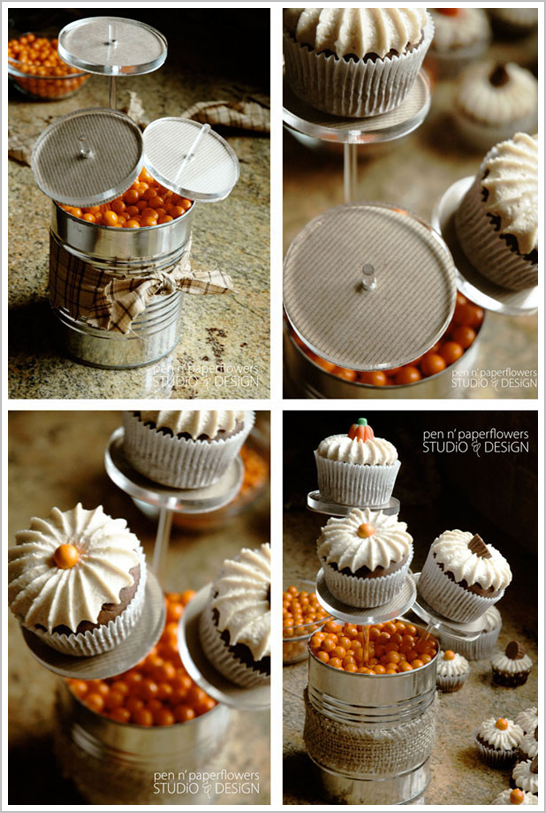
I also swapped out the mini cupcakes for regular sized cupcakes just to show you the difference in the displays you can achieve. However, mini cupcakes are one of my favorite things to display on The Pastry Pedestal™. So I changed the finished look again by removing the burlap from around the tin can and using a Fall-festive scrap of fabric instead. (replacing the regular cupcakes with my favorite minis).
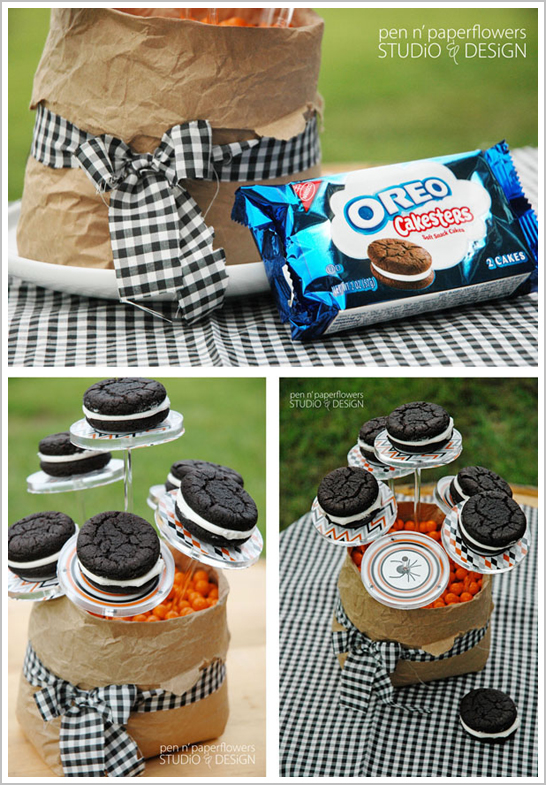
No time for baking? I’ve got you covered! There are many prepackaged commercial items that work well with The Pastry Pedestal™ . For instance, these Oreo Cakesters were SO easy and perfect for a Halloween centerpiece.
I hope you’re inspired to try out this simple centerpiece idea – and if you do, I hope you’ll come back here and share your results.
Check out The Pastry Pedestal™ Facebook Fan Page for ongoing styling ideas…a lot of which are from creative customers showcasing the creative things they’ve done using this versatile and innovative way to creatively display your petite pastries. There are also how-to videos on the website as well as ordering information for those of you that just HAVE to have these for your next event. *wink*
Hope you all are inspired…
Thanks for inviting me to guest-blog for you Carrie…it’s always a pleasure and an honor!!


Love the tin can! Great ideas!
LOVE!