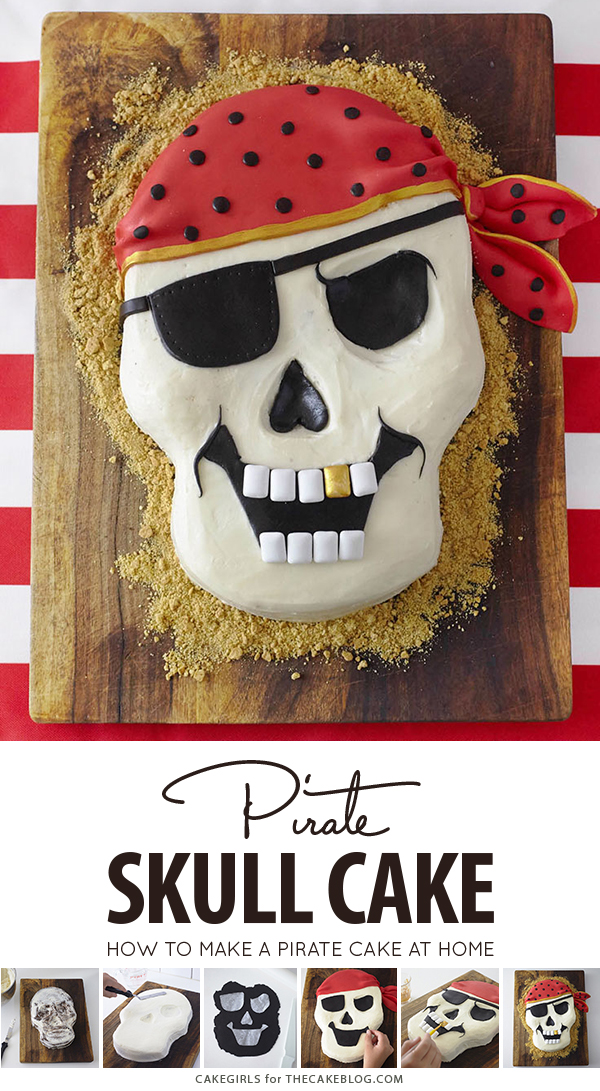
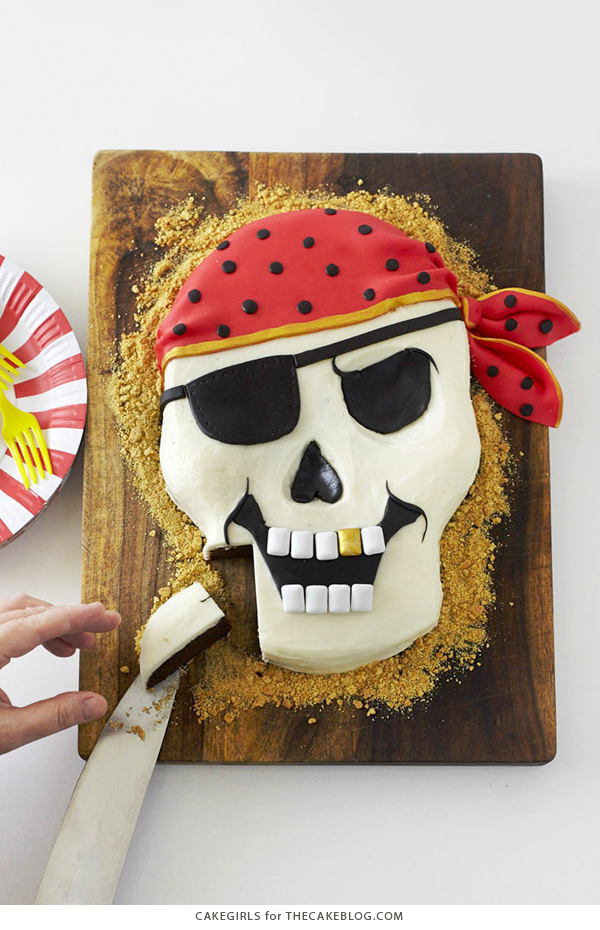
Our contributors, Mary and Brenda Maher of Cakegirls, are sharing a DIY Pirate Skull Cake tutorial. Easy to make and perfect for pirate birthday parties!
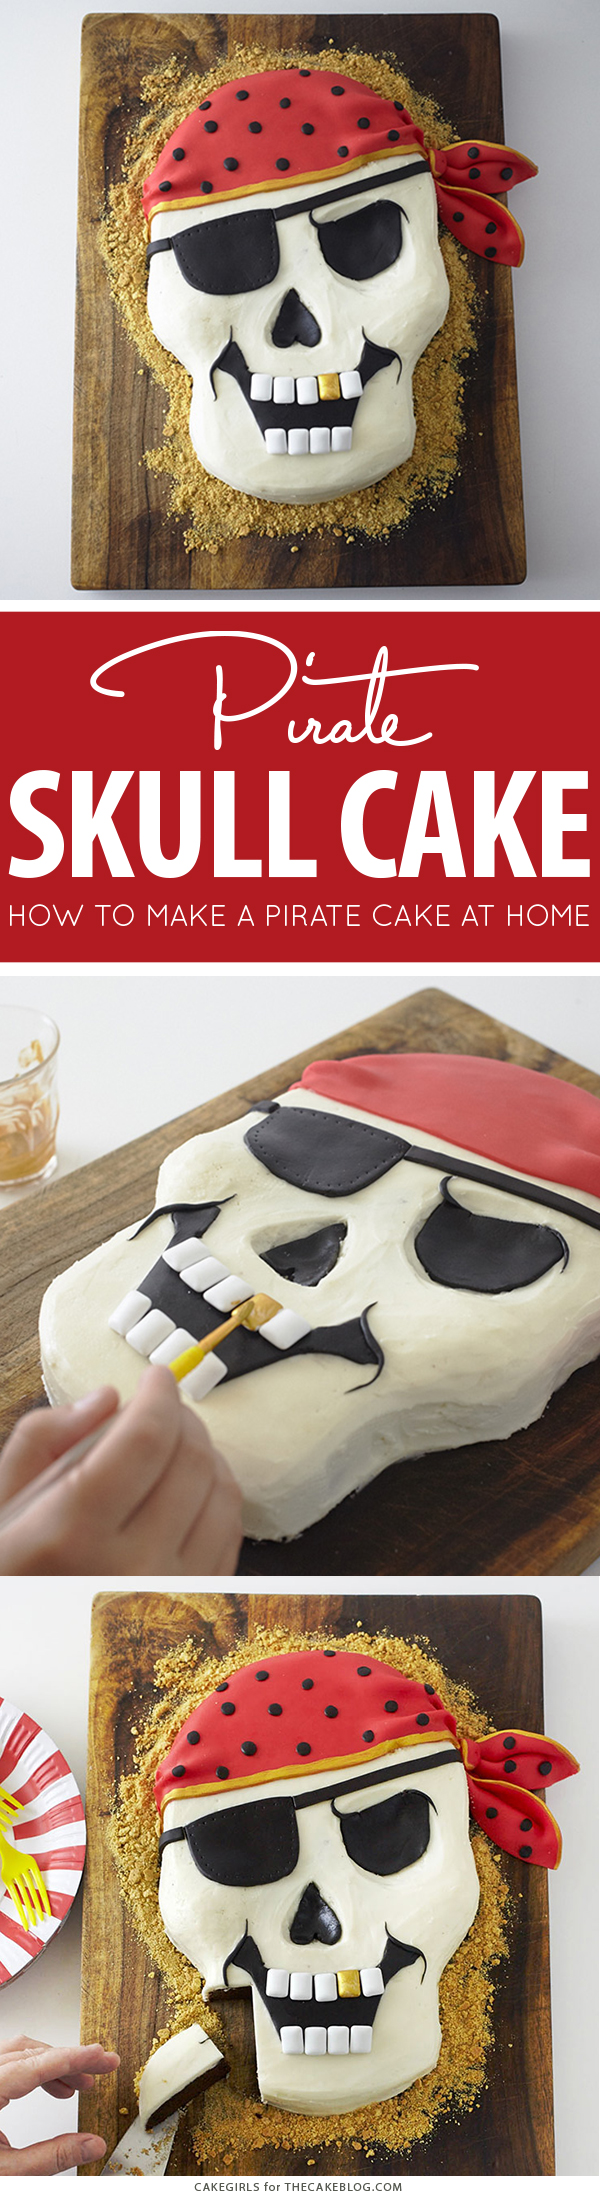
We love making themed cakes for kids. There’s just something about carrying out a cake to that little girl or boy, and having their eyes pop because you made them feel so special. And, it seems as though all kids go through their dinosaur, pirate, princess or ballerina phase, so themed kids cakes become part of every cake decorator’s repertoire. It’s good to have a go to design that’ll work time and time again, like this deceptively easy Pirate Skull Cake.
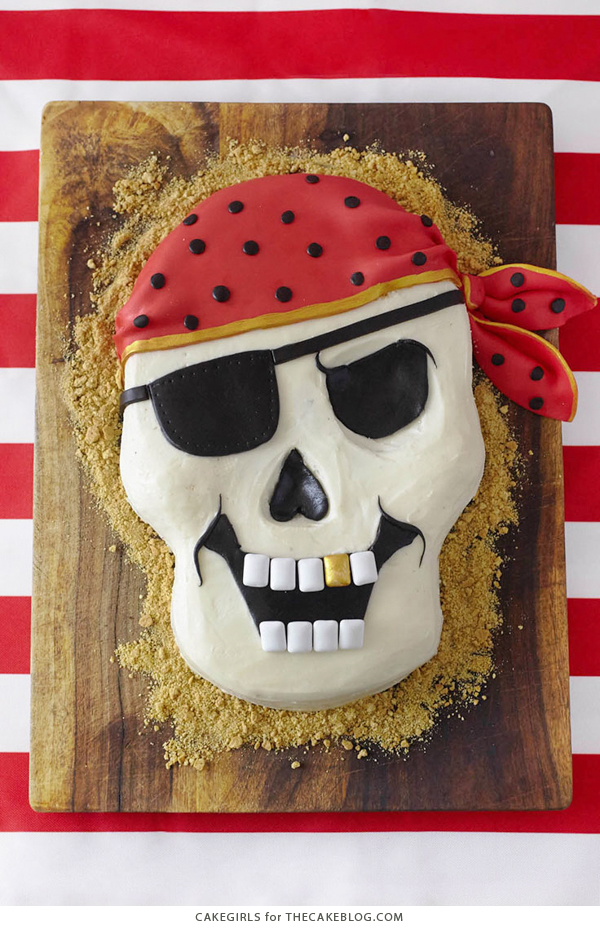
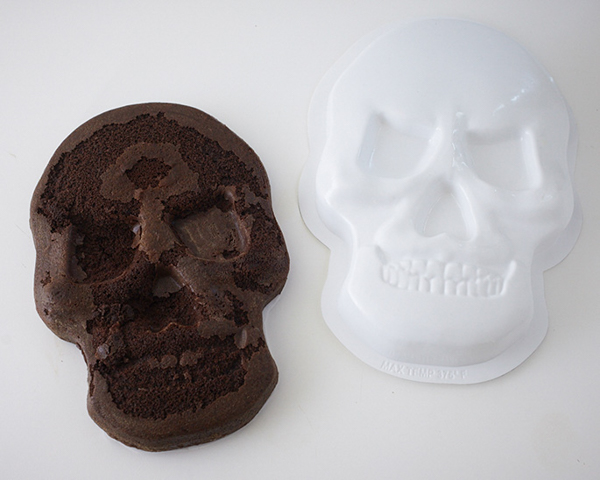
It’s starts with a cake baked in an inexpensive skull cake pan, iced in buttercream and finished with fondant accents. A homemade cake recipe or box mix will work for this. Pair it with your favorite buttercream recipe (we used an American style buttercream) and smooth it to the best of your ability…no perfection required. Once the cake is iced, all the fondant accents can be easily customized; switch to a pink bandana for a pirate princess party, apply a happier facial expression for the littlest of pirates or create a creepy fondant eyeball and dark overtones for Halloween. Arrgh…so get crackin’ on this pirate cake, matey…time to shiver some timbers.
PIRATE SKULL CAKE
a tutorial by Cakegirls
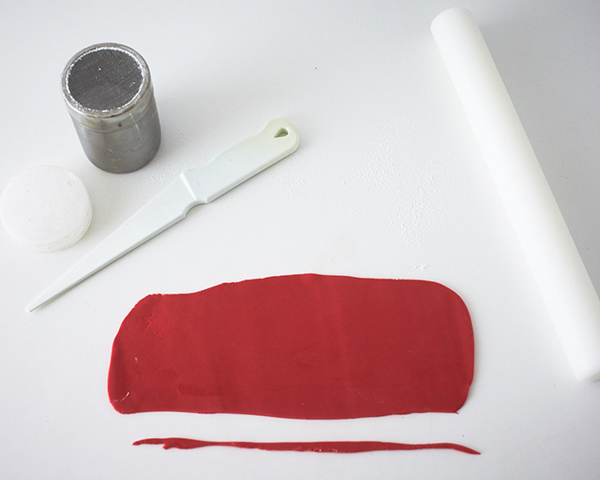
Supplies:
Generously coat your skull pan with baking spray and bake your favorite cake recipe or box mix according to the directions. Cool in the pan for 10 minutes or so and then flip out onto a cooling rack. Once cool, wrap the cake in plastic wrap and place in the freezer. Remove and let thaw a bit when you are ready to start decorating your cake (you definitely want your cake to be firm and chilly so don’t let it come completely to room temperature).
Make one batch of your favorite crusting buttercream. Spread a really thin coat of buttercream on the cake to seal in the crumbs and then place it in the refrigerator for 20 minutes or so, until the icing feels firm.
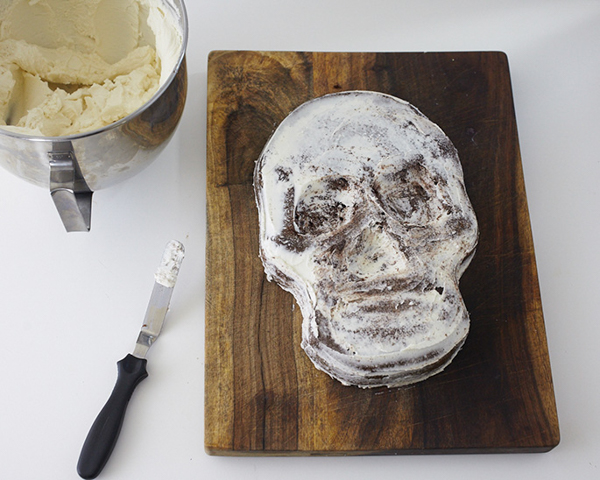
Remove cake from refrigerator and then add a thicker layer of buttercream. You can fill in the left eye cavity completely with icing (you’ll be putting an eye patch there) but try and preserve the rest of the cake shape as best possible. Don’t worry about preserving the teeth, you’ll add that part later too. Place the cake back in the refrigerator for 30 minutes, until firm.
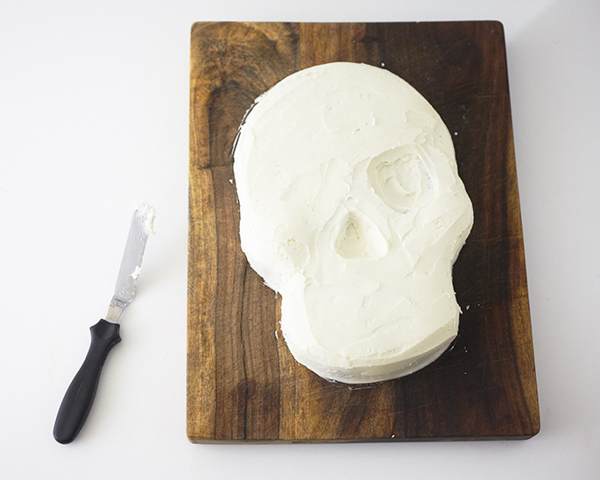
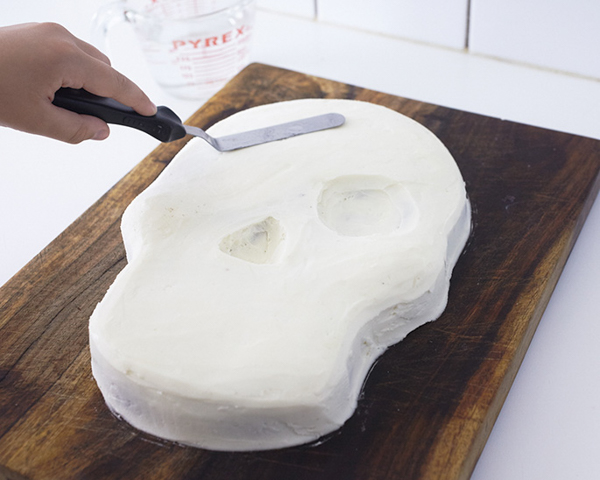
Heat some water in the microwave for about a minute, until very hot. Dip your spatula in the water, shake off the excess and then run your spatula over the cake to smooth out the surface as best possible. Take your time, but don’t worry if it’s not perfectly smooth. The skull can be a bit rough…it’s a pirate party for heaven’s sake! Once you think it looks pretty good, place it in the fridge while you work on your fondant accents.
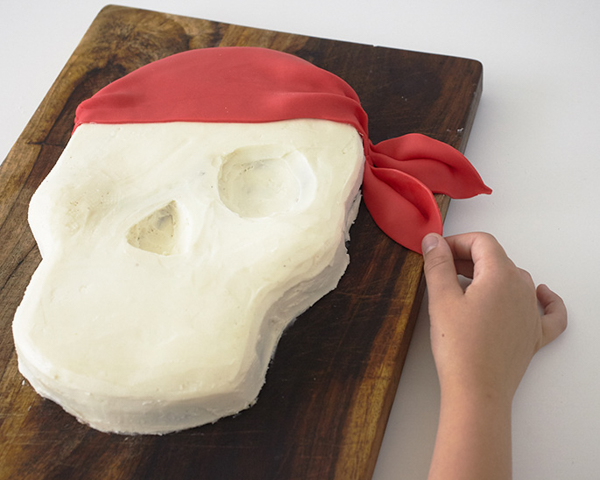
On a surface covered lightly with powderd sugar, roll out 4 oz. of red fondant into a rectangle. Ours measured 4 1/2 ” x 11″. Trim one long side so it’s nice and neat.
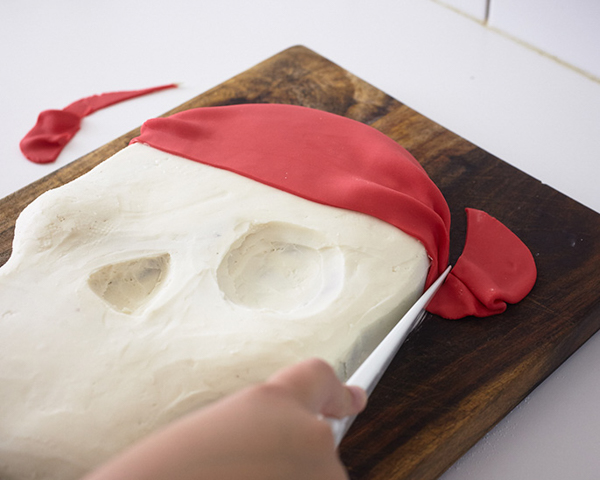
Remove the cake from the fridge. Lift the rectangle and place it on the cake loosely to create a bandana. Give the bandana some wrinkles to mimic fabric texture. Trim any excess fondant off from the sides of the bandana.

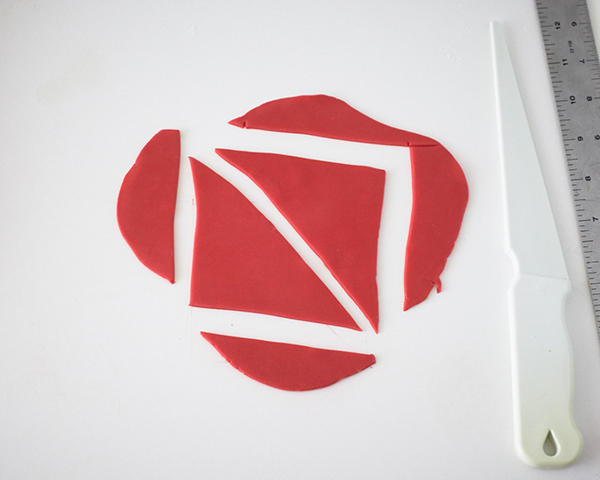
Roll out some additional fondant into a 5″ x 5″ square. Cut the square diagonally into two equal triangles. Brush a little water on the long side of the triangle and then fold it in half to create a tail.
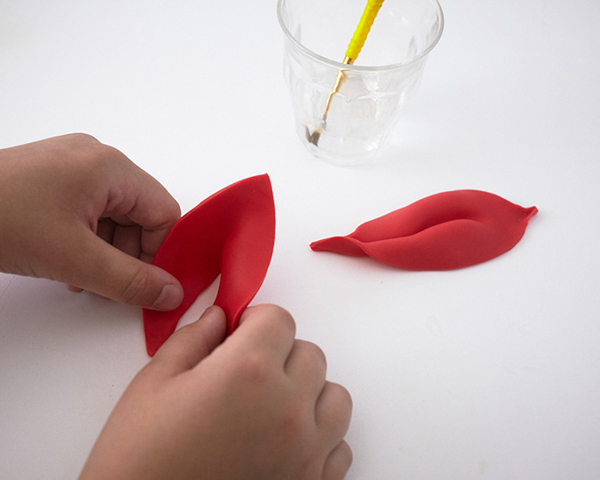
Add the tail to the cake using a bit of water to adhere. Repeat with the other triangle and then add ball of fondant in the middle to create a knot.
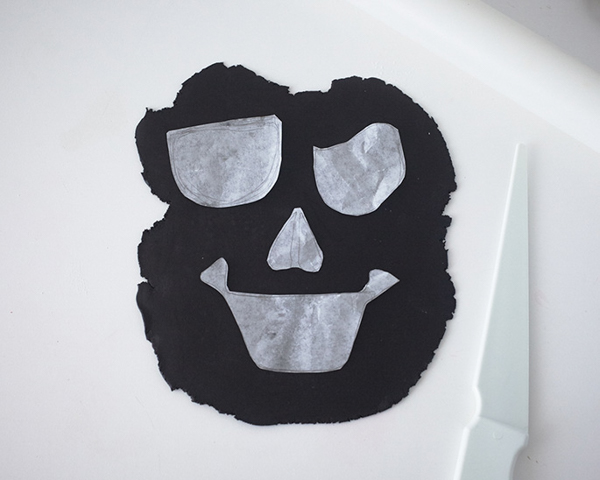
Next, take some tracing paper or parchment paper and lay it over your skull pan. Use a pencil to draw the size of the eye patch, evil eye, nose and mouth. (We enlarged the mouth to make room for the teeth and gave it some smile lines). Cut out your paper shapes and lay them on some rolled out black fondant. Cut the pieces from the fondant and lay them on your cake.
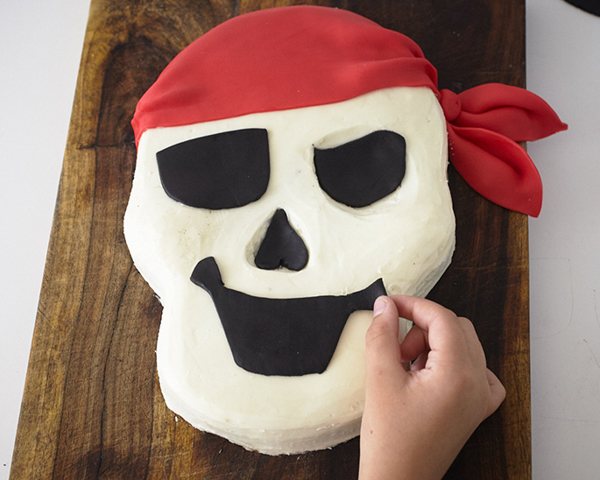
If you want, you can roll a few tiny ropes out of black fondant and add them to the evil eye and edges of the mouth to create some extra character…totally optional.
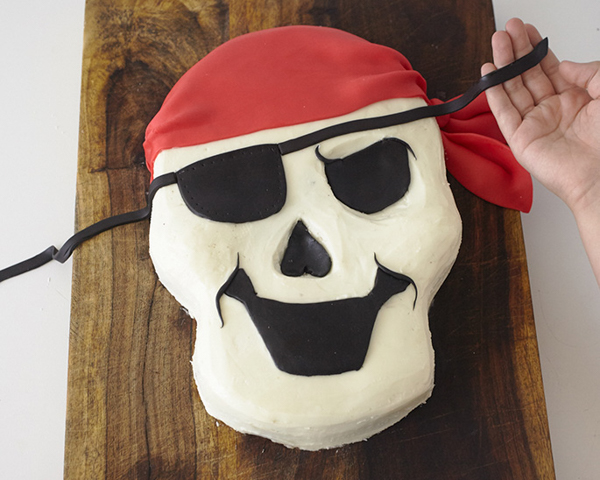
Then, cut a thin strip for the eye patch string. Cut it in half and add it to the right and left of the patch. It will stick in the buttercream on it’s own.
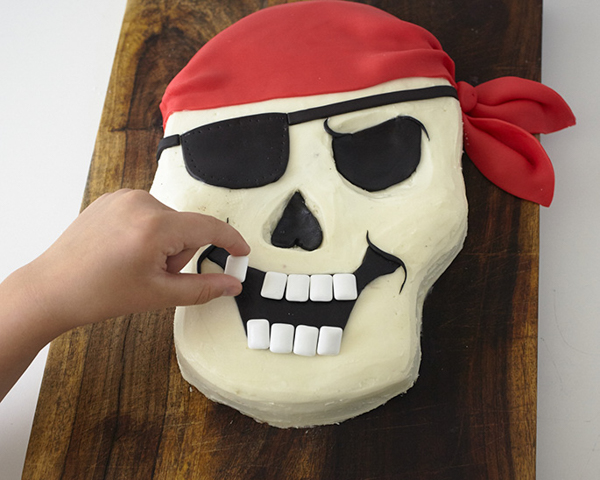
Brush the back of the gum pieces with a touch of water and place them on the fondant.
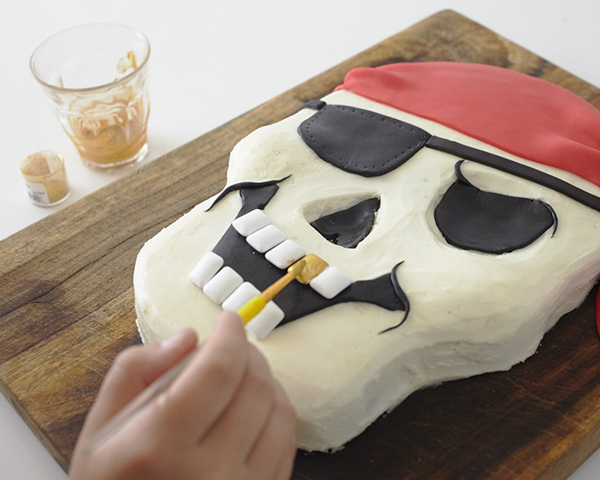
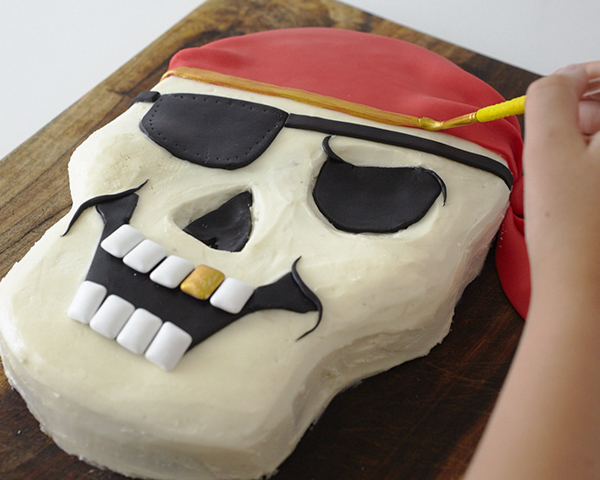
(This next step is totally optional but we kind of loved it!) Mix a little gold luster dust with a few drops of vodka or clear extract. The mixture should be liquidy but not watery…a paintable consistency. Paint one of the teeth gold and then paint the edges of the bandana as well. Keep stirring the mixture if it want to separate or add a few more drops of extract if it starts getting dry.
Note: Gold luster dust should be used for decorative purposes only. Remove the gold tooth and gold accented fondant before serving, or feel free to skip this step entirely.
To create polka dots for the bandana, roll tiny balls of black fondant, squish them between your fingers and adhere them with a dab of water. Finish the cake with graham cracker crumbs around the edge to mimic sand.
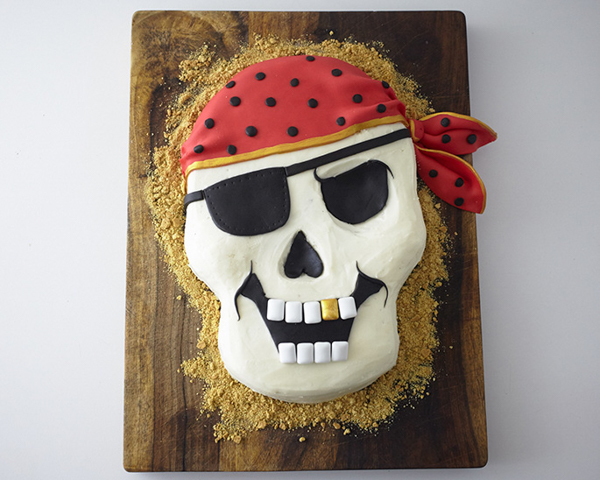
Wow! Now this show stopping pirate party cake is done!
YOU MAY ALSO ENJOY:
Mini Mice Cakes
Black Butterfly Cake
Cupcake Terrarium
Rose Cake Pops
Cake Gems


Do you need to refrigerate the cake after it is finished?
It depends on what type of icing you use. If you use a cream cheese based frosting or one that requires refrigeration, then yes. If you use a counter-stable buttercream, then no.
What a neat cake! Thank U for sharing…it is perfect for my Capt. Jack’s birthday!
Pirates is one of my favorite theme. I really love the cake. The golden touch is very important.
I made the cake but did not have the cake mold you used and I would like to purchase the mold. Can you post a site where I can purchase it, thank you.