Chocolate Easter Bunny Cake – how to decorate this easy cake for Easter dessert, using edible grass, a chocolate Easter bunny and candy eggs.
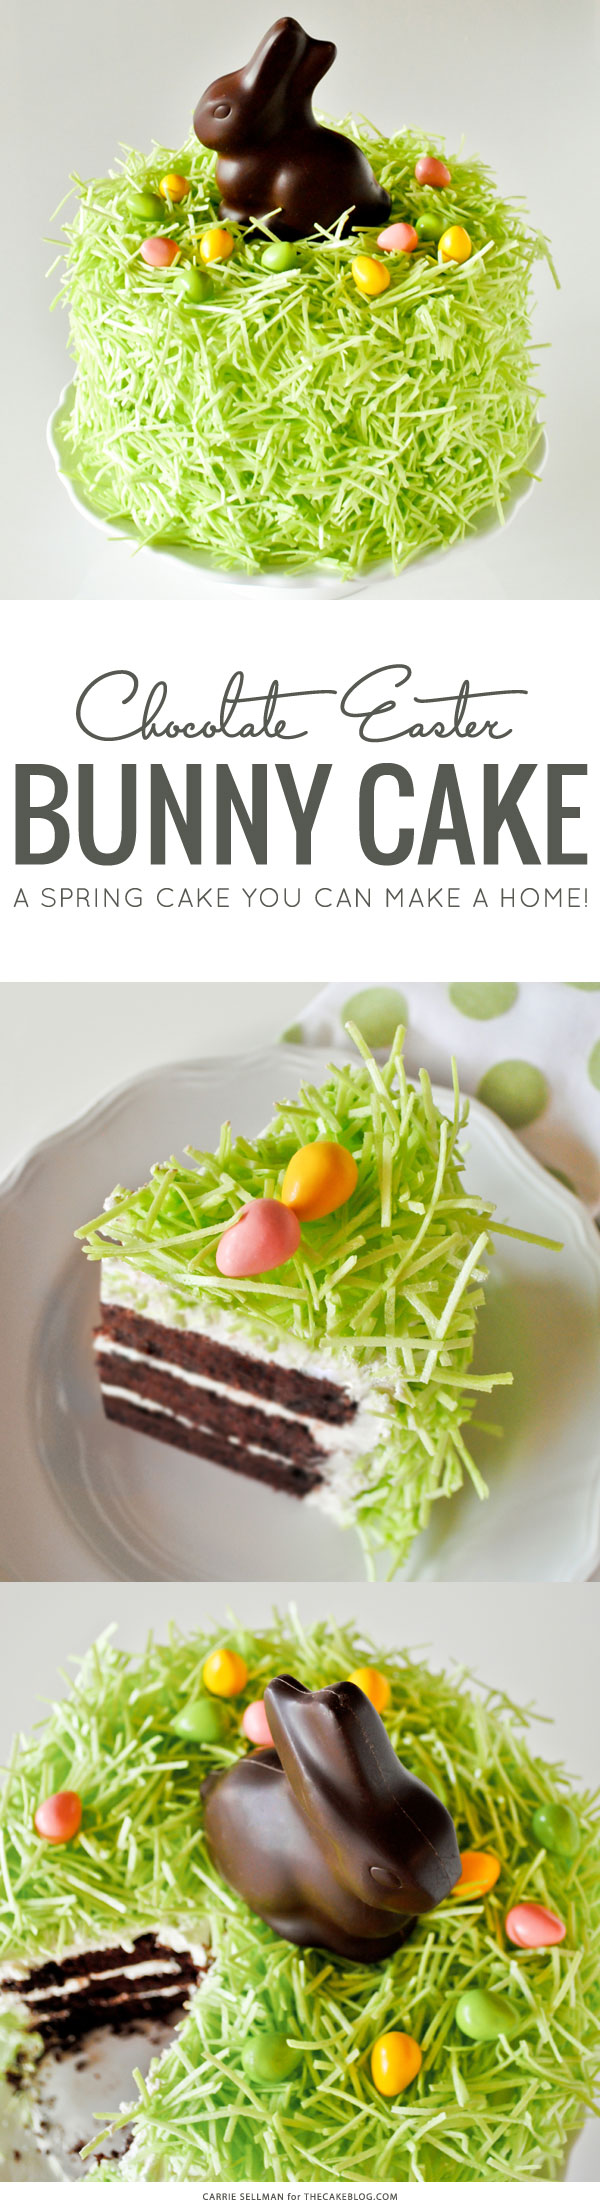
Spring is officially here and little signs of growth and renewal are sprouting up everywhere. Easter is just three weeks away and the white ceramic bunnies in my living room have been ready for weeks. If you haven’t noticed by now, I love holidays. I love the planning, the decorating, the celebrating, and of course, the baking. Last year we celebrated Easter with this super simple Speckled Egg Cake DIY. And I’m happy to share another new Easter cake tutorial with you again today. This time it’s all about fluffy green grass and a little chocolate bunny. Traditionally the star of the Easter basket, this chocolate bunny is hoppin’ on top of the cake. And I must say, he looks pretty happy with his sweet new home. Let’s take a look at this quick and easy Chocolate Easter Bunny Cake.
Today’s cake might just be the simplest cake I’ve ever decorated. Back in the day, I used to love the challenge of creating a complex design with lots of intricate details. You know, like the cakes we ohhhh and awwww over each day. But now, my days are filled with the responsibilities of an editor and of a mother. So when it comes time for me to bake, I want something that still looks clean and polished. But takes a fraction of the time! Seeing that’s easier said than done, this has become my new challenge. Creating a design that’s completely forgiving with no right or wrong way of doing it… so my toddler assistant can actually put her clump of grass onto the real cake. And it looks imperfectly perfect. A design that is achievable by those who bake once in a blue moon but still inspires those who bake everyday. Because I know that you, yes you reading this post right now, might fall on either end of that spectrum or somewhere in between. And then there’s those of you who would love to bake but the reality of life has you stopping by the market to purchase a cake. I’m happy to say, this project is for you too! This Chocolate Bunny Cake is quick and easy and do-able by all.

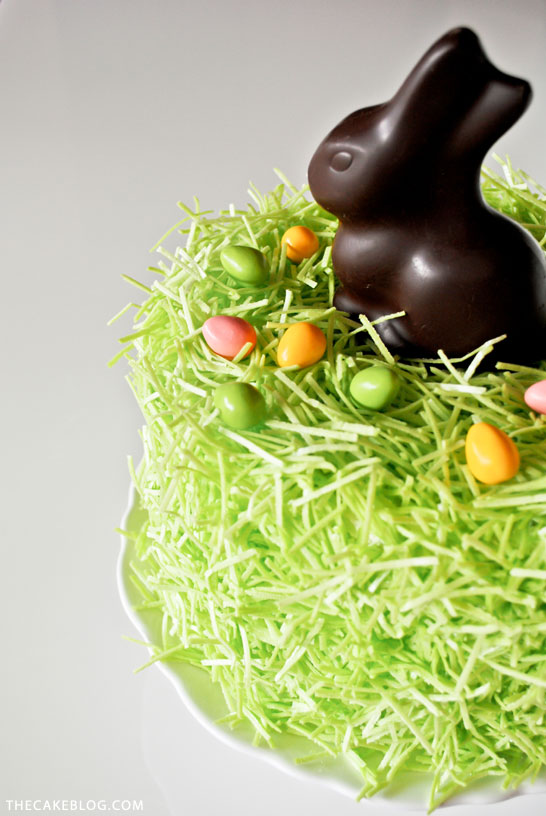
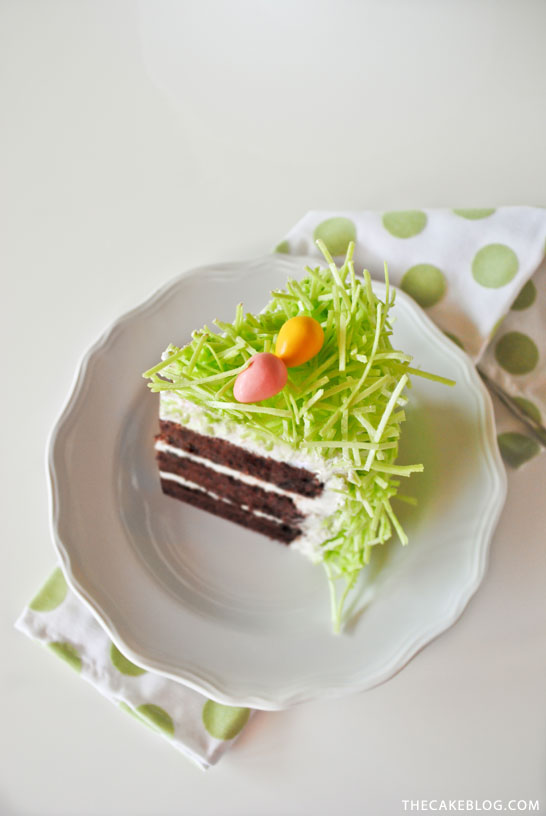
Now, I know some of you are wondering about the edible grass. Specifically, if it is edible! Where I purchased it…. what’s it made of. I first spotted edible Easter grass at Target in 2012 and that’s where I snagged all of my supplies for today’s cake. The grass is made of potato starch, much like wafer paper. I absolutely love how it looks on this cake but preferred the taste of the buttercream frosting underneath, which is quite similar to how many people feel about fondant. So when it came time to eat a slice, I personally left the edible grass behind. But I think an eight year old would love it!
Why not just use coconut flakes, colored green, you ask? Because I loved the playful confetti-like appearance of the edible grass. It added so much texture and reminds me of Easter basket filler. Not to mention, it was fun! But you could certainly use green colored coconut flakes instead if you prefer.
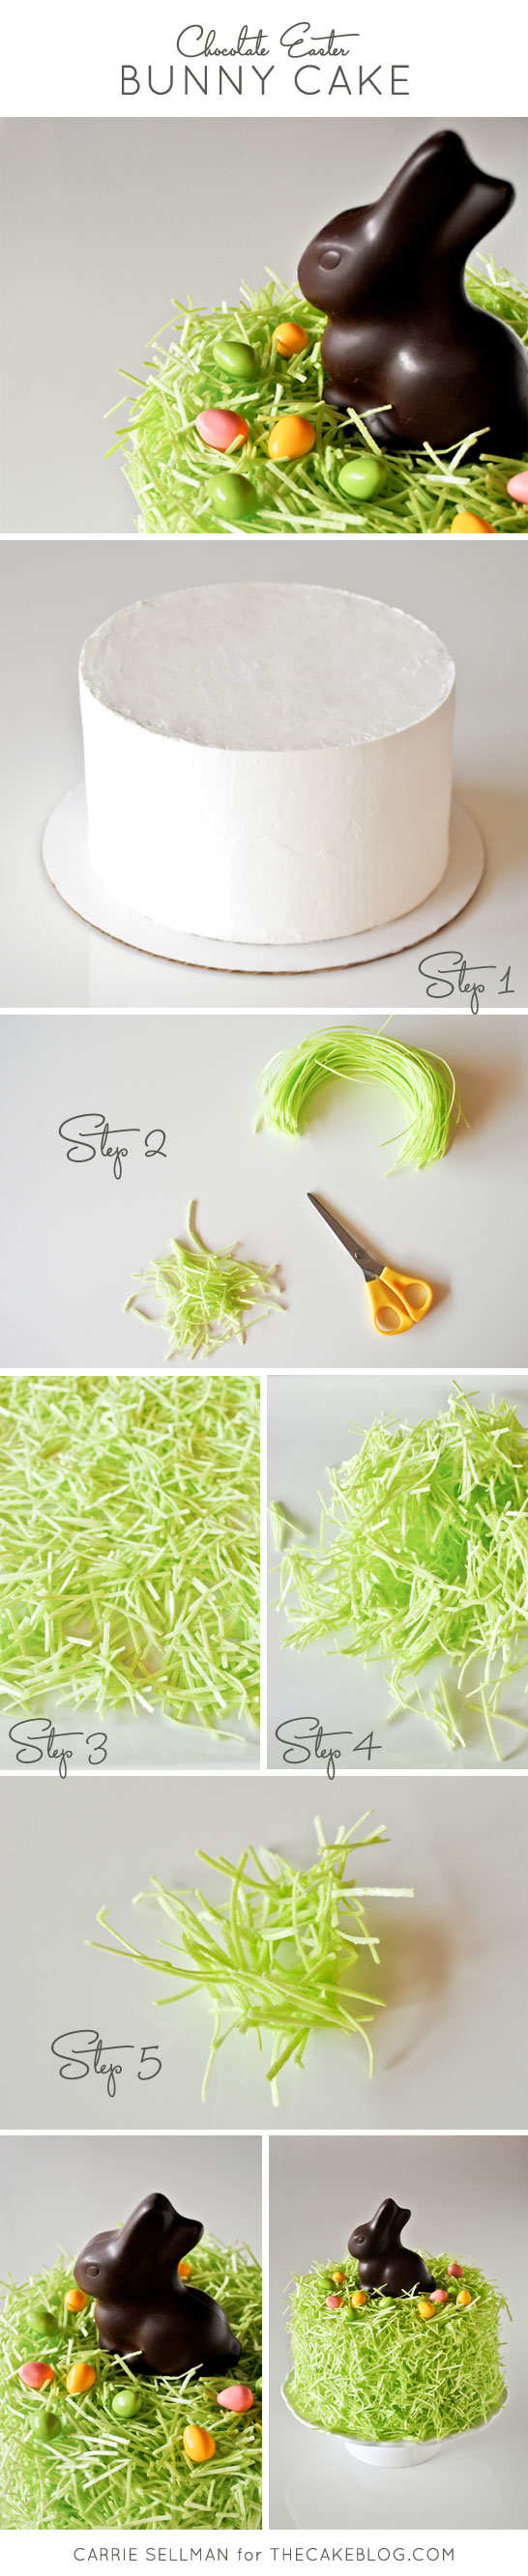
Okay, it’s time to show you how quickly this cake comes together. Seven simple steps and you’ll have the centerpiece for your Easter table.
CHOCOLATE EASTER BUNNY CAKE
a DIY by Carrie Sellman
Supplies :
8″ round layer cake with white frosting
3 to 4 packs of Edible Grass
Candy Eggs
Chocolate Bunny
Scissors
STEP 1 : Prepare an 8″ round cake with white frosting. Use your favorite recipe or one of our cake recipes. Bake it from a mix. Or purchase one at the market.
STEP 2 : Unroll one package of edible grass and cut into 1 to 2 inch pieces using clean kitchen scissors.
STEP 3 : Spread grass clippings out onto a tray and, very sparingly, sprinkle a few drops of water over the top. 1 teaspoon of water per package is plenty. You do not want the grass to get too wet or it will break down. NOTE : We’re working with one package of grass at a time.
STEP 4 : Using your hands, mix up the grass and allow the water to spread. This will make the grass start to clump together.
STEP 5 : Pull off a tiny clump of grass and stick it to the side of the cake. Just gently push it right on to the frosting, letting it stick out from the side of the cake. Repeat with another small clump of grass, sticking it very close to the last clump. Repeat with additional clumps and additional packages of grass until the entire cake is covered in grass. Step back and look for any holes or bare spots. Fill in with a tiny clump of grass or single blade.
NOTE : If your grass dries and is no longer clumping together, simply add another drop of water and mix. Remember to go light on the water.
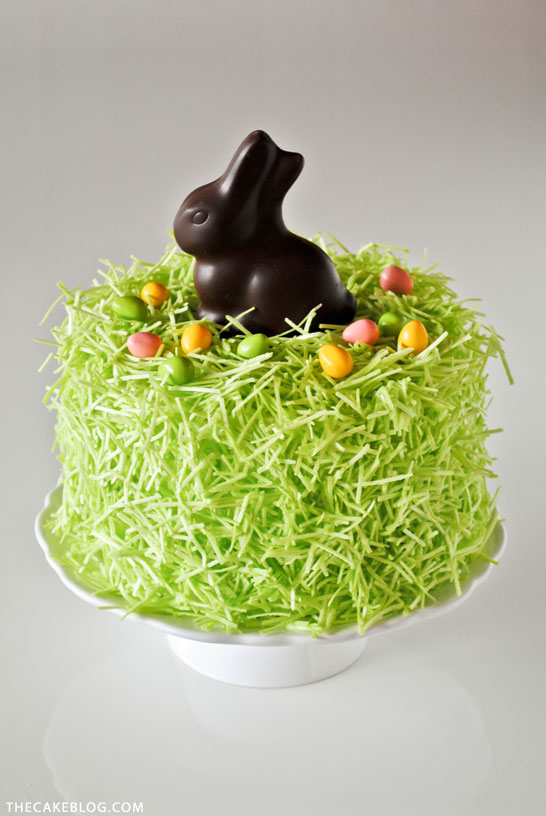
STEP 6 : Place chocolate bunny on top of cake and sprinkle eggs around him.
STEP 7 : Your cake is complete! The grass will dry in place and become quite firm. When ready… slice, eat and enjoy!


YOU MAY ALSO ENJOY:
Bunny Face Cookies
Spring Wreath Cake
Speckled Egg Cake
Mini Easter Egg Cakes
Coconut Nest Cake


I love this and plan to make with all of my unplanned free time… would you mind telling me what brand of chocolate bunny you used? He’s cute!