Marbled Chocolate Easter Eggs – how to make marbled Easter egg toppers for cakes and cupcakes using chocolate coating and cookie cutters. A new tutorial by our contributor Erin Gardner.
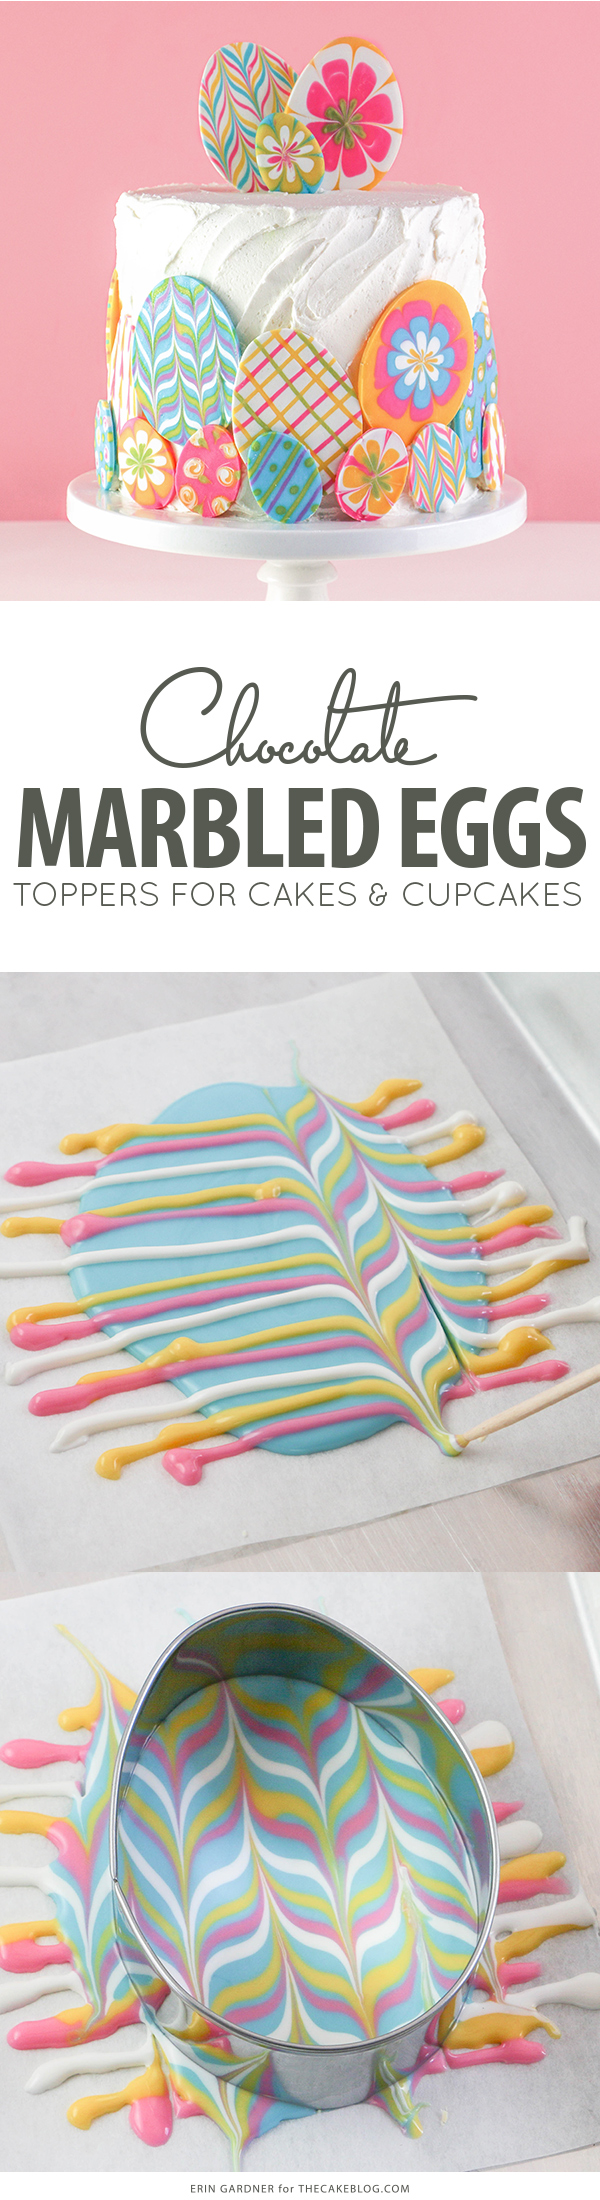
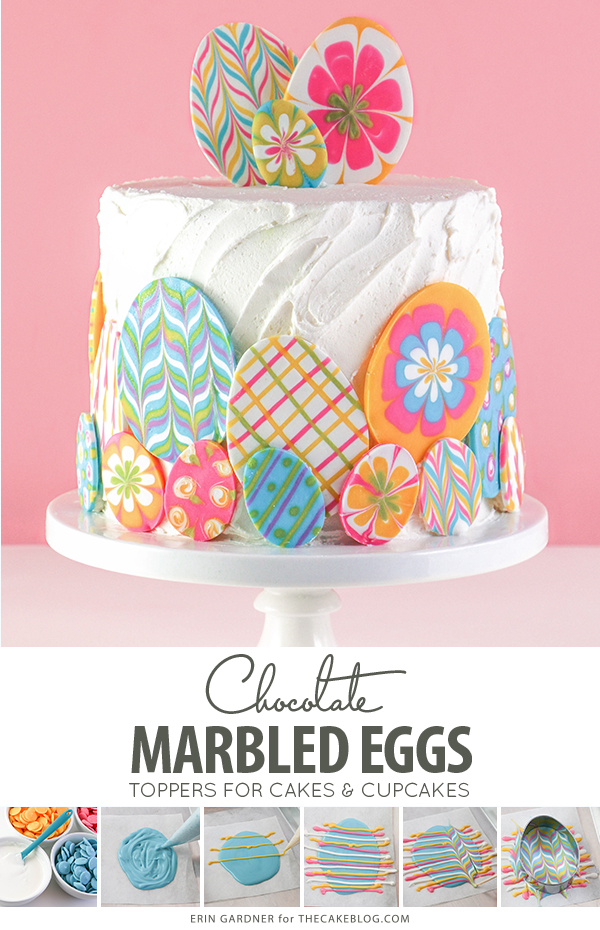
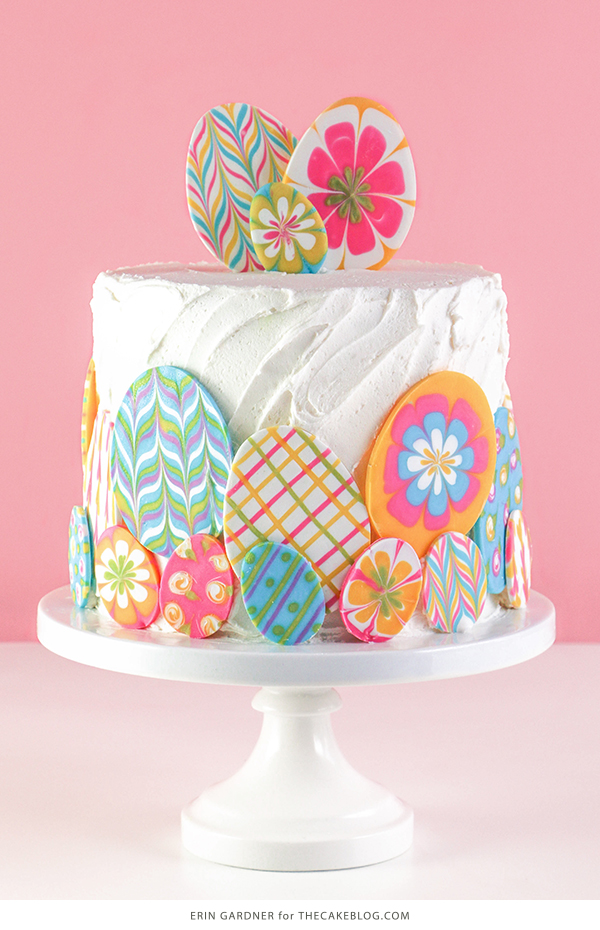
These marbled chocolate Easter eggs are a fun, easy, and delicious way to dress up a cake or cupcakes for your holiday brunch table. They look so impressive, but are way easier and faster to make than they appear. Don’t worry about having a steady piping hand! Anything wonky or wobbly will be smoothed over in the marbling process.
Create a similar look suited for any spring celebration by swapping the egg-shaped cutters for circles or flowers. Use my heating pad trick to keep the chocolate fluid and frustration to a minimum.
Here’s a video of the process, followed by the detailed instructions below. Enjoy!
MARBLED CHOCOLATE EASTER EGGS VIDEO TUTORIAL
MARBLED CHOCOLATE EASTER EGGS
a tutorial by Erin Gardner
Supplies:
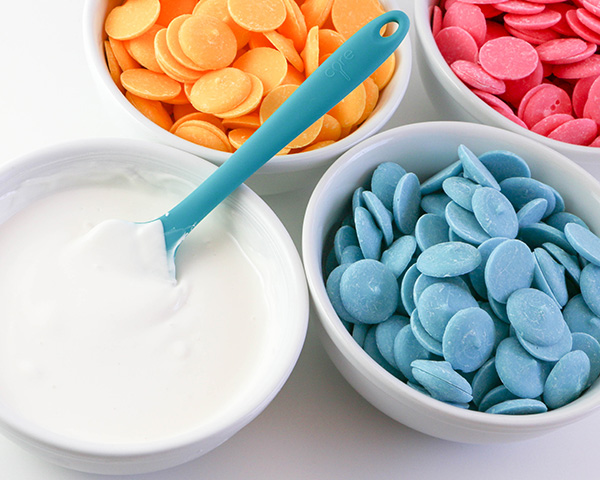
Coating chocolate in assorted colors (or tinted tempered white chocolate)
Parchment paper
Pencil
Egg Cookie Cutters
Scissors
Paper cones or piping bags
Cookie sheet
Heating pad, optional
Toothpicks
Plug in the heating pad (if using) and turn it up to high heat. Cover the pad with a piece of paper towel. Top the paper towel with a sheet of foil.
Melt various colors of coating chocolate in heatproof bowls according to the package directions. I used pink, blue, white, green, and yellow, but you can use whatever colors you like. Fill piping bags or paper cones with each color. Store the piping bags under the foil on the heating pad to keep the chocolate fluid while you work.

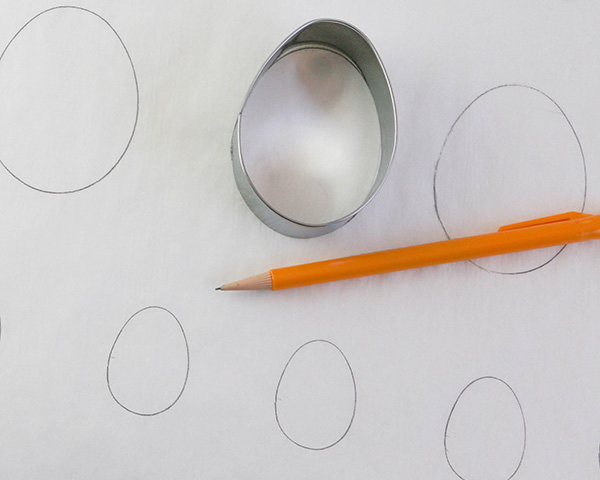
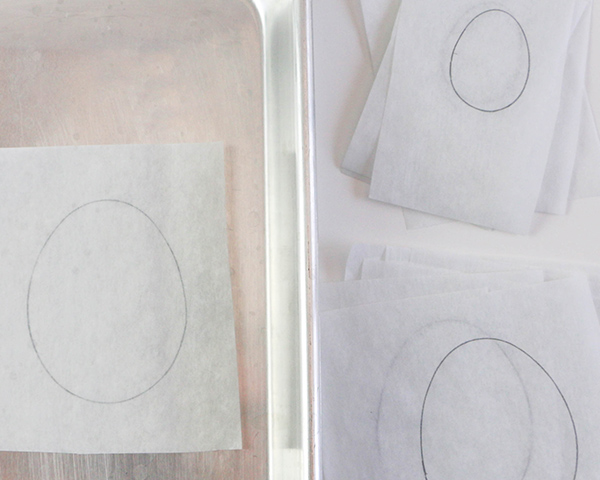
Use a pencil to trace the outline of egg-shaped cookie cutters on a piece of parchment paper. Cut the paper into little squares with an outline on each square.
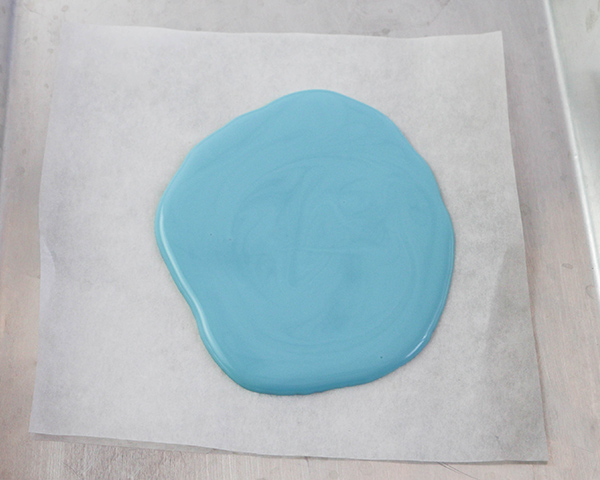
Flip one of the egg templates over onto a tray or cutting board. Fill in the outline of the egg with one of the coating chocolate colors. Don’t worry about being precise! The outline is there just to make sure you marble enough chocolate to fill your cookie cutter. Steady the piece of paper with your finger tips and swiftly tap the tray against your work surface to spread and smooth the chocolate out.
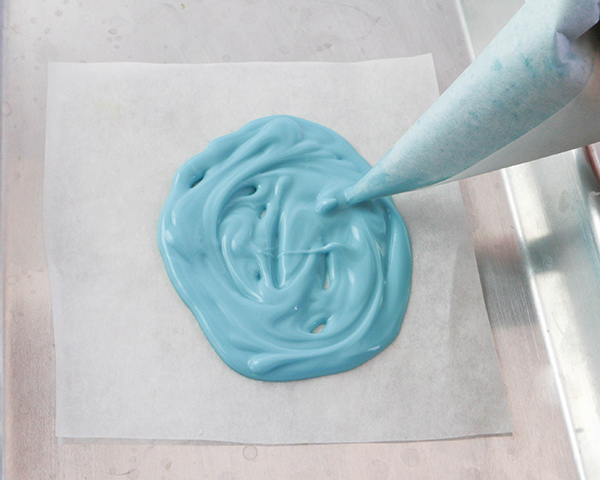
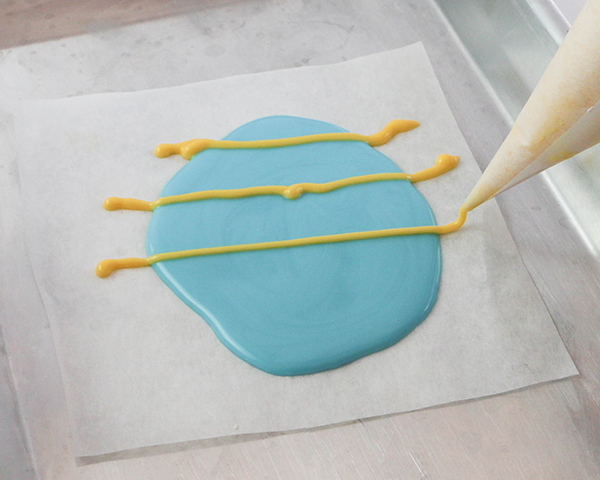
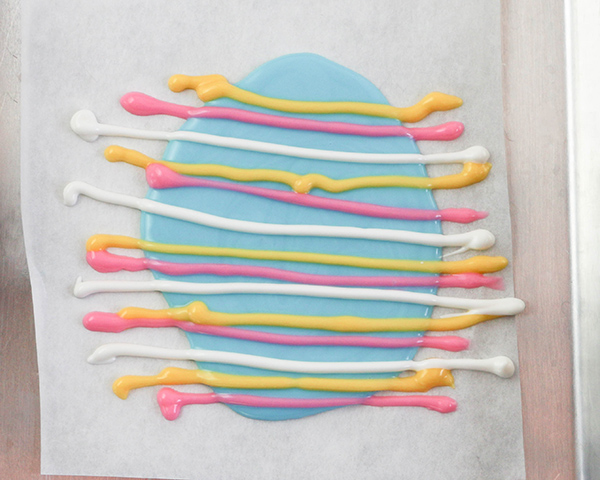
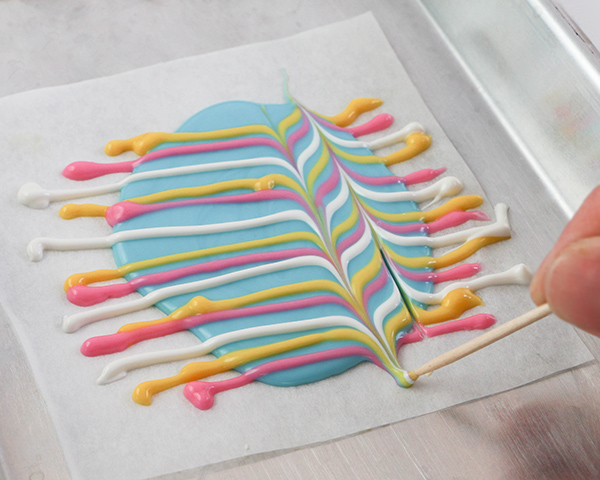
Working quickly and confidently, pipe lines of chocolate in different colors.
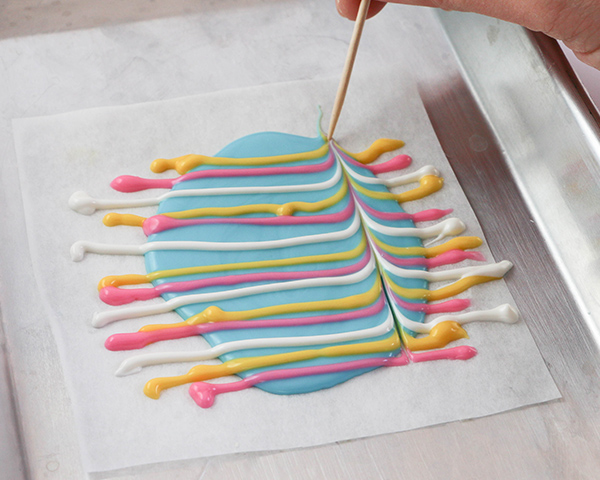
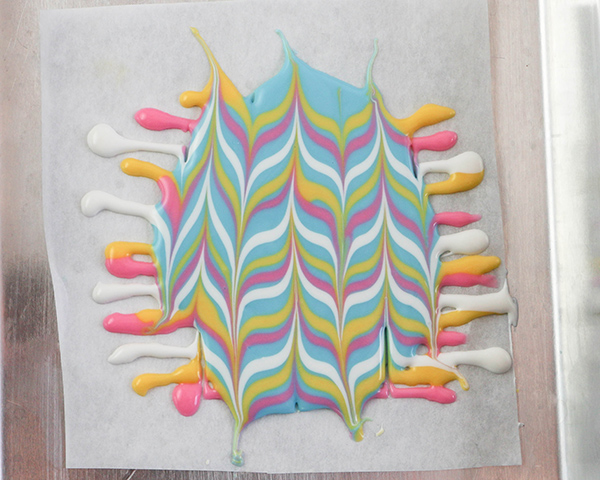
Start at one end and drag the tip of a tooth pick through the lines. Wipe toothpick clean then drag the next row in the opposite direction. Repeat across the entire surface. Tap the tray to spread the lines flat.
As soon as you you finish your design, press one of the egg-shaped cookie cutters into the chocolate. Set it aside to harden, about 10 minutes.
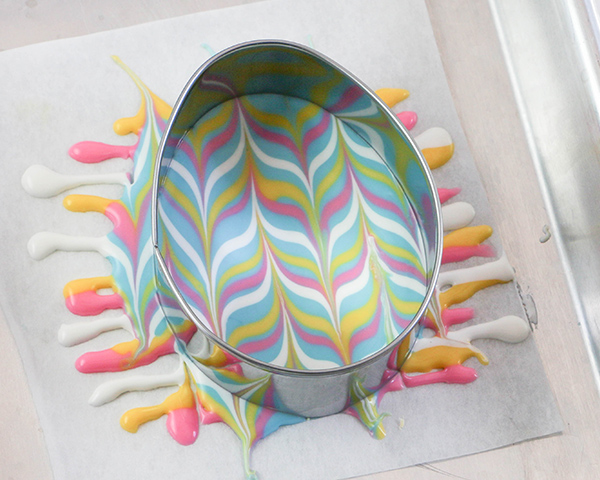
Lift the cutter up and slide the finished chocolate egg out.

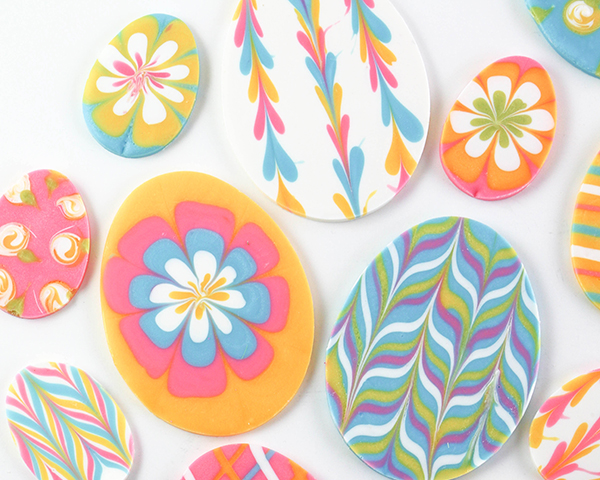
Use finished eggs to decorate a simple buttercream iced cake or to top cupcakes. Repeat as many times as you like to make chocolate eggs in various sizes. Store chocolate eggs in an airtight container layered between parchment paper at room temperature until the expiration date on the bag.
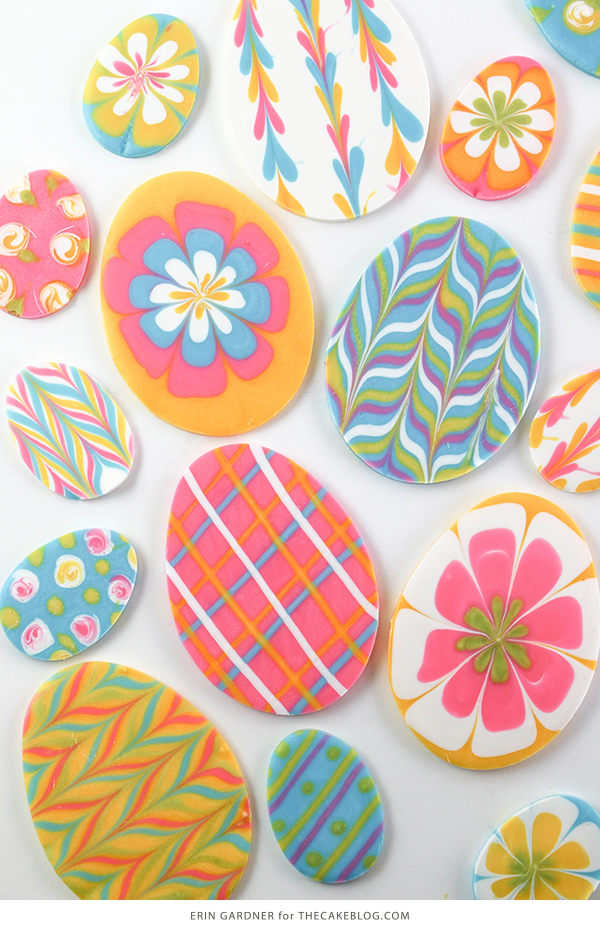
Here’s some additional techniques to try! You can watch me make each of these in the video above.
Flowers: Pipe circles of chocolate within each other. Tap the tray to spread the circles flat. Use a tooth pick to drag the chocolate in towards the center to create petals.
Hearts: Pipe lines of dots in different colors. Tap the tray to spread the dots flat. Drag the tip of a tooth pick through the rows of dots to create hearts.
Swirled Flowers: Pipe tiny dots of chocolate in one color. Top the dots with smaller dots in another color or white. Tap the tray to smooth the dots flat. Swirl each layered dot with the tip of a tooth pick. Pipe tiny green dots toward the edge of each swirled dot. Drag the tip of a tooth pick though the dot out away from the flower to create a leaf shape. Tap the tray to smooth the whole design out.
YOU MAY ALSO ENJOY:
Mini Easter Egg Cakes
Speckled Egg Cake
Chocolate Bunny Cake
Chocolate Flower Cake
Chocolate Daffodils


Oh my gash! Where have you been all my life! This is awesome!
Erin, I always enjoy your work……but this cake makes me happy just looking at it! I love how you chose a white cake to allow the chocolate eggs to pop. And, the colors you picked for the eggs are bright, fun, and colorful. How can anyone look at this cake and not smile? 🙂