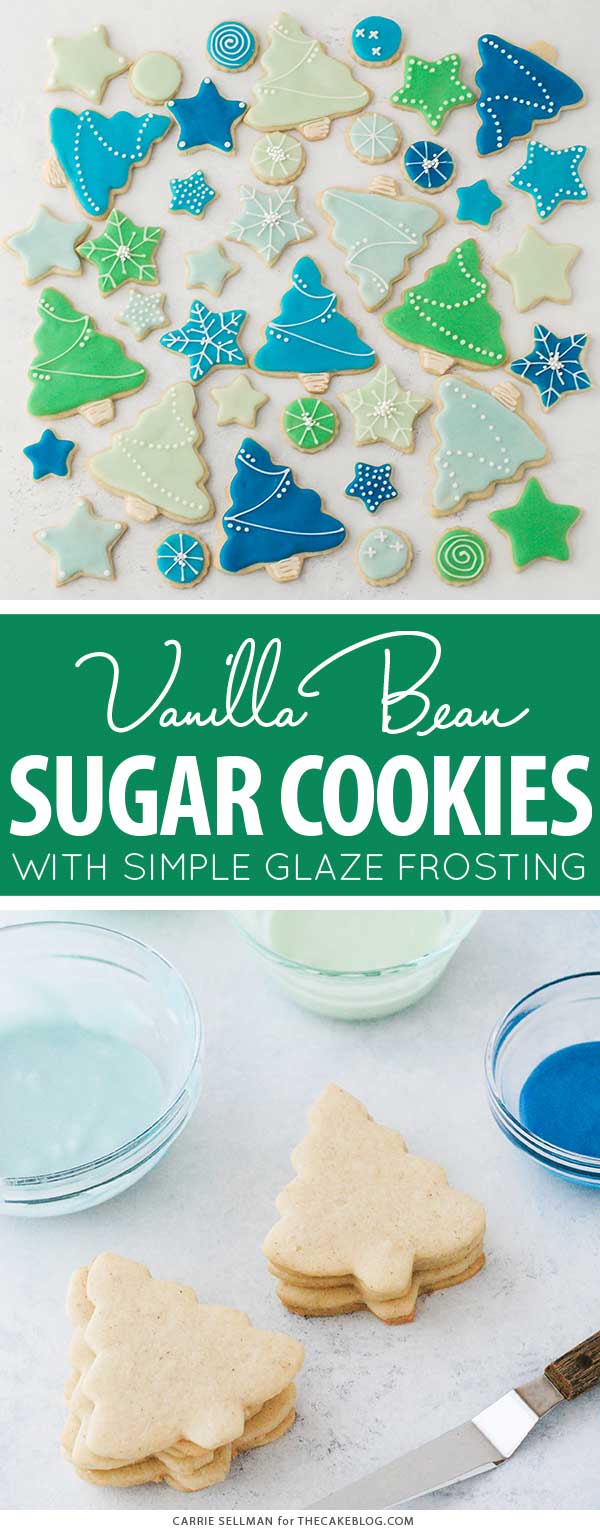
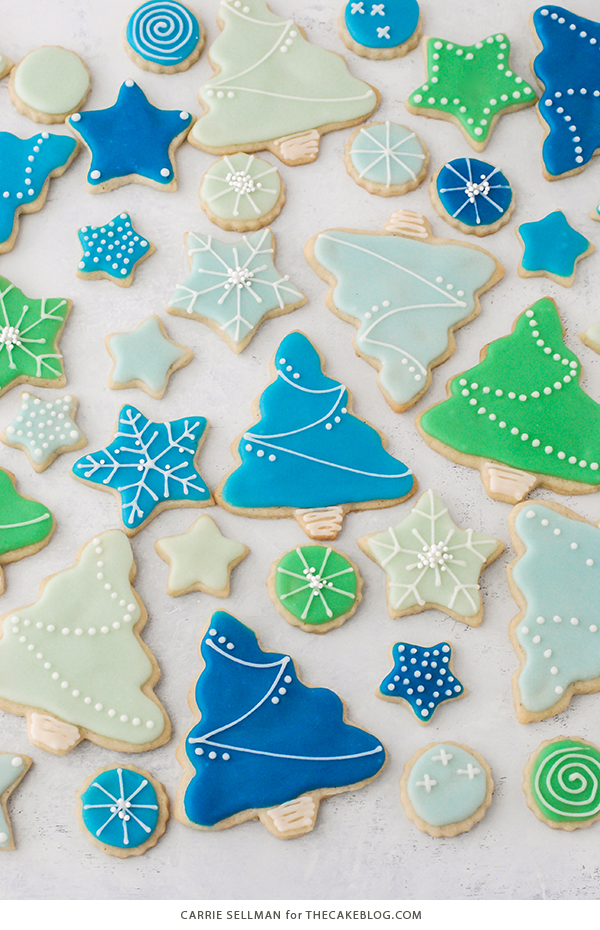
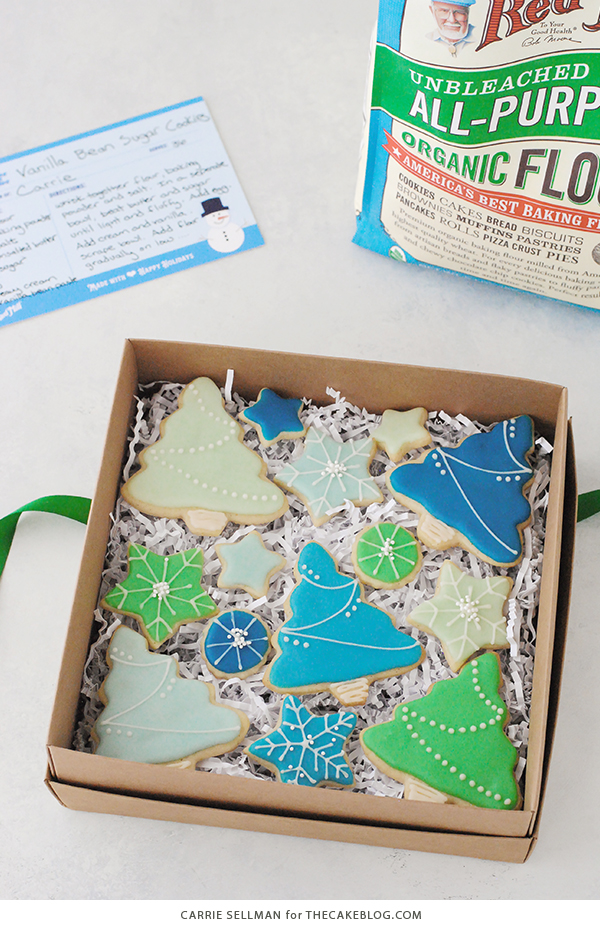
Decorated Sugar Cookies – vanilla bean sugar cookies with a simple glaze icing for easy yet thoughtful gift giving. A holiday sugar cookie recipe, sponsored by Bob’s Red Mill as part of their Made with Love, Baked with Bob’s campaign.
I know 99% of our posts are focused on cakes or cupcakes, but did you know that my love of baking actually started with cookies? My very first memories of baking were created in my grandmother’s kitchen, helping her make cookies. Even though I was young, she gave me real tasks like chopping the nuts or stirring in the end of the flour by hand, once the dough was too stiff for her arthritic hands to manage. The act of baking cookies together was an act of love that I’ll forever cherish.

As an adult, my first small trial into baking as a career involved cookies as well. I became interested in decorating sugar cookies and one of my best friends threw me a life raft when she asked me to make cookies for her wedding. Soon I was selling cookies as a side hustle which not only gave me a creative outlet outside my corporate job but a hobby to lift my heart. Not to mention putting me on my current path…

Then there were all the times my husband was far from home for long periods of time… to which I responded by baking cookies, packaging them up, and mailing them with much love from me to him. Somehow that act of baking cookies made me feel closer to him, even over all the miles between us. Little did I know, I was on to something. Psychologists have found that baking for others promotes a sense of wellbeing and benefits the baker as much as, if not more, than the recipient. Funny how it takes a research team to prove something we already know inside, but maybe were unable to quantify. While I was baking for others – I was also baking for myself.

So when given the opportunity to participate in this campaign with Bob’s Red Mill, I knew I wanted to share it with you. Even if it’s not cake! My pantry is full of Bob’s products and while they’re top in my book when it comes to quality and wholesomeness, the company’s altruistic message is one I personally agree with. Bob’s Red Mill believes in making our world a better place through small acts of kindness. What better way to lift someone up this season than to show your love with a baked good. Whether it’s someone close to you or an elderly neighbor who lives alone, a teacher who goes the extra mile for your child or someone you know who’s hurting — everyone could benefit from a kind gesture. And while cookies won’t magically solve all of the world’s problems, they can certainly be a bright spot in someone’s day. Your day included.
I hope you take some time this holiday season to share your love with a gift of freshly baked cookies. To get you started, here’s a $1 off coupon for Bob’s Red Mill Product and my favorite recipe for Christmas cookies, paired with an easy glaze frosting. No fussy royal icing needed. Happy Baking!
Decorated Sugar Cookies

Vanilla bean sugar cookies with a simple glaze icing for easy yet thoughtful gift giving.
- Yield: about 3 dozen
- Category: ✽ ✽ ✽
Ingredients
For the Vanilla Bean Sugar Cookie Dough:
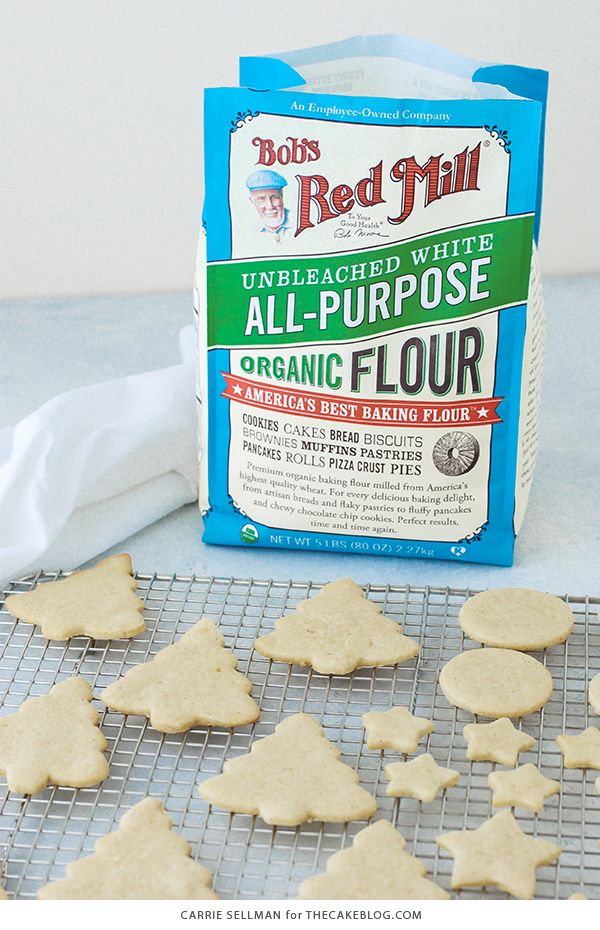
- 3 cups Bob’s Red Mill Organic Unbleached White Flour
- 1/2 teaspoon baking powder
- 1/2 teaspoon salt
- 1 cup unsalted butter, softened
- 1 cup sugar
- 1 egg
- 1 tablespoon heavy cream
- 1 tablespoon vanilla bean paste, or vanilla extract
- confectioners’ sugar for rolling dough
For the Glaze:
- 4 cups confectioners’ sugar (powdered sugar)
- 6 tablespoons heavy cream
- 6 tablespoons light corn syrup
- 2 teaspoons vanilla extract
- soft gel food coloring (sky blue, royal blue, red and green)
Instructions
Make the Sugar Cookies:
- Whisk together the flour, baking powder and salt. Set aside.
- In the bowl of a stand mixer, beat butter and sugar on medium-high using the paddle attachment. Beat until pale and fluffy, about 3 minutes.
- With the mixer on low, add the egg.
- Add heavy cream and vanilla bean paste and mix to combine. Scrape down the bowl and the mixer blade as needed.
- With the mixer on low, gradually add the flour a little at a time. Mix until the dough pulls away from the sides of the bowl. Stop mixer and scrape the bottom of the bowl to get any dry flour that hasn’t mixed in, then mix on low again to thoroughly combine. Finished dough will be sticky.
- Tear two pieces of plastic wrap and divide the dough in half onto the two pieces of plastic wrap. Wrap the dough and flatten it into two discs. Chill in the refrigerator for at least two hours or overnight.
- When ready to bake, preheat oven to 375F.
- Remove one disc of chilled dough from refrigerator and place onto a piece of parchment paper. Cover with another piece of parchment paper. Using a rolling pin, roll out dough between the two pieces of parchment paper until the dough is 1/4 inch thick. Remove top sheet and use cookie cutters to cut as many cookies as possible out of the dough. Place the entire sheet of parchment paper, cutouts and the scraps between, onto a baking sheet and refrigerate for 10 minutes. Once chilled, remove the scraps between the cut out cookies. Rewrap scraps in plastic wrap and refrigerate to roll out again later. Rearrange cookies on parchment lined cookie sheet so that they’re one inch apart.
- Bake for 7 to 9 minutes until they are just beginning to brown around the edges. Often they will not brown at all. Baking longer will result in a drier, crispier cookie.
- Let cool on cookie sheet for 2 to 3 minutes then remove to wire rack to finish cooling.
- Repeat process with remaining dough until all is baked.
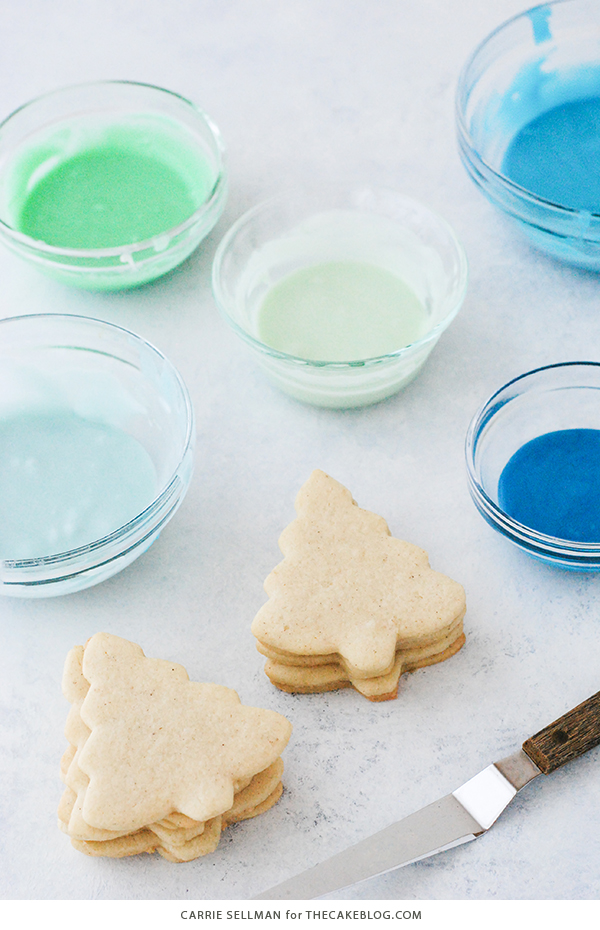
Make the Cookie Glaze:
- In the bowl of a stand mixer, combine confectioners’ sugar, cream and corn syrup on low using the whisk attachment. Mix until completely combined with no traces of the sugar still visible. Do not skimp on the mixing as any sugar not completely dissolved will show as little white patches after the glaze dries on the cookie.
- Add vanilla extract and mix again on low to combine.
- Divide glaze into bowls and color with soft gel paste food colors as desired.
- While working with glaze, keep bowls covered with a damp paper towel to prevent it from drying out. For longer storage, cover with plastic wrap and refrigerate.
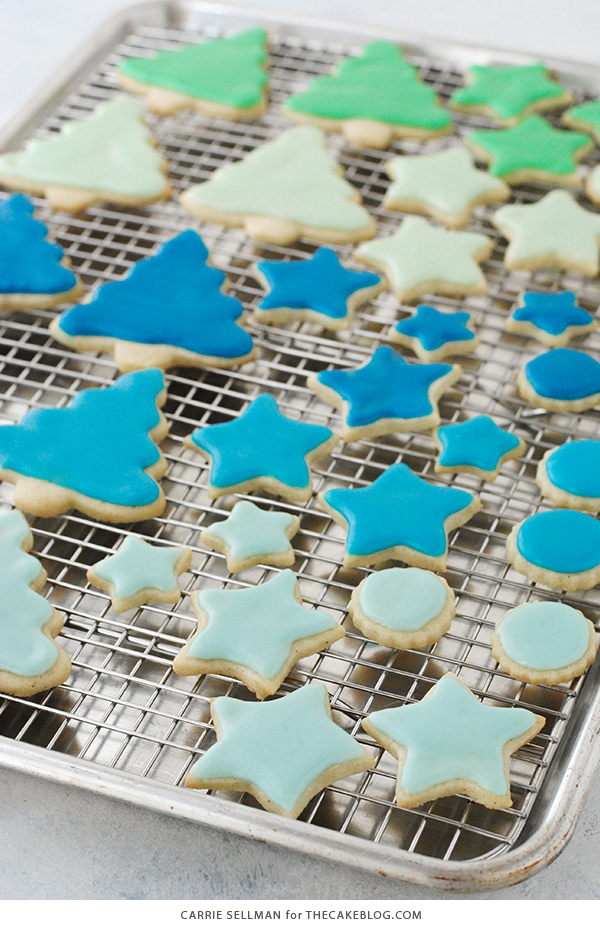
Decorate the Cookies:
- Spoon a small scoop of glaze onto the middle of a cookie.
- Using a small offset spatula (I like one with a tapered tip) spread glaze out almost to the edges of the cookie without going completely to the edge. This prevents the glaze from dripping off. If glaze is too thin and running everywhere, stir in some additional confectioners’ sugar to thicken just a tad.
- Place cookie on a wire rack inside a cookie sheet for drying.
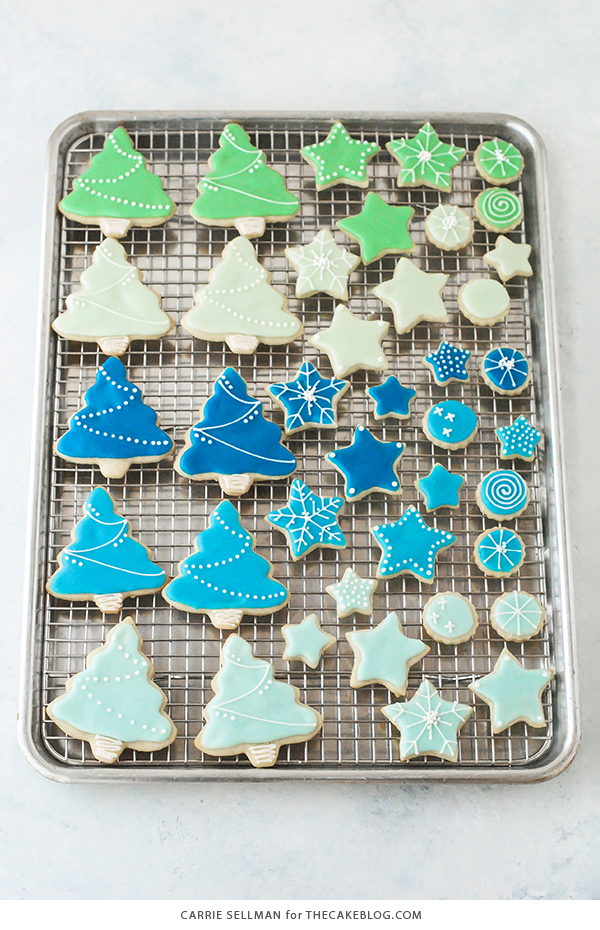
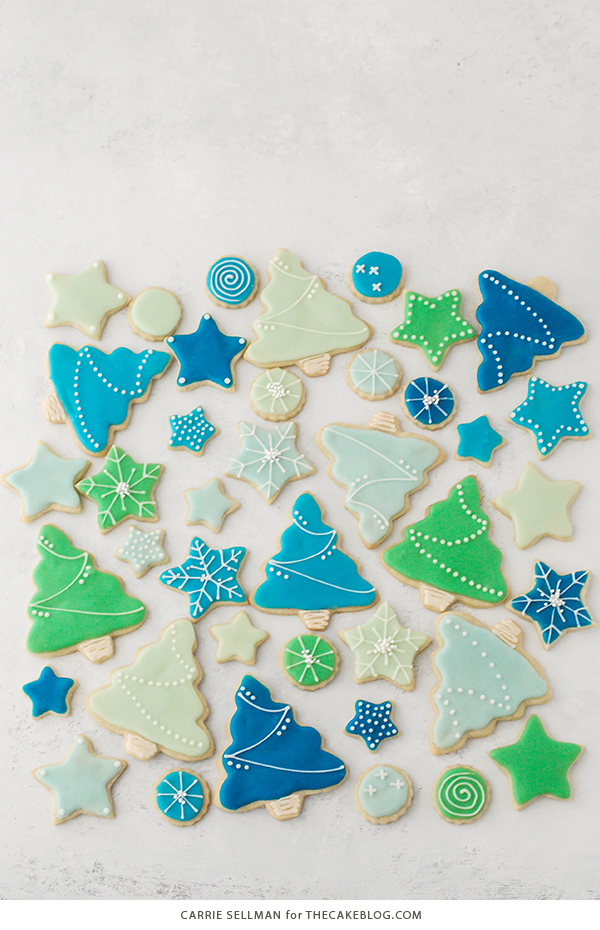
- Once base glaze is somewhat set, 20 minutes or so, you can add additional details if desired. Thicken your detailing glaze with more confectioners sugar until it is quite stiff. Place into a piping bag fitted with a #1 tip. Test glaze on a plate to see if what you pipe holds it shape. If not, thicken glaze some before piping onto a cookie. One you have the desired thickness, decorate cookies with outlining, dots, stripes, sprinkles, etc until you love them.
- Let cookies completely dry overnight, uncovered, on the rack. Once dry, glaze will be completely set.
Notes
- Cookie designs inspired by great cookie decorator, Holly Fox. Kudos to all the amazing peeps who decorate cookies for a living – I cannot compete with your skills but can aspire!
- Cookie dough scraps can be saved, refrigerated and rerolled approximately two times before the end resulting cookie is noticeably tougher.
- Rolling the cookie dough out between two pieces of parchment paper prevents the need for additional flour, which can toughen the cookie. If you do not have parchment paper, I recommend using confectioners’ sugar to roll the cookie, as opposed to using flour.
- Use very small amounts of gel food coloring when tinting the glaze, so you can gradually build to your desired shade. It’s easy to add more, but impossible to remove excess. I like to use a toothpick to avoid squeezing unintended large drops of gel into the glaze.
- Dark blue glaze was tinted using sky blue gel and a teeny bit of red gel. Medium blue glaze made using a scoop of the already colored dark blue glaze mixed with some plain white glaze. Light blue made with using a scoop of dark blue glaze mixed with even more plain white glaze.
- Green glaze was tinted using green gel and royal blue gel. Light green glaze made using a scoop of the already colored dark green glaze mixed with plain white glaze.
- If you want a fast and easy approach to frosting cookies, add a little more cream to your glaze to create a thinner consistency. Then dip the face of the cookie directly into the glaze. Let excess glaze drip off cookie back into bowl. Flip upright and lay on a wire rack inside a cookie sheet to dry. Excess glaze will drip off cookie onto tray underneath. While not as polished, this technique is fast and easy and still looks nice!
- Once glaze is completely set, cookies can be stacked or individually packaged. Storing in an airtight container keeps them fresh for a week or so. Heat sealing in individual cello bag keeps them fresh even longer.
- To ship, place individually cookies in a heat sealed cello bag or ziplock bag. Then individually wrap in bubble wrap. Place all cookies into box with more bubble wrap on bottom and on top.
This is a sponsored post written by me on behalf of Bob’s Red Mill.
Thank you for supporting the sponsors who keep us going!
YOU MAY ALSO ENJOY:
Chocolate Gingerbread Cupcakes
Cupcake Wreath
Birch Log Cake
Hot Chocolate Cake
Pie Crust Cookies


Hello! Thank you for such an awesome recipe! These sugar cookies reminded me a lot of my childhood. 🙂 I think this is a perfect activity for grandmothers and her grandchildren, so they can also spend a fun bonding moment together! 🙂
Thanks Sam, I completely agree!
Hello, Carrie!
Thank you for the perfect recipe! It`s beautiful Christmas decoration idea!
Milen
Thank you Milen!
My husband and I enjoyed the taste but the dough seemed to be too floury, even though we used the exact amount. Any idea what it might have been? Over mixing? It wasn’t sticky when it came out of the bowl and was extreme hard to roll back out.
Your blog is so inspiring and can’t help but admire your creativity.
For the glaze- in NZ we don’t appear to get corn syrup. What substitute would you recommend? Will a Golden syrup work?