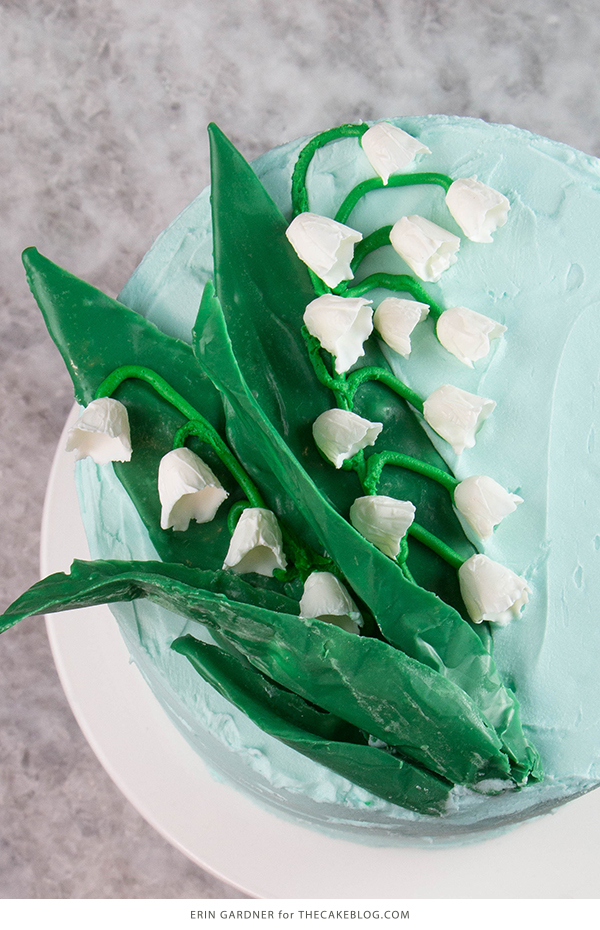
Chocolate Lilies – how to make Lily of the Valley cake decorations with chocolate. A new tutorial by our contributor Erin Gardner.
After months of snow falling outside my window, the first day of spring came and went. While it still does not feel like spring, these delicate chocolate lily of the valley are helping to make me a believer. They would certainly warm up a spring birthday, shower or Mother’s Day brunch.
The technique for these tiny blooms was inspired by the throat from another spring flower of mine, chocolate daffodils. They could not be simpler to make and require no special tools. The most finicky part of the job is peeling the foil from the backs of the leaves. If you find you’re getting a lot of breakage it’s probably because there wasn’t enough chocolate on the foil or they weren’t set up all the way through. Take note that I use heavy duty aluminum foil. Regular foil is too thin and tears easily.
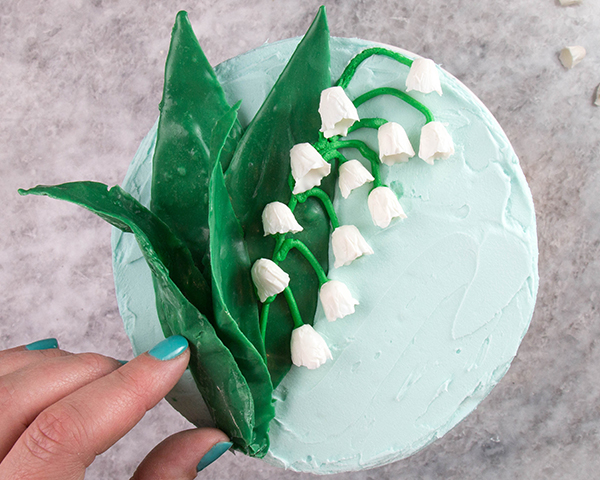
I normally encourage free styling with colors and whatnot, but lily of the valley are almost always white and green. I’ve seen a pinky-purplish variety in garden magazines, but never in person. What you can get creative with is how you use these beauties to decorate a cake! Line them up around the sides of the cake, tuck them between other flower varieties, or follow my lead with a sweet floral crescent on the top. Their simple, beautiful nature make them an ideal choice for any spring celebration cake (even if it still feels like winter).
LILY OF THE VALLEY TUTORIAL VIDEO
CHOCOLATE LILY OF THE VALLEY
a tutorial by Erin Gardner
Supplies
- Heavy duty aluminum foil
- Pen or marker with a rounded cap
- Scissors
- Small paint brushes, food safe
- White coating chocolate (or regular white chocolate)
- Green coating chocolate (or regular white chocolate tinted green)
- 1 cup green buttercream
- Piping bag
- Small round piping tip
- 6-inch round cake finished with light blue buttercream
Tear off a 2-3-inch wide strip of aluminum foil. Cut the strip into squares. Repeat to make as many squares as you’ll need for each blossom. I ended up using 16 total, but it’s always a good idea to make a few extra. Ones you don’t use can always be remelted down and used in another project.
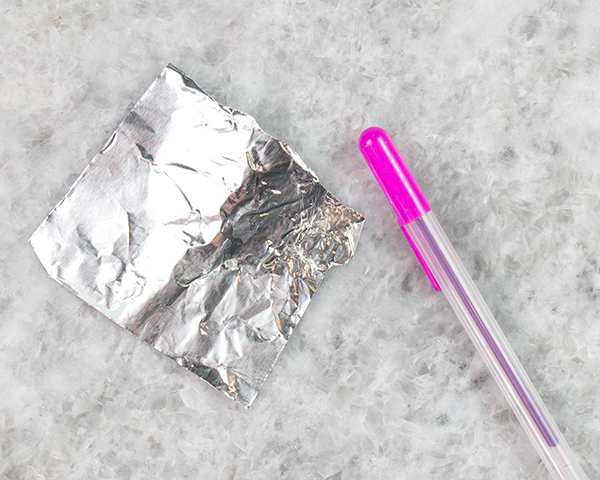
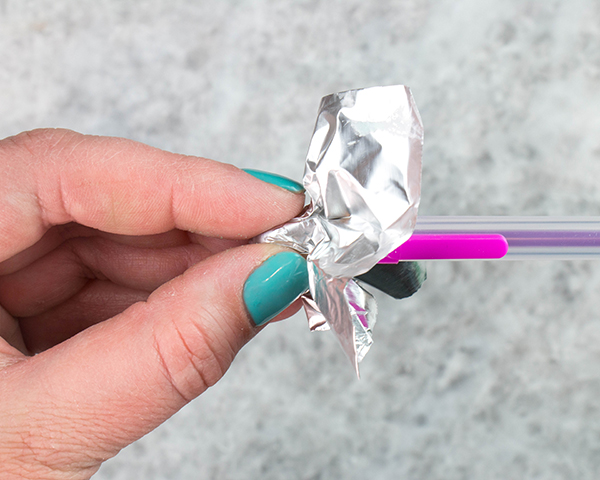
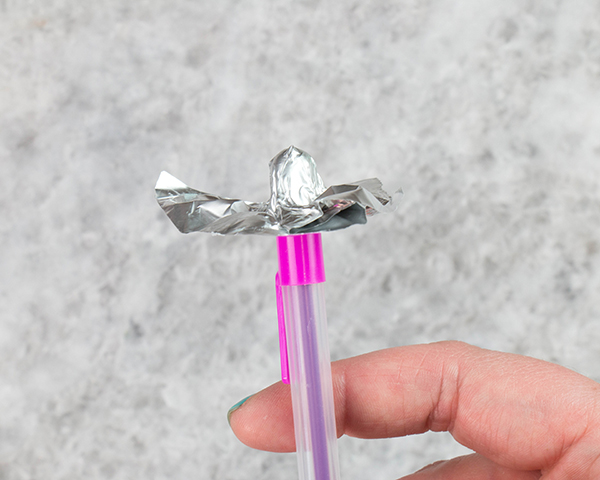
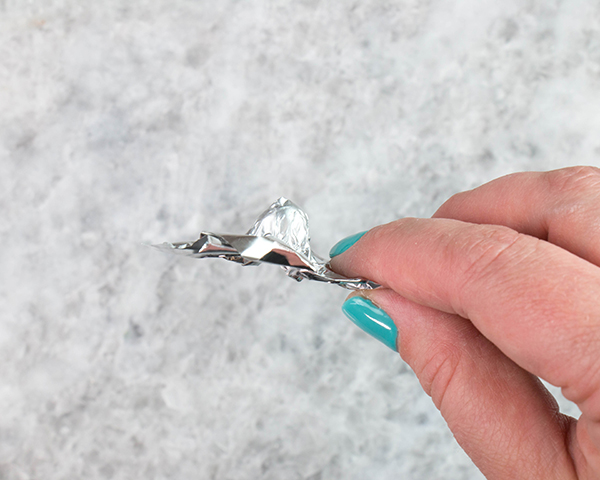
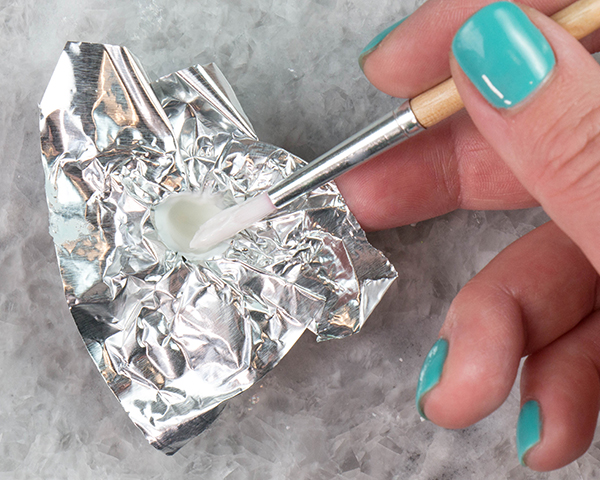
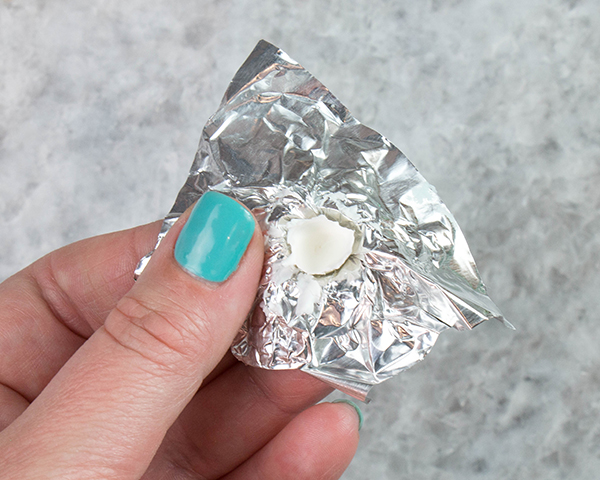
Pinch the middle of a foil square around the rounded end of a pen or marker cap. Hold the foil-wrapped cap in your fingertips about 1/2-inch up from the end and peel back the edges of the foil to flatten them, creating a teeny, tiny foil cup. Repeat with the rest of the foil squares.

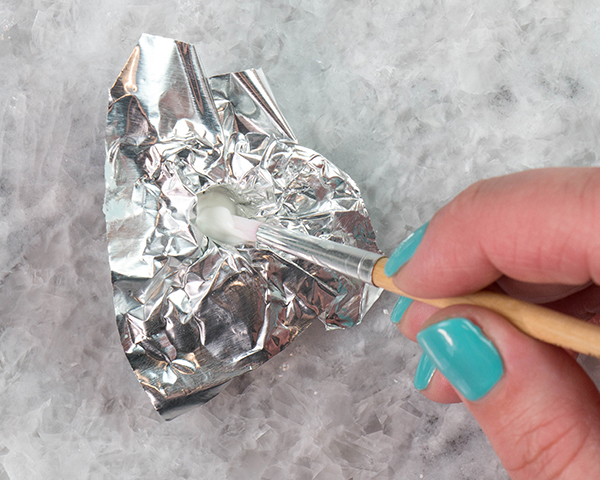
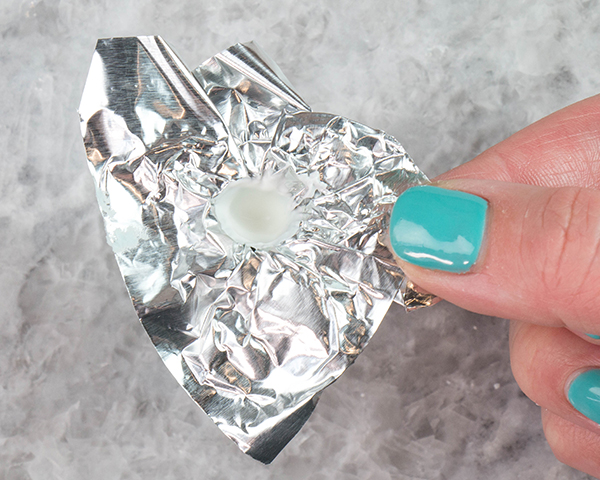
Melt the white coating chocolate (or melt and temper if you’re using regular chocolate). Use a small paint brush to coat the insides of the foil cups with the melted coating chocolate. Make sure the coating is thick enough so that no foil shows through. Set the cups aside or pop them in the fridge until the chocolate has completely hardened, less than 10 minutes.
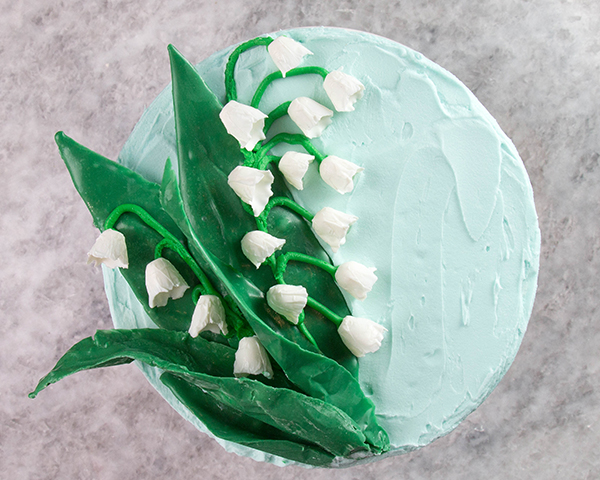
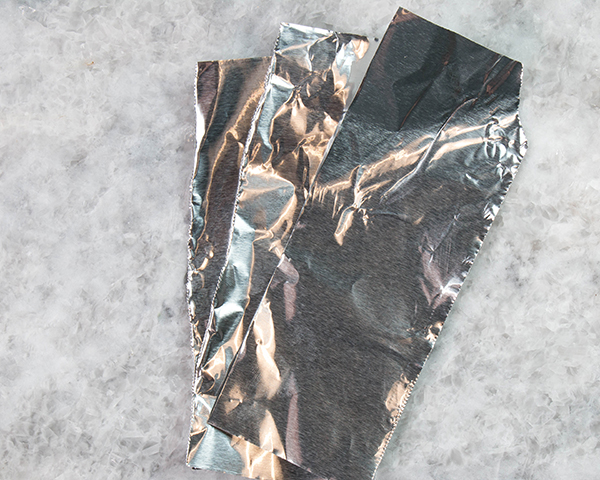
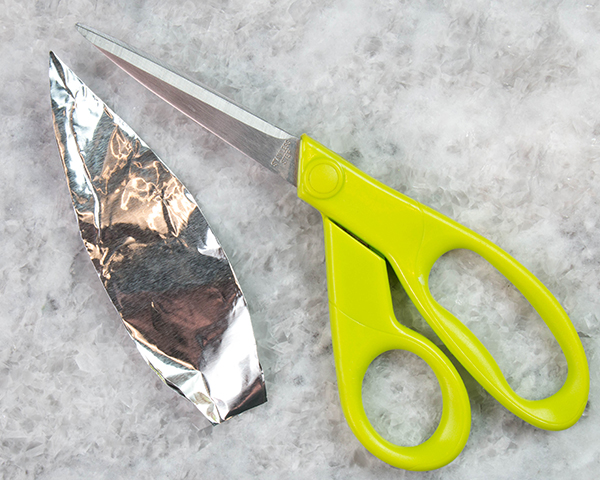
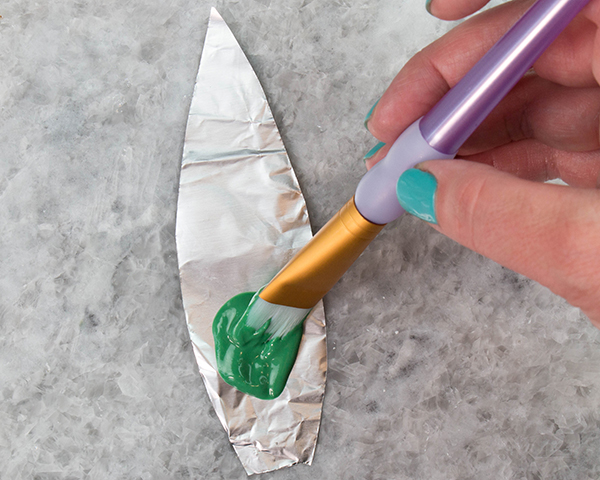
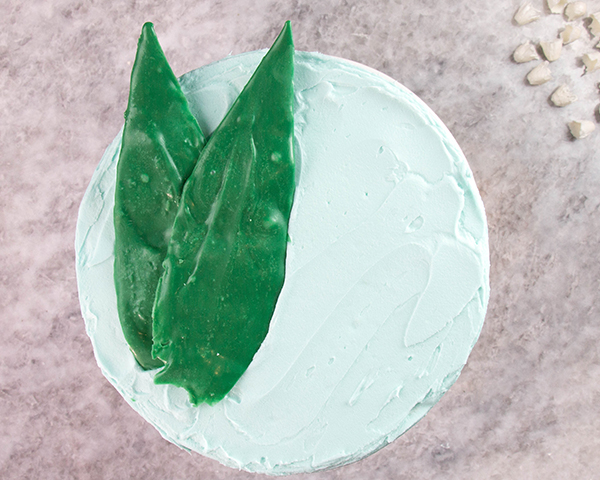
Now let’s make the leaves. Tear of a few 3-4-inch wide strips of foil. Lay the strips on top of each other and cut them in half again to make a stack of thin strips of foil. Cut the stack into a long leaf shape with one pointed end. Peel the stack apart into individual leaves.
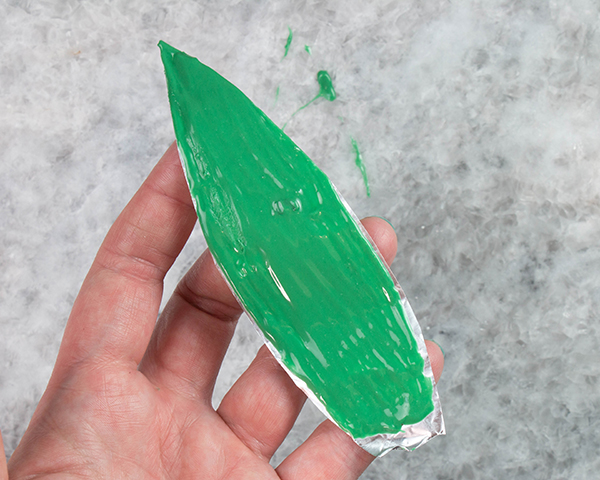
Melt the green coating chocolate (or melted and temper). Use a small paint brush to coat the leaf template with melted chocolate. Allow a few leaves to dry flat (at least 2). Pinch a few of the coated leaves together at the base and allow the tip of the leaf to fall back over your finger. Prop the shaped leaves on the edge of a cookie sheet or over a rolling pin while they set up. Make at least three of these leaves, but it’s a good idea to make a few more as breakage insurance. Make sure all of the leaves are completely hardened before peeling away the foil, at least 10 minutes.
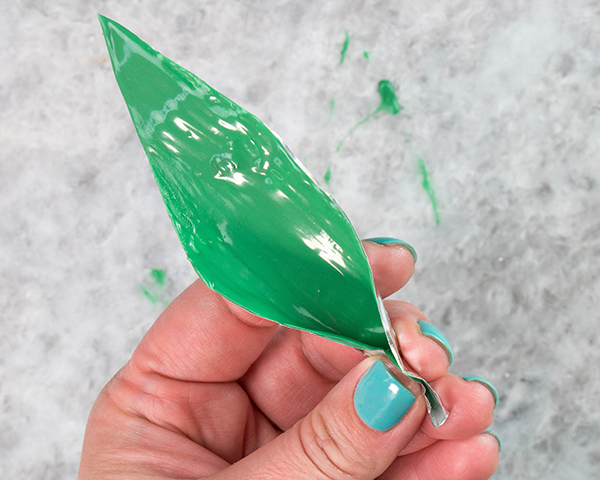
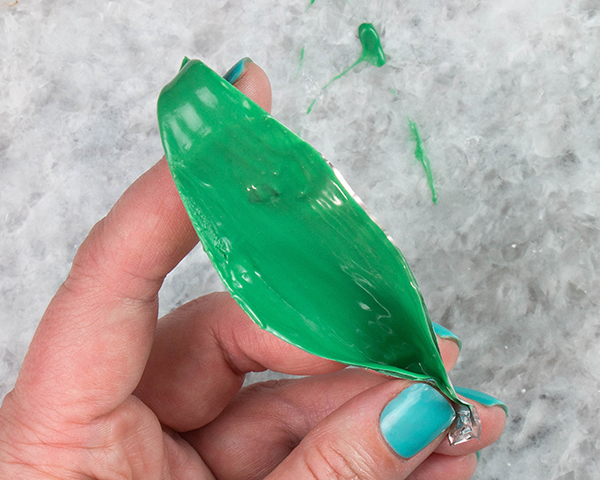
Once chocolate is set, un-mold the flowers by carefully peeling back the edges of the foil and popping them up from their little cups. Peel the foil backings off of the leaves. Start at the thick base of the leaf and carefully work your way towards the more delicate tip.
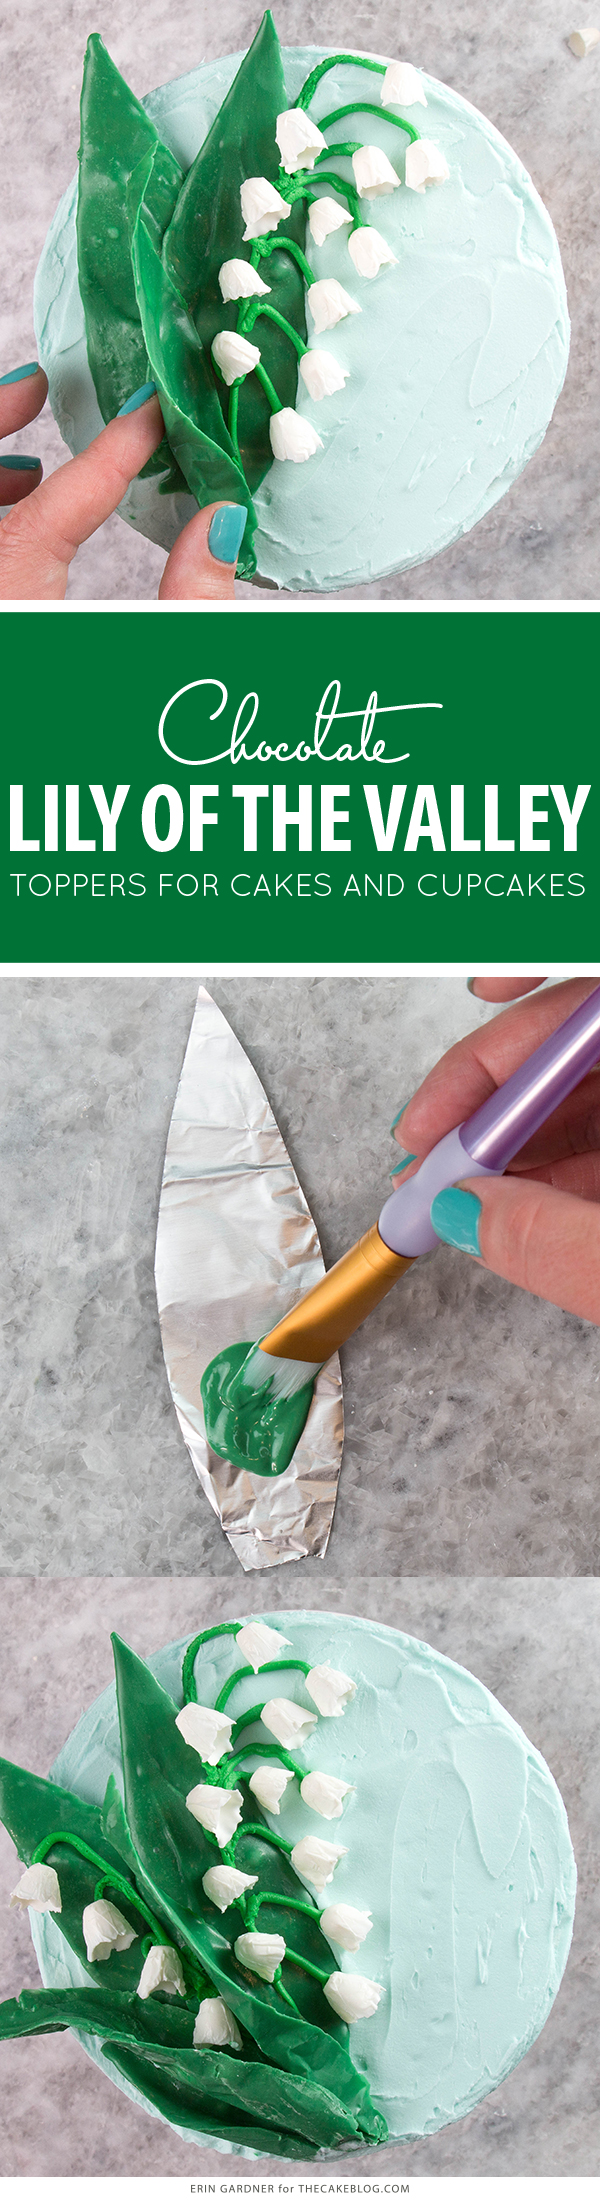
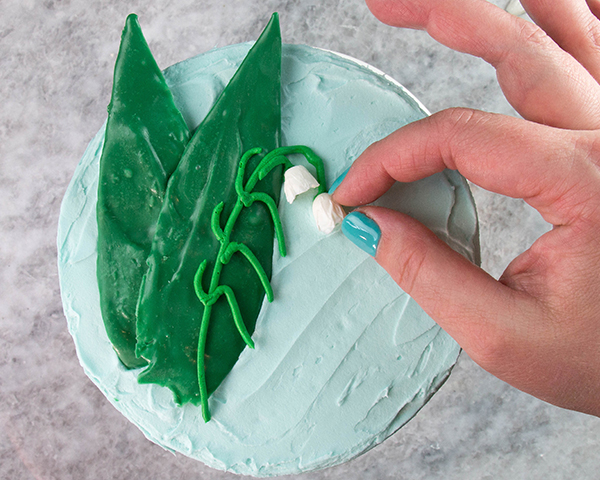
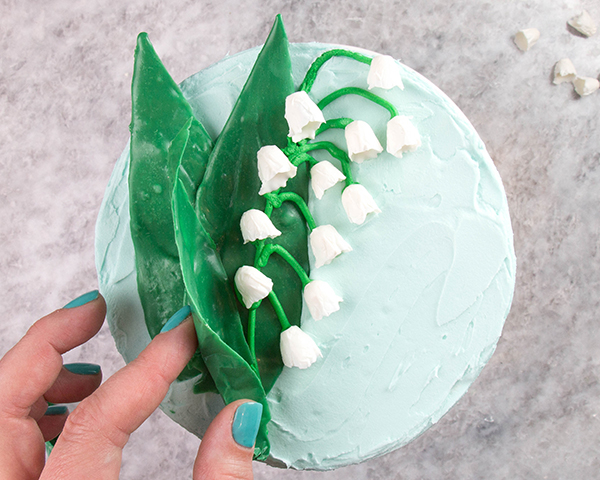
Fill the piping bag with the green buttercream. Arrange a few of the flat leaves on the surface of the cake. These will serve as the backdrop to your little blooms. Pipe the long, thin lily stem on one of your leaves. Add little hooked lines down the stem. Place a blossom at the end of each hook. Add as few or as many as you like. Pipe a tiny dot of buttercream to help the flowers stick, if needed.


Add the shaped leaves behind the flower stem with a few more dabs of buttercream. Arrange the leaves so that it appears their cupping the flower stem. Add as many more blooms and leaves as you like!
MORE CHOCOLATE FLOWERS TO MAKE:
Chocolate Tulips
Chocolate Daffodils
Chocolate Flower Cake
White Chocolate Flower Cake
Chocolate Floral Wrap


Amazing