Candy Succulent Cake – how to make a succulent cake with edible candy succulents. A new cake tutorial by our contributor, Erin Gardner.

I must confess, I have a succulent problem. I really do! Every time I come across a new-to-me variety at the garden store, straight into the cart it goes. I can’t help myself. Don’t you just want to squeeze those juicy little petals!? The shapes, the colors, the easy care instructions of these pretty desert plants — I love all things succulent.
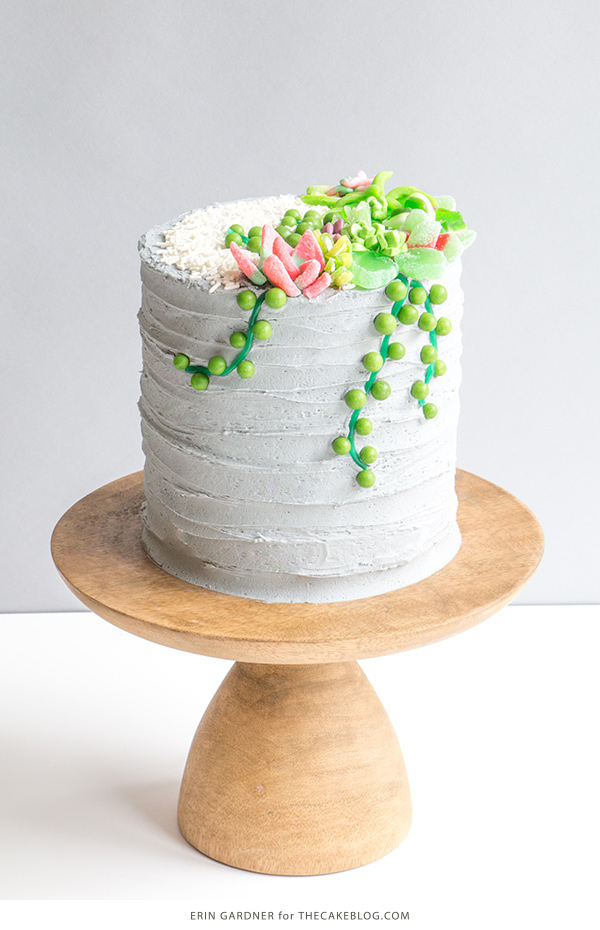
I also love candy. That’s far less of a confession if you’ve been hanging around my cake adventures for any length of time. Combining these two loves to create an edible terrarium was a total no brainer. Gummy candy’s rubbery, translucence perfectly replicates juicy little succulent leaves. The good news – you can pinch these and they’re delicious! Seek out the same candies I used in this project or apply the same techniques to whatever is readily available near you. As much as I love these sweet succulents as a cake topper, they’d also work beautifully to create a lush, green cupcake garden.
CANDY SUCCULENT CAKE
a tutorial by Erin Gardner
Supplies:
- 6-inch round cake finished in gray buttercream
- 1 cup white jimmies sprinkles
- 1/4 cup sparkling sugar
- Sour watermelon slices
- Gummy mint leaves
- Sour strawberries
- Gummy frogs
- Sour filled taffy bites
- Green taffy strips
- Taffy rope (green and purple)
- Filled sour licorice ropes
- Watermelon taffy
- Green licorice rope
- Large green candy pearls
- Small icing spatula
- Small knife
- Kitchen shears
- Pan spray or grease
VIDEO TUTORIAL
DECORATE THE CAKE LIKE A CEMENT POT:
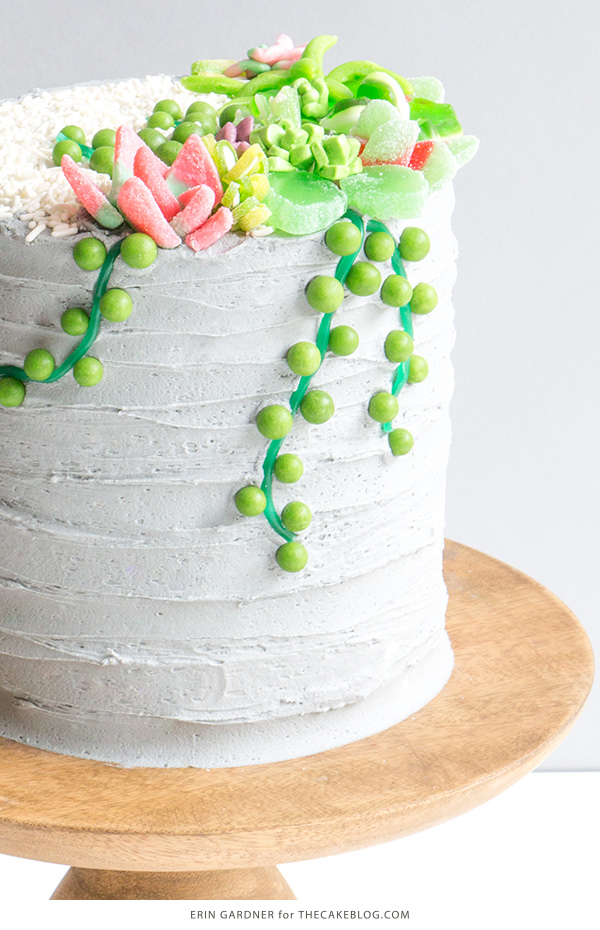
Set the cake, freshly iced with light grey buttercream, on a turntable. Spin the cake while you drag the tip of an icing spatula through the buttercream while the cake turns to create horizontal lines all around the cake. Don’t worry about making the lines neat or even. I never do.
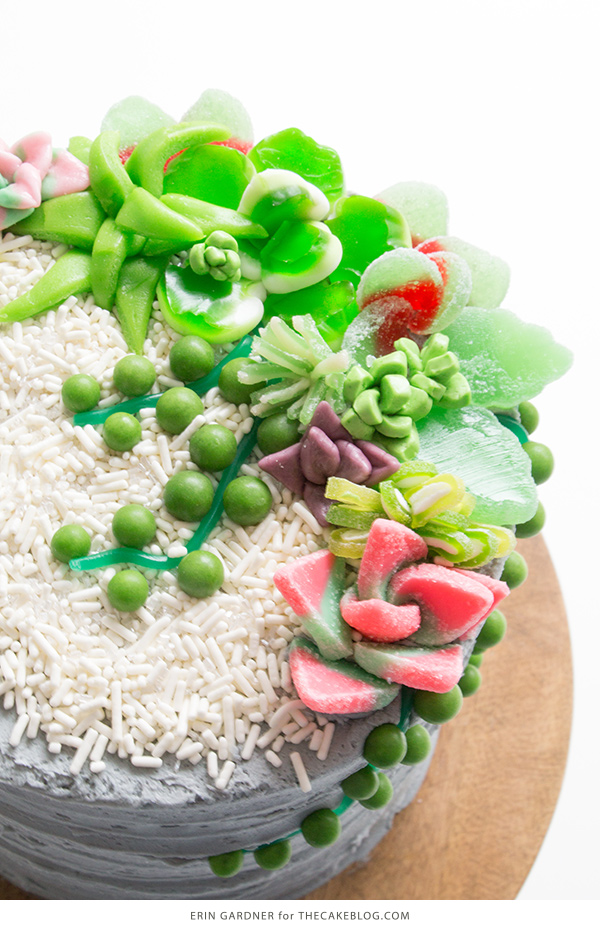
Combine the sprinkles and sparkling sugar in a small bowl. Spoon the sprinkle mixture onto the top of the cake leaving a crescent shape of open space on one side and a 1/4-inch lip around the rest of the cake to mimic the lip of a planter.
MAKE THE LEAVES AND STEMS:
Lightly grease the blade of a small knife and/or the blades of kitchen shears. Clean and re-grease the blades as needed.
I took many botanical liberties when designing my little succulent spread. I suggest you do as well. I ended up cutting a little more candy than I actually needed and filled in empty spaces with single leaves. With this kind of design it’s always a good idea to remain flexible with your end goal. Go where the candy takes you.
TAFFY ROPE: Slice the rope into small ovals. Line the pieces up and press them down to make them stick together. Roll the line of candy up. Pinch it at the base and fan the tips count away from the center of the bundle. Trim the bottom so the succulent sits flat. Repeat to make as many as you need.
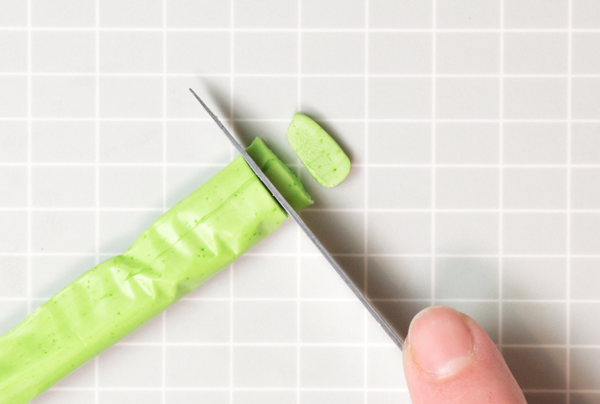
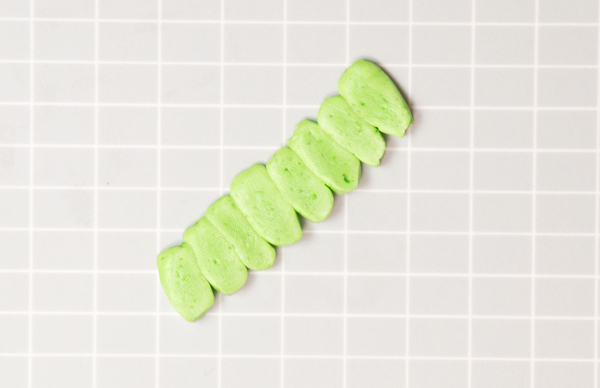
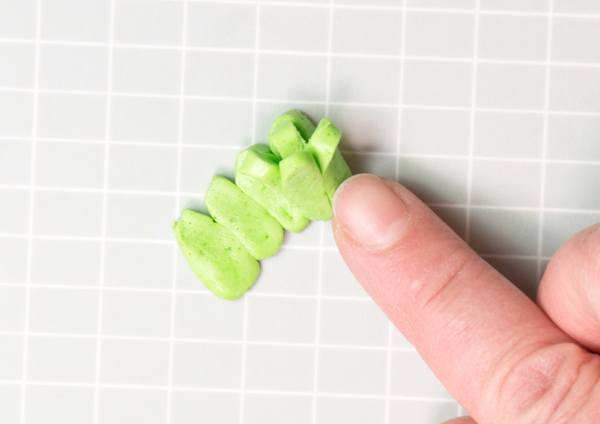
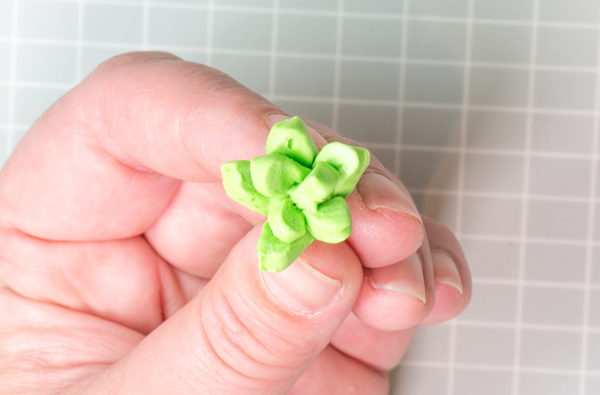
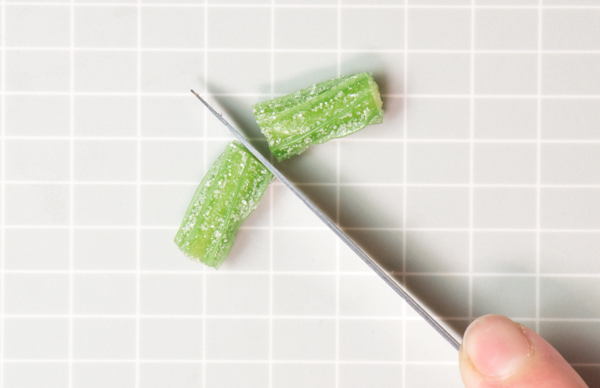
FILLED SOUR LICORICE ROPES: Cut the rope into two pieces. Lay one of the pieces on its side and cut the rope in half lengthwise, exposing the white center. Cut into the center a few times to make thin strips, leading the base of the piece of candy intact. Repeat with the remaining candy pieces. Gather the cut sections into a bundle and pinch them together at the base. Fan out the stringy pieces.
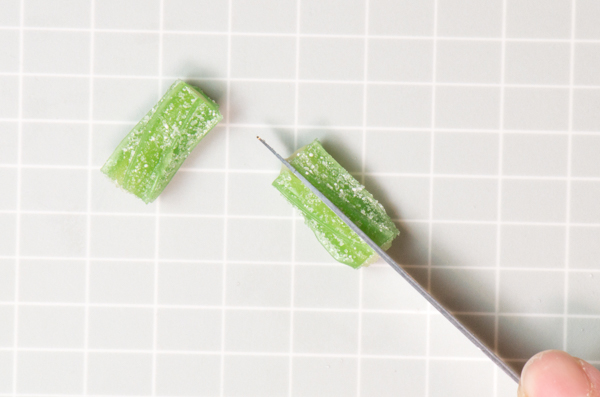
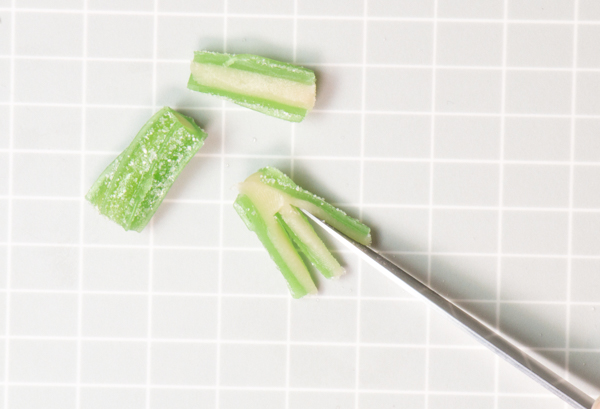
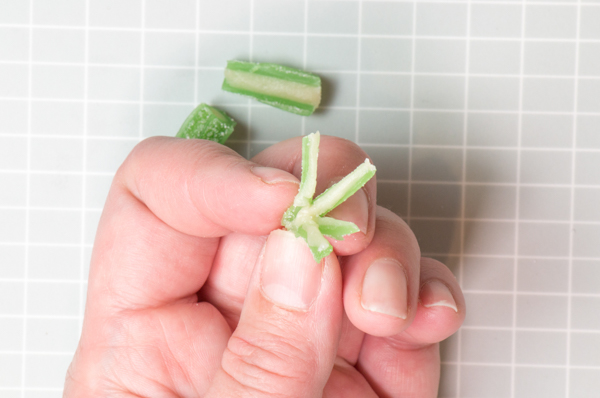
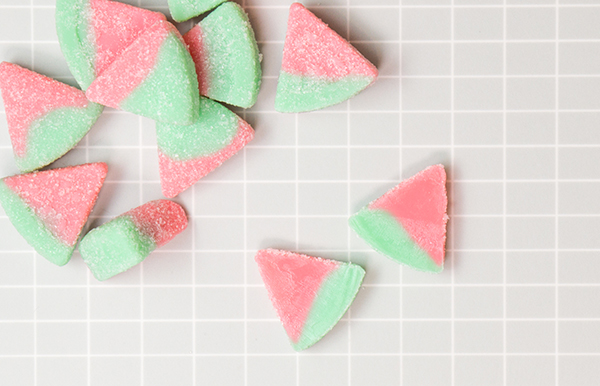
SOUR WATERMELON SLICES: Stand a candy up on the rind side. Slice the candy in half to create two triangles. Lay the pieces down cut side up and set aside. Repeat with 2 more slices. Cut 2 to 3 candies per succulent. Lay three pieces overlapping, cut side up. Roll the line of candy triangles up and pinch the base. Fan the tips out away from the base using your fingertips. Reserve more cut slices for tucking into the final arrangement.
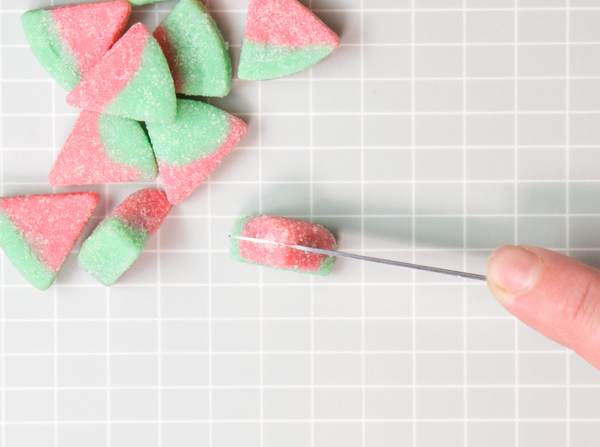
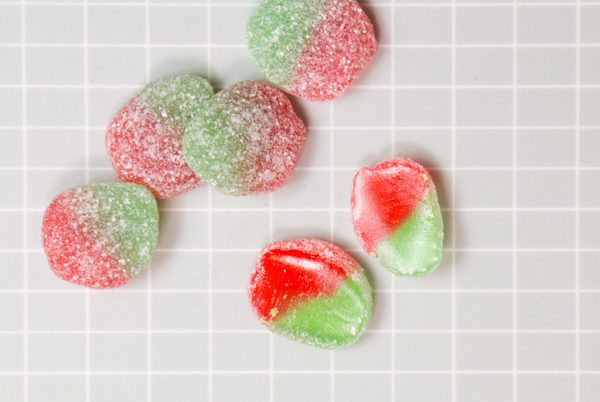
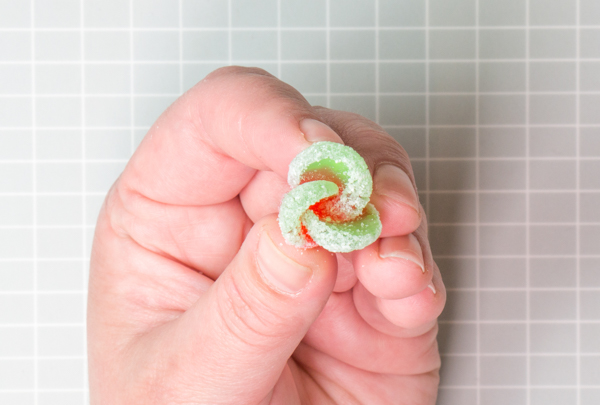
SOUR STRAWBERRIES: Carefully cut a sour strawberries in half horizontally. Curl up three pieces following the same process as the sour watermelon slices. Reserve more cut pieces for tucking into the final arrangement.
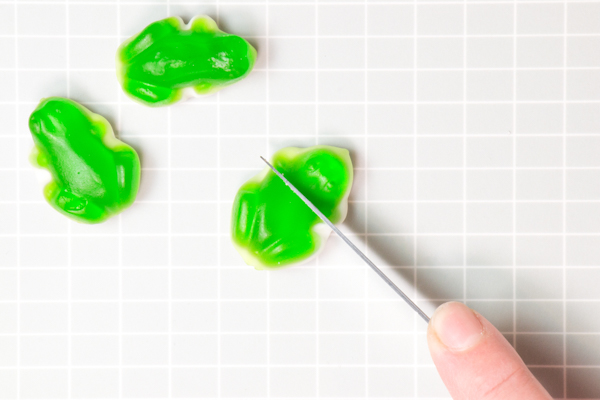
GUMMY FROGS: Apologize to the little froggies for what we’re about to do to them. Then, cut the frog in half at the base of its head. Stand both pieces up on the cut side and slice down through the green part of one of the candies. Repeat with the other piece. Repeat with a few frogs. I used 5 cut bottoms and 3 cut tops to form one of the large succulents.
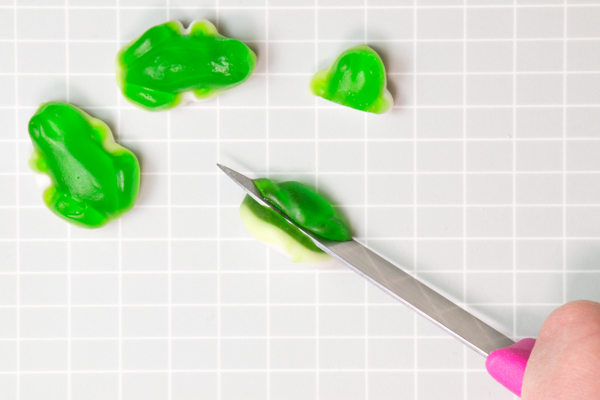
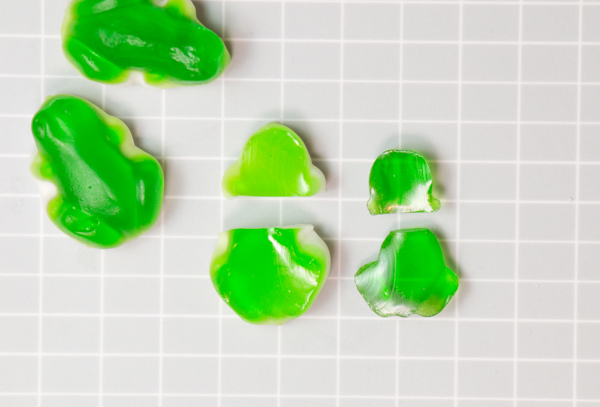
SOUR FILLED TAFFY BITES: Slice the bites into thin oval strips. Gather the little strips up and pinch the bundle together at the base.
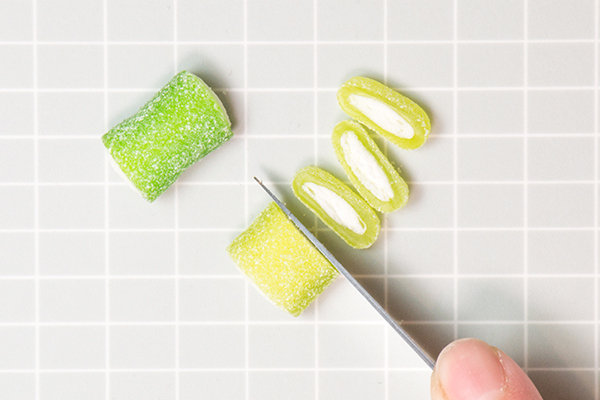
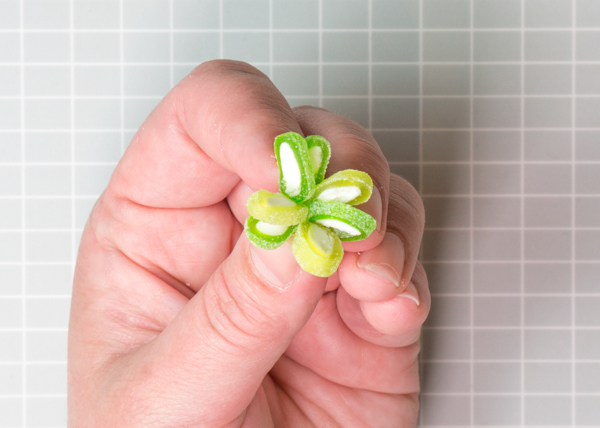
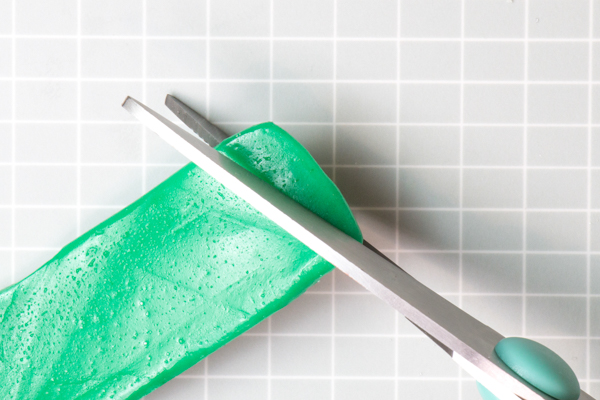
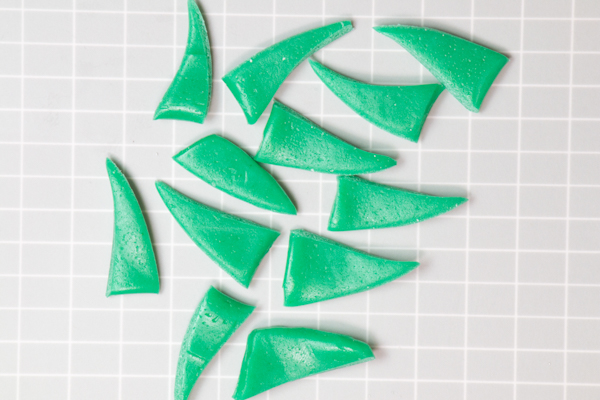
GREEN TAFFY STRIPS: Use the kitchen shears to cut the taffy strip into many long thin triangles. Layer three triangles overlapping at the smallest side of the triangle, roll, pinch, and arrange just as you did with the watermelon slices. Add more triangles around the outside of the center you just created.
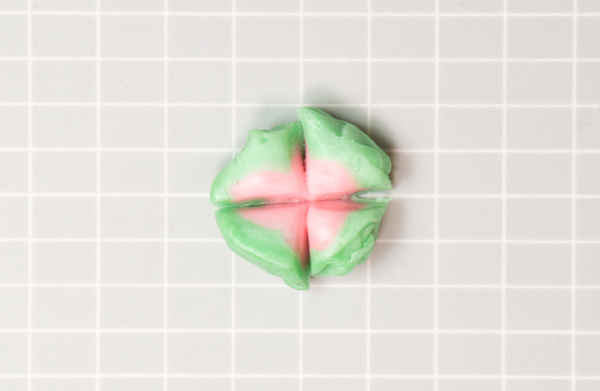
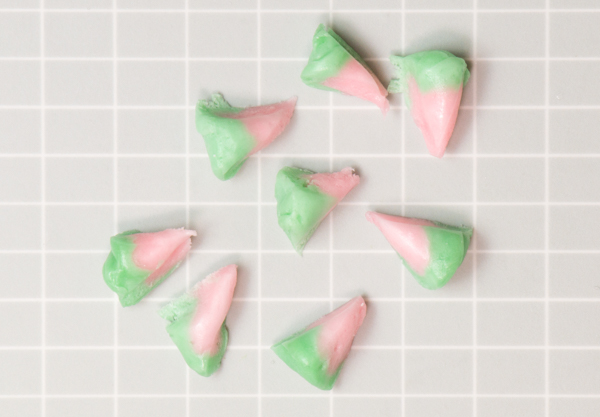
WATERMELON TAFFY: Cut the watermelon taffy into 8 pieces, like a pie. Flatten each of the wedges to create a petal shape. Lay three petals in a row, slightly overlapping the bases. Roll the petals up and fan out the tips. Stick the rest of the petals around the coiled center. Trim the base flat if needed.
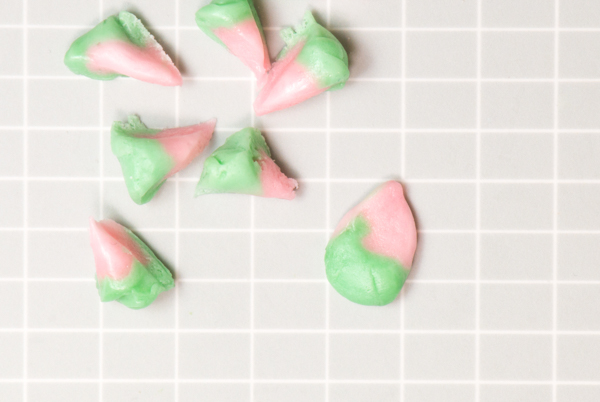
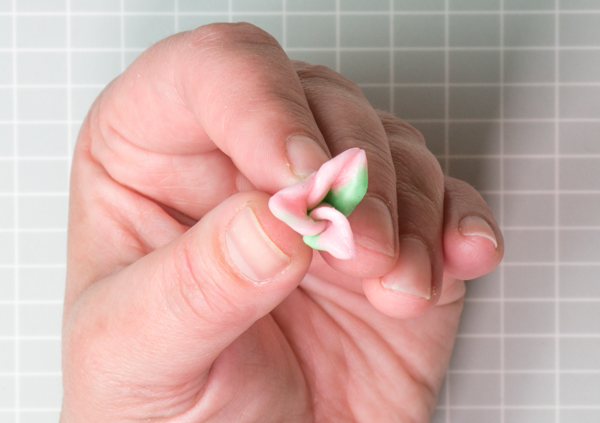
GUMMY MINT LEAVES: Use them as-is or slice them in half horizontally to reveal the translucent, shiny center.
ASSEMBLE THE SUCCULENT CAKE:
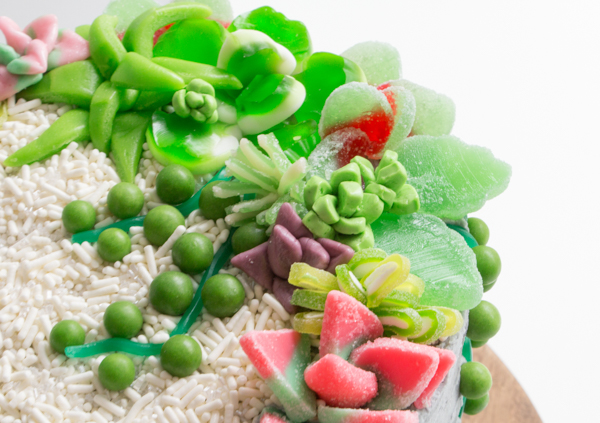
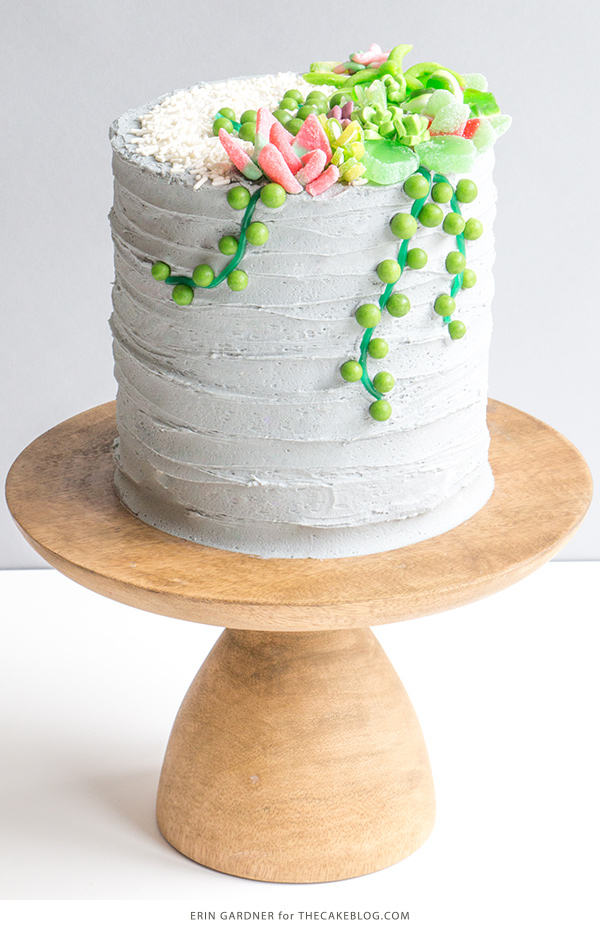
Add the larger succulents to the top of the cake first. Arrange 5 of the gummy frog bottoms in a flower shape. Add three of the cut frog heads to the center. Cut two short lengths of green licorice rope and add them to the cake coming out from the arrangement. Add green candy pearls along both sides of each rope. Add some more of these pearl succulents hanging down over the sides of the cake. Fill in the rest of the arrangement with the finished succulents, tucking in extra leaves where needed.


I love candy. But Never tried a cake with candy. The cake is looking awesome. Thanks for sharing this recipe. I would love to try this cake.