As seen on the cover of Country Living Magazine, October 2013!
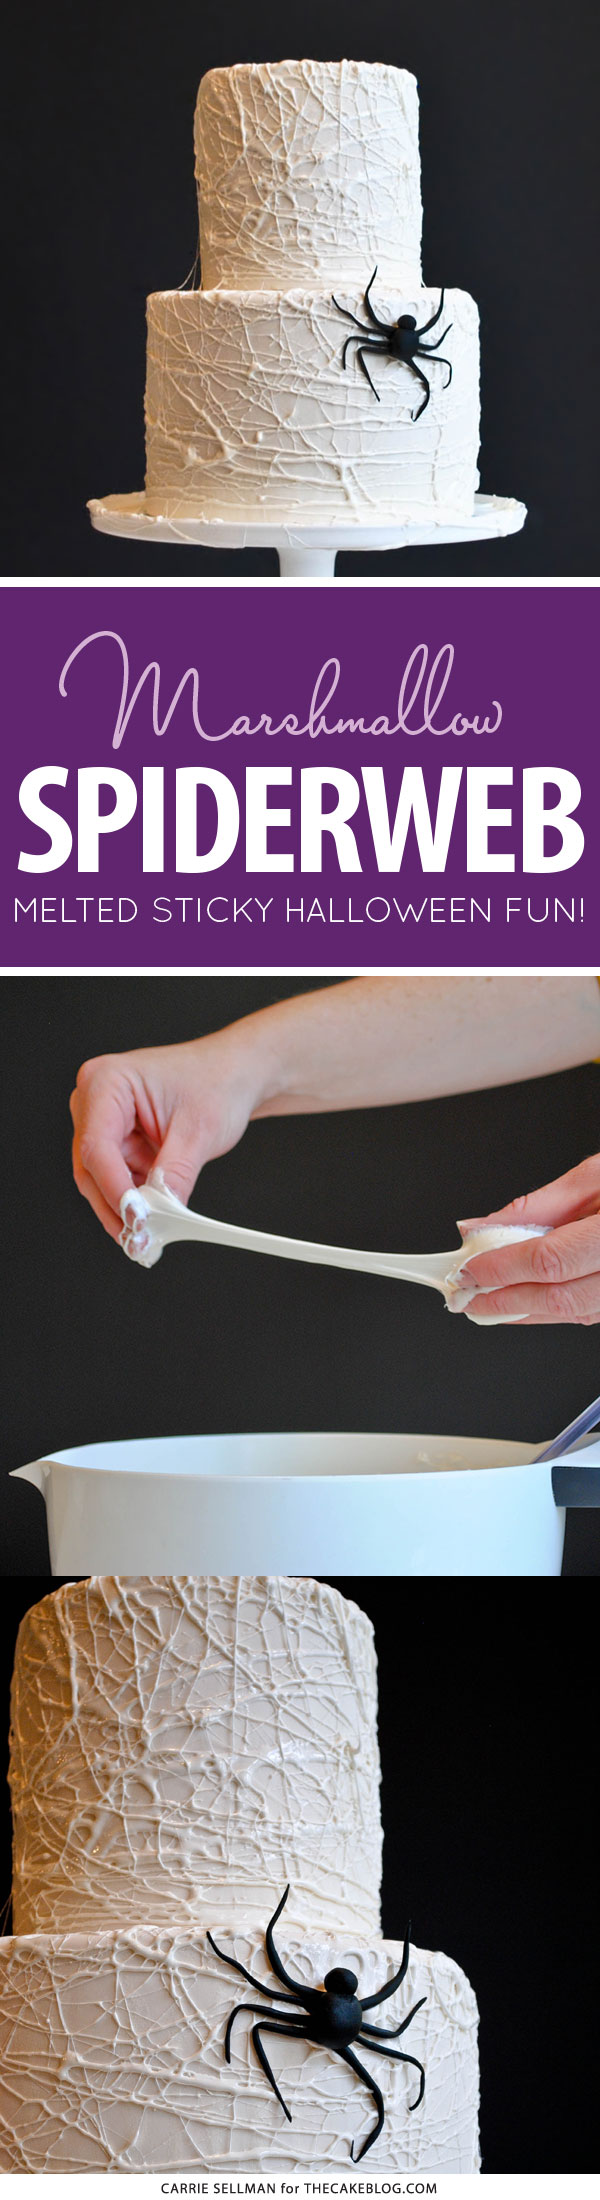
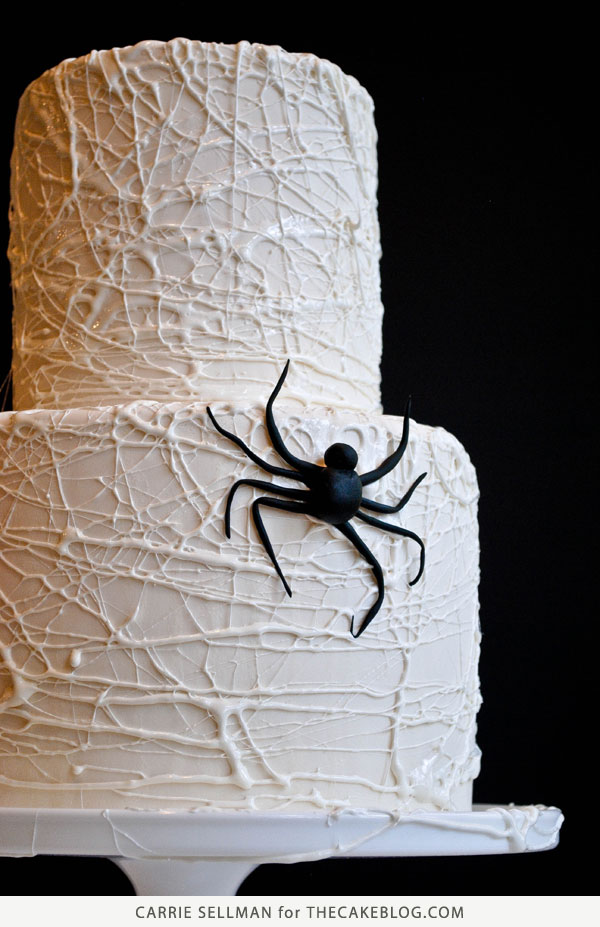
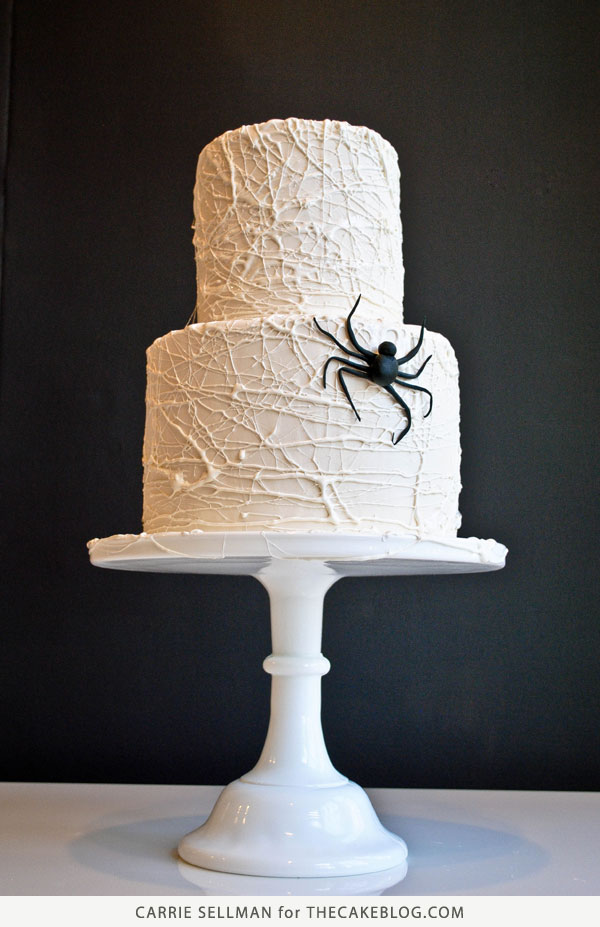
Now that we’re officially in the Halloween spirit and inspired to bake, here is a super easy DIY for you to try at home. There’s no piping, no painting and no wrong way to do it! You just need marshmallows, two hands and some imagination! It’s a creepy, crawly Marshmallow Spiderweb Cake! And I have a simple tutorial to show you how to do it!
You know how marshmallows get stringy when melted? Well that makes for a super sticky, super easy spiderweb!
I think this cake would be a fun project, no matter your experience or skill level. If you’re a medium to advanced baker, this cake will seem super easy and you’ll be finished in no time flat. Beginners…. your end result will look more challenging than it actually was. Bonus for you! And you certainly don’t have to tell anyone how easy it was. And if you really just don’t bake at all, why not try out the marshmallow technique on a plain white cake from the market. It could be a fun way to get your hands a little sticky and surprise everyone, including yourself. There’s really no right or wrong way for a spiderweb to look… so just go for it!
MARSHMALLOW SPIDERWEB CAKE
a DIY by Carrie Sellman
Supplies
- Cake
- White Fondant
- Marshmallows (8 oz)
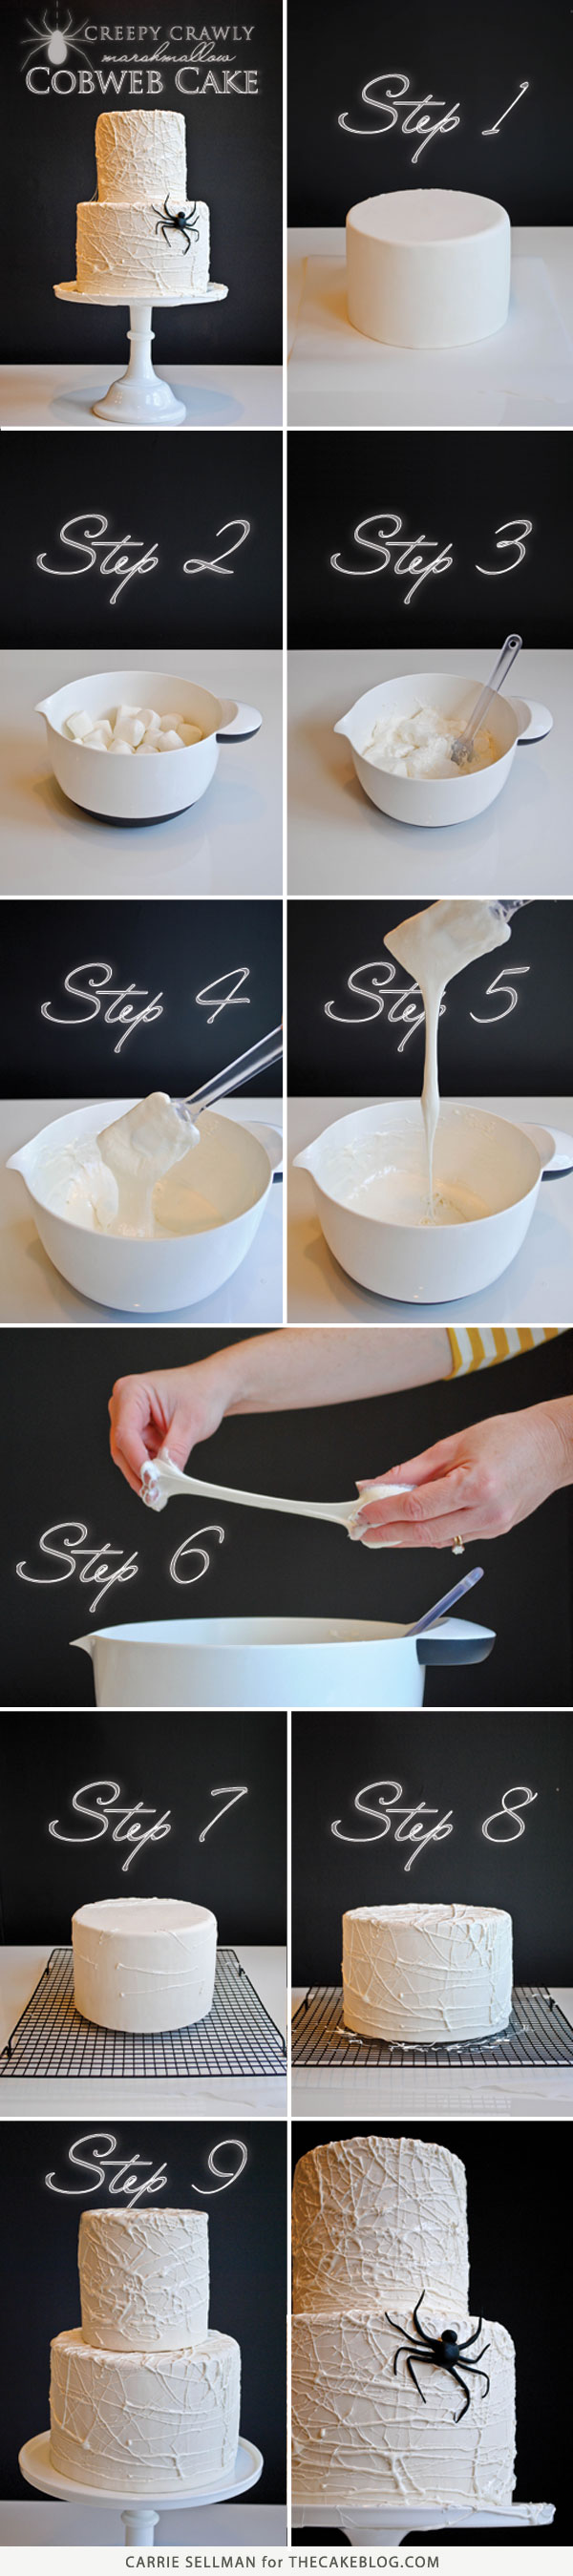
STEP 1 : Cover your cake(s) in white fondant.
STEP 2 : Place marshmallows into a microwave-safe bowl. Heat for 30 seconds.
STEP 3 : Stir marshmallows. {Warning. Hot marshmallows will burn. And it hurts!}
STEP 4 : Keep stirring.
STEP 5 : Stir, stir, stir some more! Stir until marshmallows are cool enough to touch.
STEP 6 : This is where it gets messy. Or fun, depending on how you look at things. Using both hands, stretch a small glob of marshmallow out into a long, thin, stringy strand. Way, way longer and thinner than what is shown above (it was hard to get a picture of this exactly… especially with marshmallow covered hands).
STEP 7 : Start wrapping the stringy marshmallow around your cake. Go up, down, around and around. Diagonal. Every which way. There is no right or wrong way for a spider web to look. Just start wrapping. Go light at first until you get the hang of it. Less is more! And thinner strands look better in the end.
STEP 8 : Continue to pull, stretch and drape marshmallow strings. Going every direction way you possibly can.
STEP 9: Cover second tier in marshmallow strings. Stack both tiers together.
STEP 10 : Add additional marshmallow strings to both tiers, draping some from one tier to the next. Add a spider with long, spindly legs. And you’re done!
BAKERS NOTE : I should have taken pictures while making the spider. My bad. But he’s made of fondant and very straightforward. One oval for his body. A smaller circle for his head. And eight very long, exaggerated legs to make him extra creepy! Hey, a big spider had to be responsible for such a crazy cobweb!
ADDITIONAL NOTE : I realize I could have written this tutorial with much fewer steps. But I was having fun with sticky marshmallows and my new chalkboard backdrop! What to do you think? Do you like it? Want to see more of it in future posts?
I hope you give my creepy, crawly Marshmallow Spiderweb Cake a try! I think even the kiddos would enjoy this tutorial. Just make sure the marshmallow is cool enough for them to handle safely and be prepared to clean up some sticky hands. And faces. And tables. You get the idea!
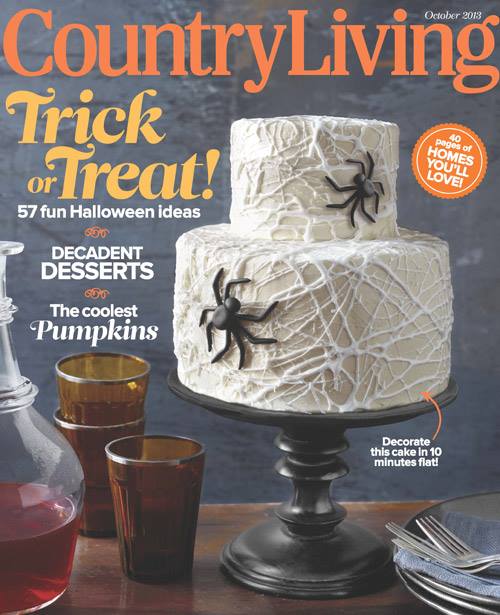
UPDATE: I was tremendously honored to work with Country Living Magazine on their 2013 October issue. As it turns out, they enjoyed playing with melted marshmallows too! I’m honored that my sticky spiderweb concept made the cover!
YOU MAY ALSO ENJOY:
Poison Apple Cake
Black Cat Cake
Monster Eye Cake
Mini Mice Cakes
The Birds Cake


Carrie this is fabulous!! What a fun idea!
Very cool! I will have to try this soon.
Amazing! I love it!
It’s pretty awesome!
Carrie you are so clever, this looks like so much fun and I’m loving the chalkboard back drop!
Wow… very creative, I would have never thought about using marshmallow as a cobweb/spider web. Your cake is very lovely. Even though it suppose be creepy… how can it not, it’s too cute. Lol
Hi Carrie – I am a first-time visitor to your blog, and I absolutely LOVE this cake! How pretty would something like this be for a Halloween wedding? Yeah, I guess a Halloween wedding would be a little strange, but kind of cool, too… right? 😉 I’ve been sneaking around your blog for the last 20 minutes, and it is dangerously wonderful. Have a great weekend! xo
This is sooooo awesome! THanks so much for sharing this technique..i would have never thought this up!
Beautiful! I wonder how a chocolate cake would look like….
Very Cool!!
I wonder if you could do it over a butter-cream iced cake ?
Love the back drop!
In the magazine article, the cake was frosted with white buttercream frosting. The white-white of the marshmallow looks good against the dingier white color of the buttercream. I’m going to try chocolate buttercream, I’ll wait untill it crusts before I add the cobwebs. I hope it holds up, it’s still warm and humid here in Florida.
What a clever person you are. I loved it and the chalk board idea. Hope to see more things on your site.
Love it! Thank you for sharing. I love the chalk backdrop!
oh this looks so much fun and i love the chalkboard backdrop shows up cake beautifully
Thank you for sharing with us all.
This technique is so awesome!! thanks for sharing..and I LOVE the chalkboard background 🙂
This is a wonderful idea. Thank you so much fir sharing!
This is a wonderful idea. Thank you so much for sharing!
Making this on the 29th of October for my grandson’s 15th birthday! So excited, wish me luck!!! 🙂
P.S. Thanks for sharing! Love it!
Fantastic idea! You’re so dang smart…I would have never thought of this!
Genius!!! Really!
Brilliant thank you so much for sharing.
This technique is awesome !!!
Awesome idea and it seems so super easy!
I absolutely LOVE this cake!.This is a wonderful idea.A huge thank you to the the five bakeries who participated in this special week of Halloween inspiration!
Birthday Cakes Louisville
Awesome! And so easy!
How hard it is to cut the cake?! Should I heat the knife with hot water for example?!