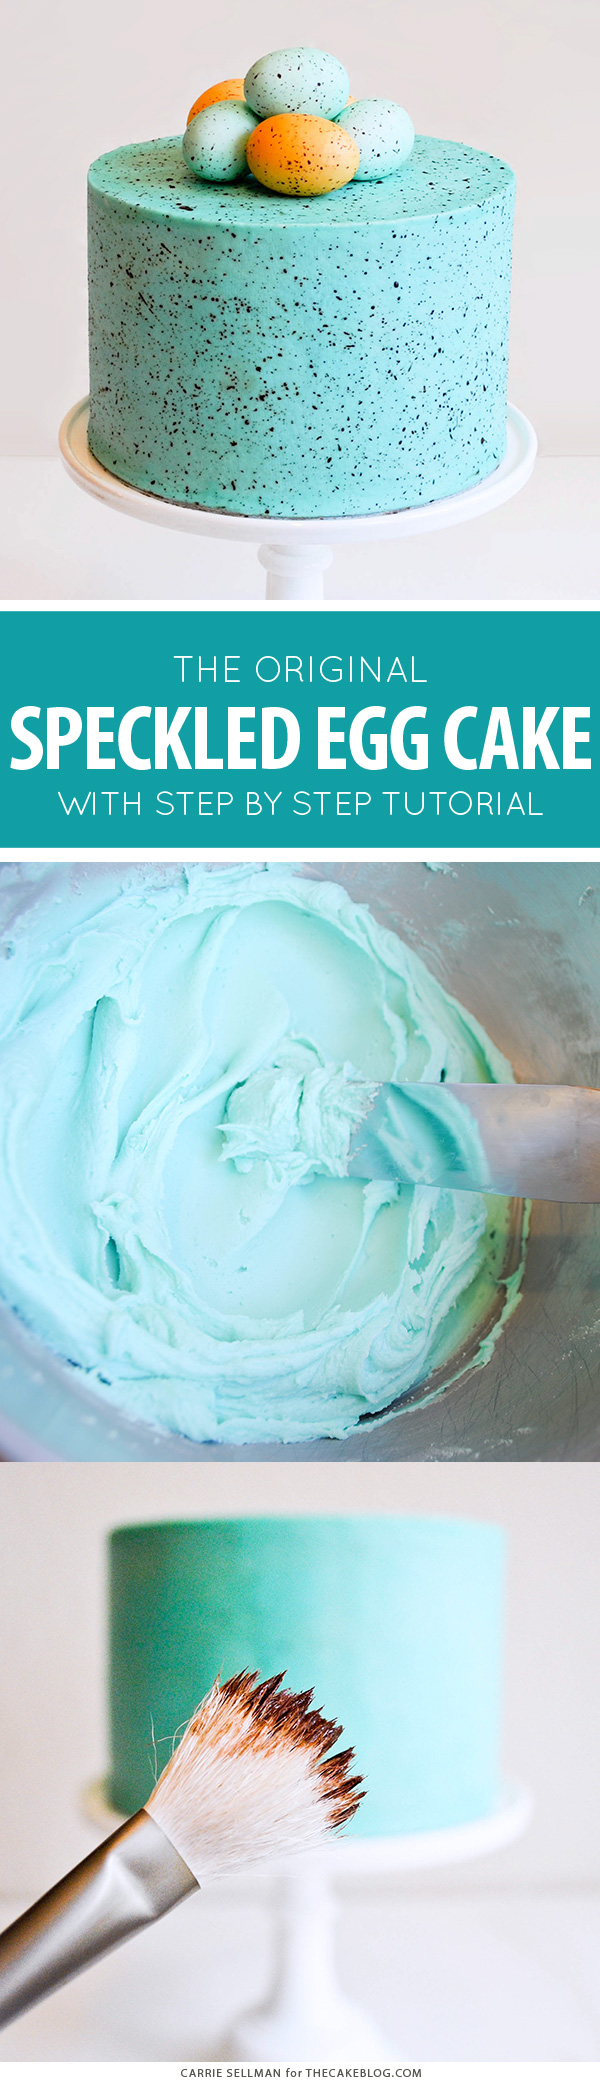
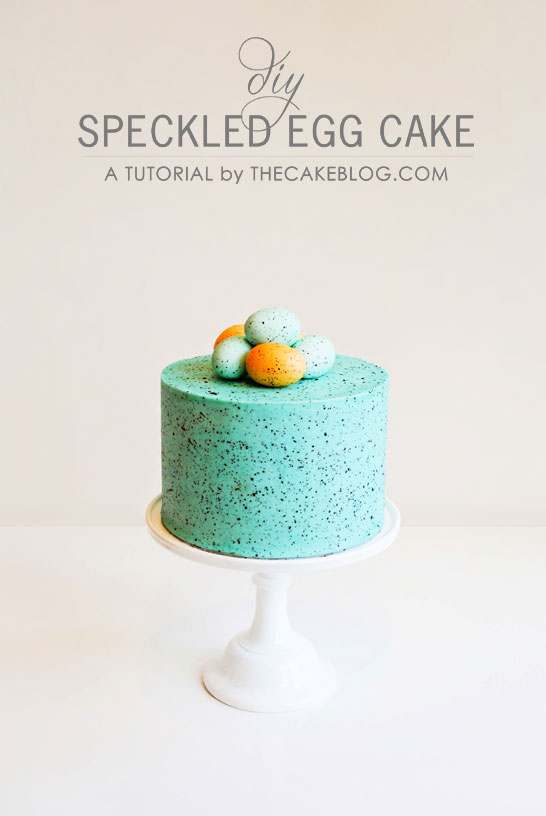
It might not feel like it, with cold air and snow still hanging around, but Spring is just around the corner. Before you know it, the first buds of green will be popping up on tree branches. Birds will be chirping. Flowers will be blooming. And Easter will be on the way! So today we’re getting ready with a new cake tutorial that is all about Spring! Inspired by the gorgeous color and texture of robins’ eggs, this cake is super easy and incredibly fun. And completely achievable for all levels of bakers, to include your favorite little egg-hunters. It’s a Speckled Easter Egg Cake tutorial and I hope you enjoy it!

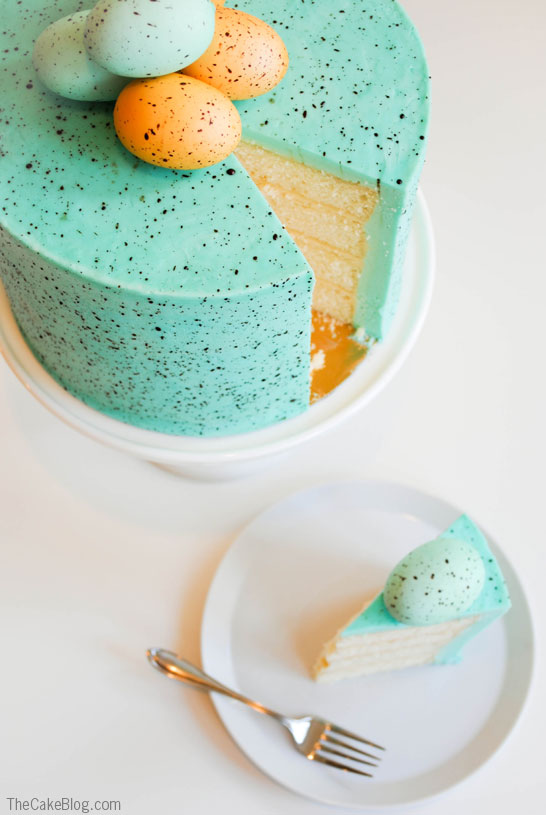
Before we get started on the very scientific speckling technique, let’s talk about the cake itself. I used a Classic Vanilla Cake recipe and baked it as four layers. You can bake your cakes several days in advance and either freeze them or keep them in the refrigerator. Being a mom to a little one means my windows of time are quite short. So on Day #1, I baked the cake and made the eggs. Day #2, I made a batch of basic buttercream icing (recipe here). Day #3, I assembled and decorated the cake. You, by no means, have to follow my extra prolonged, toddler-approved schedule. But if needed, you can certainly spread this project out over several days.
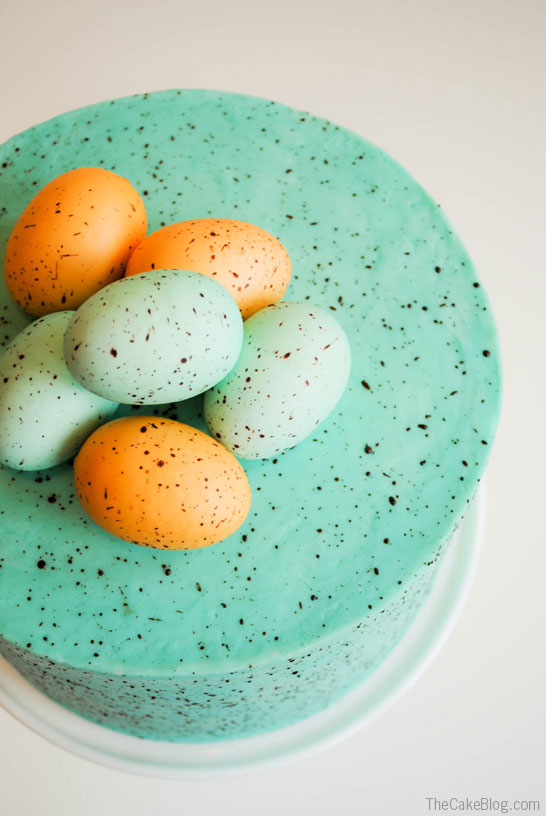
Now, let’s talk about the eggs! There are several ways you could go about making these eggs. You can use an egg-shaped candy mold to create white chocolate eggs, colored appropriately. You can use real eggs that are hard boiled (or blown out) and then dyed. {Please do not use raw eggs… that is just asking for trouble.} You can shape eggs out of fondant or gumpaste. Or you can simply purchase any speckled candy eggs that you like. Whichever route you pick, this is your first step in decorating. Your overall color scheme starts with your eggs!
Now, let’s get to the speckling! This project is incredibly fun AND slightly messy. But the mess makes it fun, right? You will absolutely get cocoa splatters on your counter, and yes, probably even your floor. I found a few stray spots even on my refrigerator. Hence the wax paper for your work surface and paper towels for clean up. So please please consider this your official warning. This is not the project for your favorite apron. But I am happy to report that my kitchen was clean with just a few paper towels. And my apron washed up just fine. Now that you’ve read the disclosures… let’s get to it!

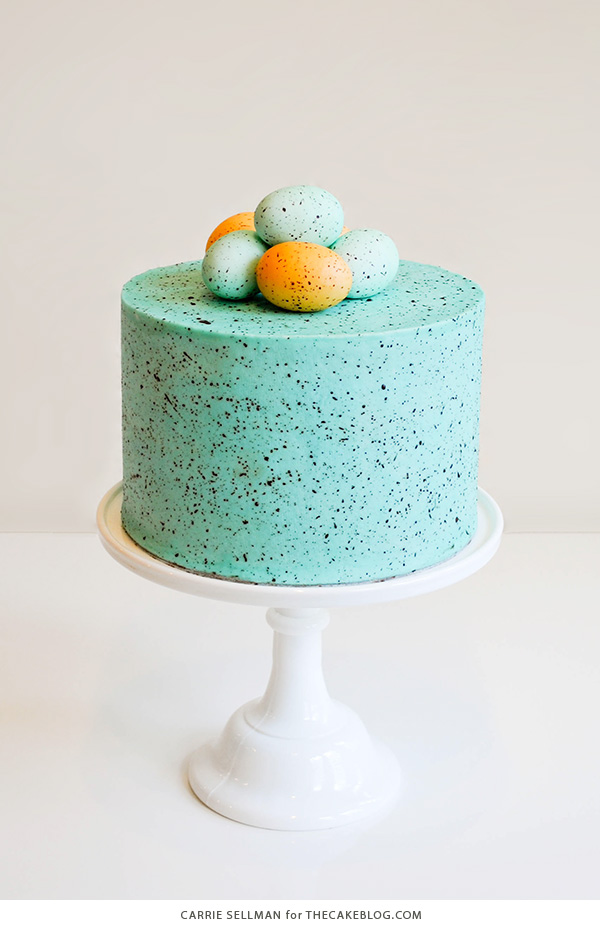
SPECKLED EGG CAKE
a tutorial by Carrie Sellman
Supplies
- cake of choice, assembled and crumb-coated
- basic buttercream icing
- Sky blue food color
- 1 tablespoon cocoa powder
- 1 1/2 tablespoon vanilla extract
- food grade paint brush
- wax paper
- paper towels, for clean up
- speckled eggs
STEP 1: Color your buttercream frosting with a few drops of food coloring. I used 2-3 drops of Americolor Sky Blue gel. When tinting buttercream, I like to add one drop of color at a time until I reach the right shade. If you’ve ever ruined a batch of icing before, you already know the benefit of adding color gradually. And when in doubt, I like to error on the light side. Buttercream naturally darkens slightly as it sets.
STEP 2: Frost your assembled and crumb-coated cake with your pretty blue buttercream. Smooth and shape to your liking. It does not have to be perfect. We’re about to splatter it up!
STEP 3: In a small bowl, mix together 1 tablespoon of cocoa powder with 1 1/2 tablespoons of vanilla extract. Stir well until cocoa is completely dissolved and you have a thin, chocolate paint.
STEP 4: Cover your work area with wax paper. Lightly dip your new (or totally clean, never used for paint) paintbrush into the chocolate. Holding the paint brush with one hand, gently flick the bristles with your other index finger to splatter the chocolate paint. Practice first onto your wax paper until you get the hang of it. No need to move on to the cake until you master the flick. When you’re ready to start speckling, hold the paintbrush fairly close to the cake and start splattering.
NOTE: A little chocolate paint goes a long way. So dip your brush lightly. If your paintbrush becomes ‘clogged’ with paint and is no longer splattering nicely, rinse it with water. Dry with a paper towel. And start again.
STEP 5: Keep splattering away! Move up, down and all around to completely cover the cake.
NOTE: As you work, you will undoubtedly get a splatter that is bigger than you would prefer. Or accidentally get carried away and bump the cake with your paintbrush. (Don’t ask me how I know this!) You have two options here. Either embrace the imperfections and let it go. Or wipe it off quickly with a light dab of water and paper towel. Then go back to speckling. If you look closely, you can see where I wiped one of my oh-no-it’s-too-big splatters. Left-middle. Not too bad of a correction and I think it adds to the speckled egg charm.
STEP 6: Now that you have the hang of splattering, you’ll also speckle the eggs you previously made. While you wait for the cake and the eggs to dry, now is a good time to wipe off any stray splatters on your cake pedestal. Once both the eggs and the cake are completely dry, arrange eggs on top of cake. Use a dab of buttercream to hold them exactly where you want them.
STEP 7: Cut, eat and enjoy!
MORE EASTER CAKES TO MAKE:
Chocolate Easter Bunny Cake
Mini Easter Egg Cakes
Easter Nest Cake
Marbled Chocolate Easter Eggs
Easter Basket Cake
Spring Wreath Cake with Buttercream Birds’ Nest


One of my very favorite cakes Carrie!! It’s gorgeous!! LOVE it so very much!! Thanks for sharing and for inspiring the buh-gee-beez out of me!! *wink*
Hello Carrie, this cake is amazing!! I’ll definitely be trying this for Easter! Thank you. Can I ask you about the cake you used? I just love the orange flecks and how it appears slightly dense which is what I love in a cake. Thank you for posting frosting recipe!!
I used a classic vanilla cake recipe. Any orange you see is due to my lack of photography skills! Still learning to use my camera!
Here’s a link to the cake recipe:
https://thecakeblog.com/2013/04/recipe-classic-vanilla-cake.html
I love this cake! How did you get your icing so smooth & perfect like that??
Thank you Tanya.
I try to smooth the icing as much as possible with a large offset spatula. Then touch it up again with a smaller offset spatula, that I heat up by dunking into hot water (and wipe dry with a towel). Hope that helps!
This is absolutely fantastic.
LOVE this cake, Carrie!! Of to pin…
Mmmm…so much Spring! I think it will be lemon cake with orange buttercream filling. The blue can be vanilla flavored. It’s done!
Beautiful cake! What butter-cream recipe did you use?
Thank you! I used a basic American Buttercream recipe. You can find it here:
https://thecakeblog.com/basic-buttercream-icing
Just made this cake for my Dad’s birthday party. It was a showstopper! I used Trader Joe’s vanilla cake mix with strawberry jam for the filling, so a pretty inside, too. I’d love to know where you got your cake pans. I love that size and haven’t found it yet!
Thank you!!
So glad you gave it a try Jenny!
I used 8″ round pans for this cake. I like Magic Line pans but any 8″ round will work.
Beautiful on the outside, as well as on the inside. I’d love to have the recipe for the cake itself.
This is AWESOME!! I may have to give it a try 🙂 Thanks for the unique Idea…I thought maybe you had crushed up oreo cookies and used that to make the dark flecks in the frosting. Cool!!
Love it! But how did you make the buttercream so smooth? Any tips on that score will be much appreciated.
I would lvoe to make this for my daughters birthday in 2 weeks. She wants a red velvet cake and wants the cream cheese frosting. Do you think this will work with that frosting as it doesn’t set up as firm as buttercream?
This is so cool!!! I love it! What a neat idea.
Lovely, gotta try this.
THIS IS SO CUTE! i love it! thanks for sharing, brilliant idea! ^__^
Carrie I just love this cake, it’s amazing! Think I’ll make it this weekend. Thanks!
This is nothing short of AAAAA-MAZING! Love! Love! Love!
I love this cake the tetuxed look along with the bold color make it pretty enough not to eat….good job!
Beautiful and great idea! Is there a tutorial to teach us how to frost so perfectly?
So pretty! You are very talented!!!!
Beautiful and simple? I’m all over this. I love the idea of speckling it…
Beautiful cake! You could also make these egg cakes and frost them too! I’ve made them before and they’re amazing:
https://www.cupcakeproject.com/2011/04/easter-cupcakes-baked-in-real-egg.html
LOVE love LOVE it!
MMMMMM I want to make this for Easter! Looks delish.
This is totally wonderful!