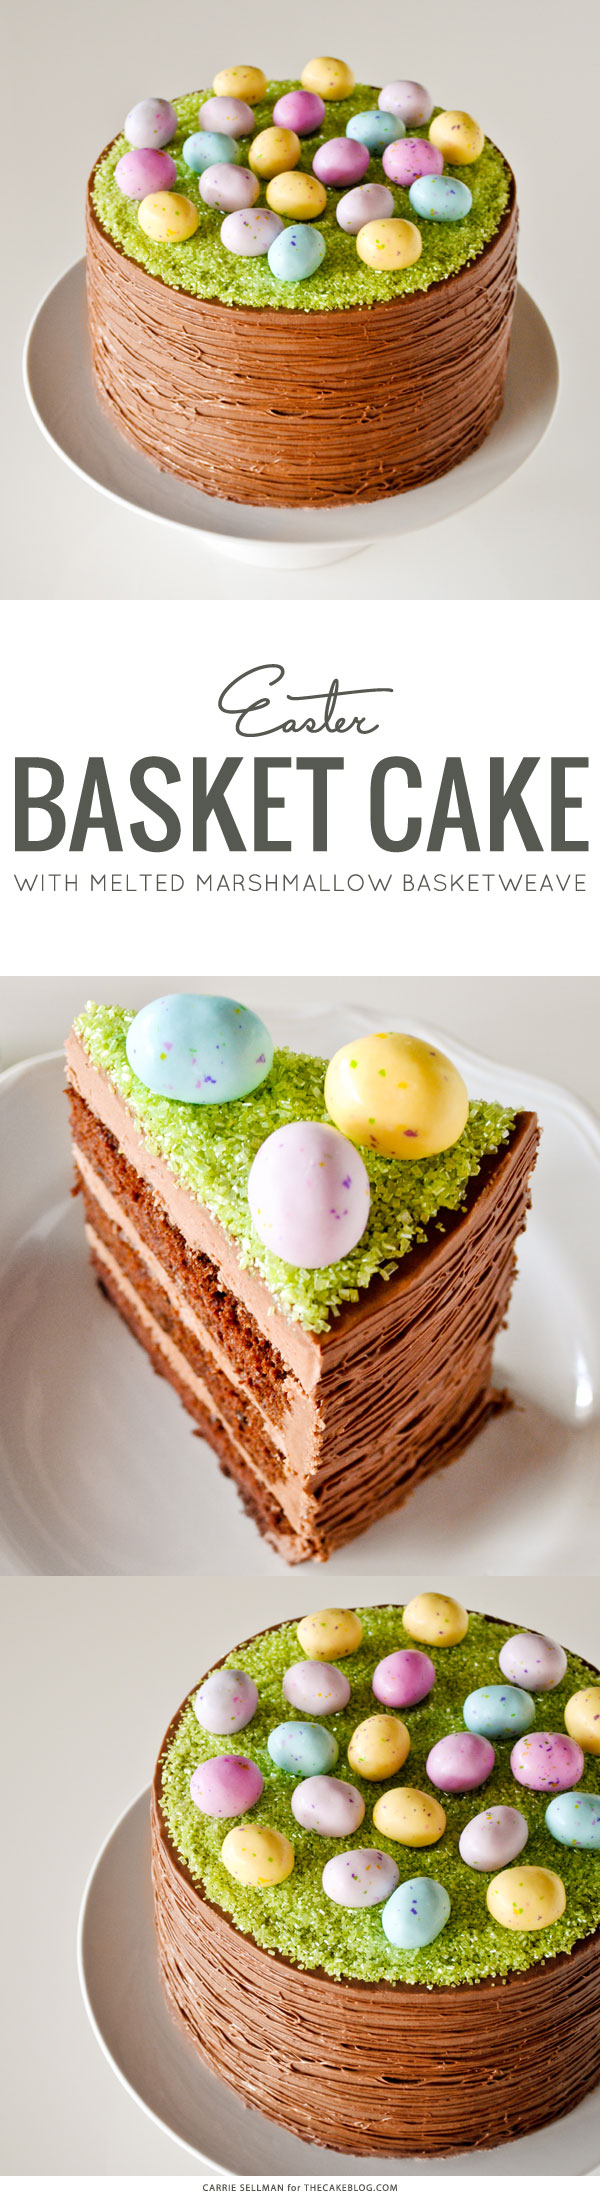
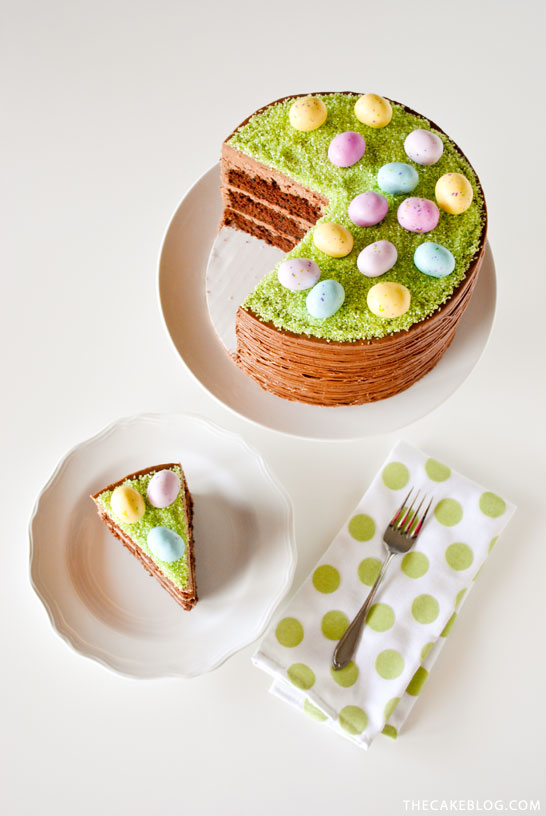
Okay friends, are you ready for new cake tutorial? I’m starting to think I have a thing for Easter cakes. You may have caught my Chocolate Bunny Cake from last week or my Speckled Egg Cake from last year. Well, today I have another new springtime cake for you. This time we’re taking old-school basketweave and giving it a sleek and modern update. Inspired by the beautiful grapevine baskets that I keep seeing in my favorite stores. You know the baskets I’m talking about, right? Thin spindly branches intertwined in a messy yet uniform way. Today’s cake is a new spin on basketweave requiring no special tools, no special tips, no tedious piping. It’s quick and simple yet can easily hold its own at your Easter table. It’s a new kind of Easter Basket Cake, and I hope you enjoy!
The best part about this cake is that it comes together in no time flat. It uses stringy marshmallows and a technique I originally created for my Cobweb Cake back in 2012. Melted marshmallow is stretched and pulled around and around the cake, creating a woven vine-like appearance. Your hands are sure to get messy but this is seriously the only downside… and for some, especially the little ones, this is the best part. Kids thrive on messy fun. And this project definitely is messy fun! My toddler assistant loved watching me swirl marshmallow all around this cake, but officially crowned herself as the guardian of the candy eggs. Lucky for her (and me), there were a few eggs left over when this project was all said and done.
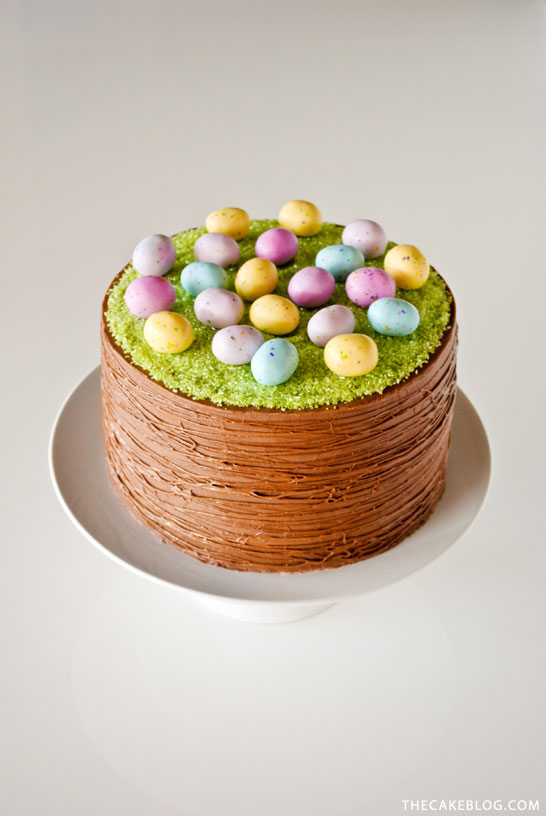
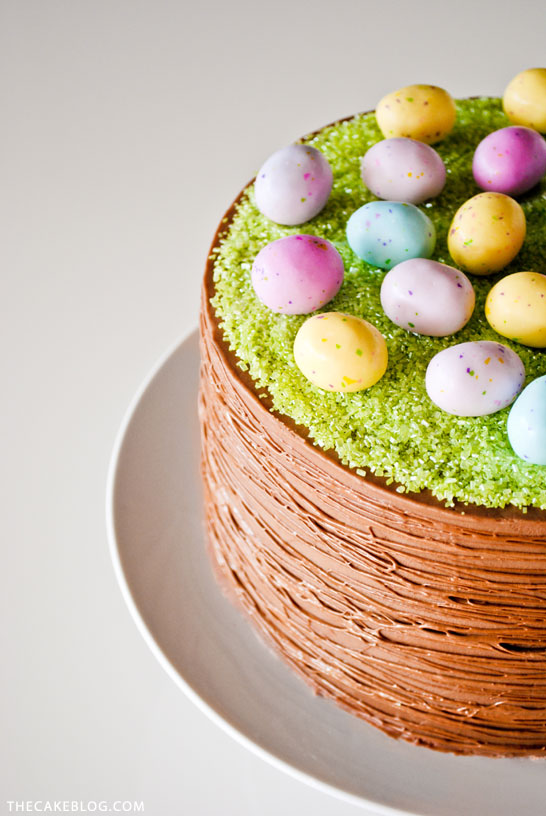
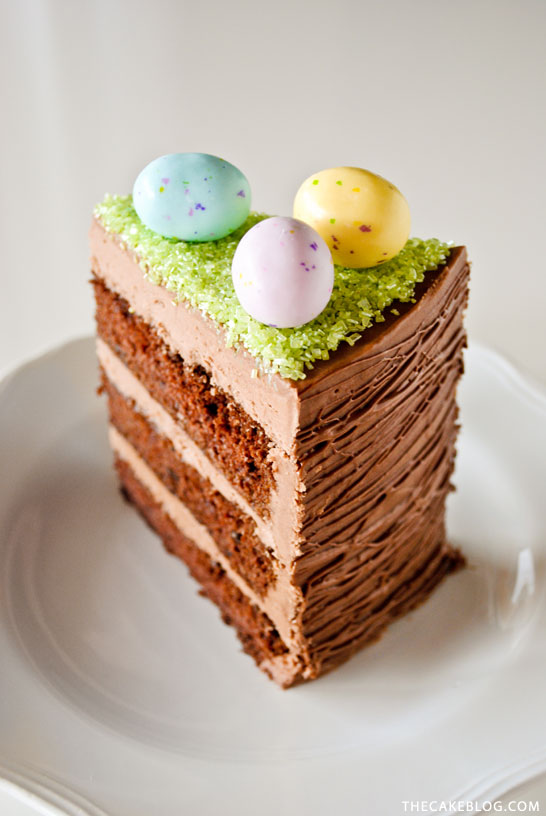
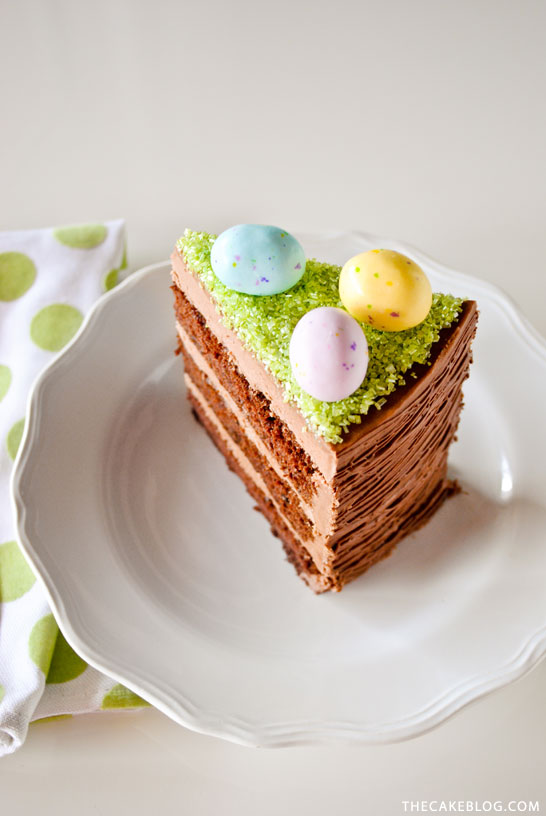
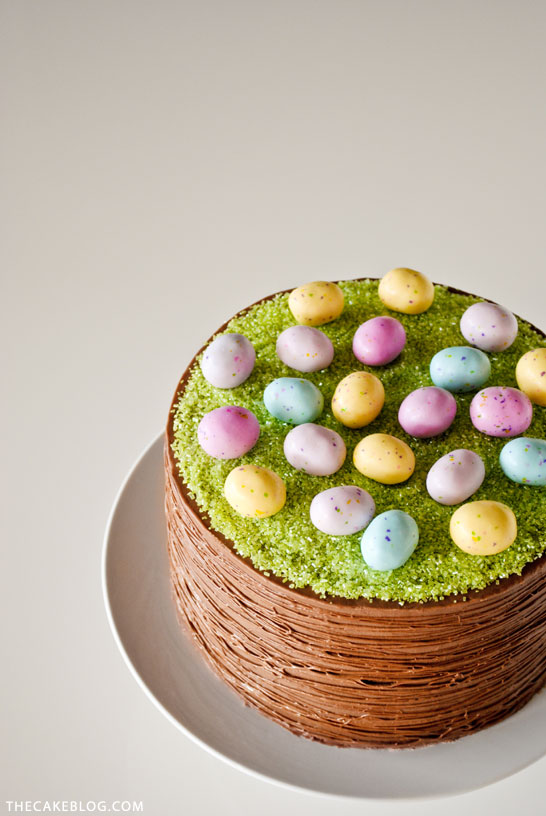
To top off this basket cake, I used green shimmery sprinkles to create the look of sparkling grass. It made a soft little bed for the candy eggs
, while adding a nice pop of color.
Okay, now that we’ve seen the extreme close up… it’s about time to learn how it all comes together. Let’s jump right in to this Easter Basket Cake tutorial.
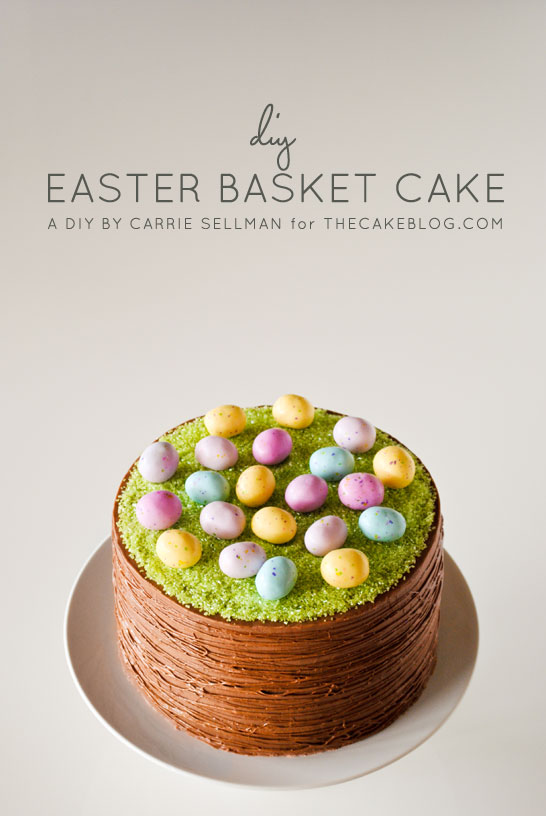
 EASTER BASKET CAKE
a DIY by Carrie Sellman
Supplies :
8″ round cake with chocolate frosting
8 ounces marshmallows
3 tablespoons cocoa
Green Shimmer Sugar
Malted Milk Candy Eggs
STEP 1 : Prepare an 8″ round cake with chocolate frosting. Use your favorite recipe or one of our cake recipes. Bake it from a mix. Or purchase one at the market.
STEP 2 : Combine marshmallows and cocoa in a microwave-safe bowl. Heat in microwave for 30 seconds.
STEP 3 : Stir marshmallows. {Warning. Hot marshmallows will burn. And it hurts!} Keep stirring. Stir, stir, stir some more! Stir until marshmallows are cool enough to touch and cocoa is completely dissolved.
STEP 4 : This is where it gets messy. Or fun, depending on how you look at things. Using both hands, stretch a small glob of marshmallow out into a long, thin, stringy strand. Way longer and thinner than what is shown above (it was hard to get a picture of this exactly… especially with marshmallow covered hands).
STEP 5 : Start wrapping the stringy marshmallow around your cake. Go around and around the sides of the cake in a circular motion. Go light at first until you get the hang of it. Less is more! And thinner strands look better in the end.
STEP 6 : Continue to stretch and drape marshmallow strings. Move up and down the cake as you continue to pull more marshmallow around the cake in a circular pattern.
STEP 7 : Continue to add more marshmallow. Start overlapping the strings to completely cover your cake and create a woven appearance. Think of grapevine baskets as you go. Call it quits when you like what you see.
STEP 8 : Fill a disposable piping bag (or ziplock bag) with sprinkles and cut a small hole at end. We’ll use this to carefully cover the top of the cake with sprinkles. We don’t want any stray sprinkles falling because they will stick to the sides of the cake.
STEP 9 : Build your top layer of sprinkles by first outlining the edges. Get as close to the edge as possible without going over. Then move inward to completely cover the cake in a solid layer of sprinkles.
STEP 10 : Place candy Easter eggs on top of cake. And you’re finished!
YOU MAY ALSO ENJOY:
Speckled Egg Cake
Chocolate Easter Bunny Cake
Sugar Cookie Moss Cake
Chocolate Daffodil Cake
Mini Easter Egg Cakes


Wow, love this. Absolutely beautiful cake and wonderful tutorial
Fab cake, I am definitely going to try this! Can you tell me what type of frosting you used and share recipe? Thks:)
I tried out a new recipe with this cake – Double Chocolate Cake from BHG.com. It’s a chocolate cake with chocolate cream cheese frosting. The only real variation I made was to double the frosting recipe (I’d rather have too much than not enough!) and I whipped the frosting a little more, which is why mine appears lighter in color. Below is a link….
https://www.bhg.com/recipe/chocolate-cakes/double-chocolate-cake/
Happy Baking!
Love this simply sweet cake. I would like to try a mini 6-7in version and add my mini egg cakepops to the top. Thanks for a beautiful Easter cake idea and great tutorial
Kim
Find me on cakepops @
cakepops101
This is amazing! Thank you so much for the tutorial. My mouth fell open in awe when I saw the photo on Instagram. I had to run over here to check out how you made this beauty.
wow!! perfect cake for easter!!
thanks for the tutorial!!i need to try this technique before easter!
could you please share the cake and frosting recipe,it seems sooo good!
thanks a lot
This is such an adorable cake! I was wondering about how long after melting the marshmallow mixture did you start to wrap it around the cake. As you mentioned, it will be very hot.
The marshmallow is hot and since we’re using our hands, I definitely wanted everyone to be aware. Just stir until your bowl starts to cool off and then lightly touch the marshmallow to see if it is cool enough to handle.
What a gorgeous GORGEOUS cake!!!! I LOVE LOVE LOVE it.
I LOVE this cake!!!!! So simple and yet very impressive looking. I’m not sure now which I like better, this one or last year’s speckled egg one.
Thank you for a really good tutorial – the detailed pictures are priceless!
Awesome cake, thanks for tutorial
This cake looks fabulous! You are so wonderfully talented and equally generous to share so much with us> Thank you!
Thank you Dru, such a kind comment. It made my morning!
Carrie, thank you so much for posting this cake which worked out so amazingly well!
I am so in love with this…! And you did a great job with the tutorial!
I tried making this cake to bring to my boyfriend’s family dinner, it was very difficult. The melted marshmallow basket effect was the most difficult, the coco powder did not mix well into the marshmallow and the color ended up very light brown despite trying to add more coco. Is there a technique to mixing the coco in the marshmallow?
This is just beautiful and your tutorial is very well written and easy to follow. I like this look much better than the more common basket weave design. I saw a lovely multi tier cake done for a wedding which I wonder, now that I have seen your post, if it was done with marshmallows. Chocolate is my favorite, but this design would be lovely as a simple white cake, with white marshmallow strings, tiered with maybe some red roses. Really lovely. Can’t wait to try.
This is just perfection!!
This year we celebrated my granddaughter’s 4th birthday on Easter with this cake. We added different spring candies as decor and everyone loved it. The marshmallow was a bit tedious, but easy to apply.
Thank you so much for such an easy to follow tutorial.
That’s wonderful Venus! Hope your granddaughter had a great birthday!
The colors are so vibrant- your photography is fantastic! This cake looks absolutely fantastic. Beautiful photos, too. I look forward to trying this.
Really this would be special and colorful cake, Carrie! Love healthy food! Thanks for sharing!