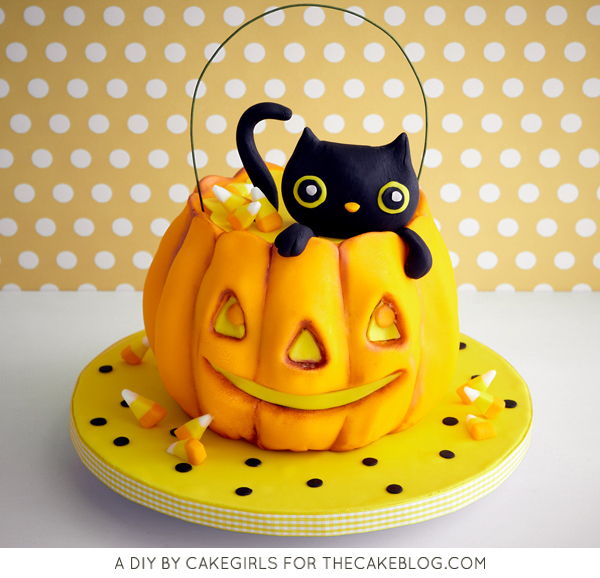
How to sculpt a 3D pumpkin shaped cake – a cute jack o lantern cake for Halloween!
By our contributors Mary and Brenda Maher of Cakegirls.

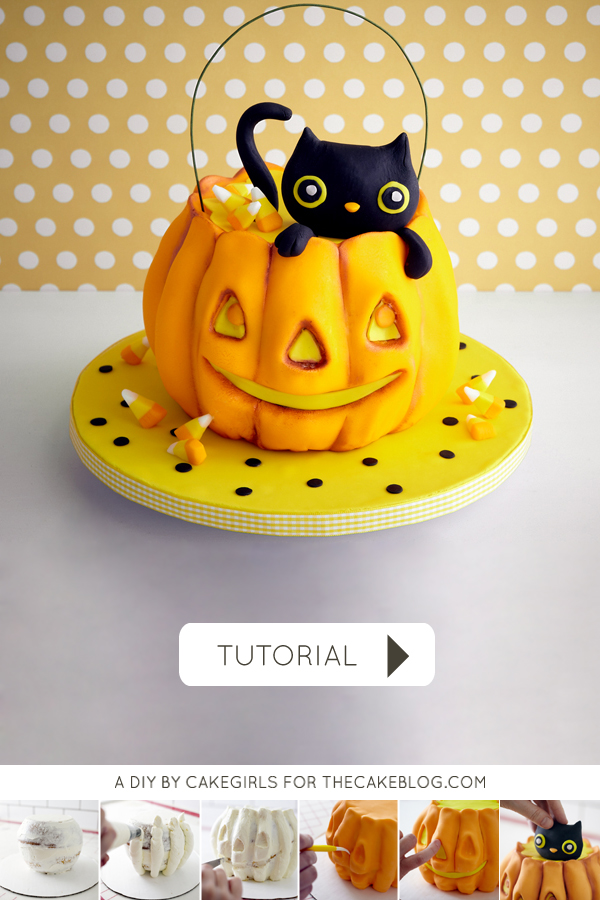
This is the perfect show stopping cake to present at your next spooktacular Halloween Party. Perfect for kids and adults alike, the pumpkin cake works as it’s own creation or even cuter with a little fondant kitty partaking in the festivities. It involves a myriad of techniques including sculpted buttercream, figure modeling and shading with luster dust…all broken down in this step-by-step tutorial. A ball pan and swiss meringue buttercream help the sculpting come together easily and all the additional steps will pay off when your guest say wow!
KITTY CAT IN A PUMPKIN CAKE
a tutorial by Cakegirls
Supplies:
Cake Baked in a Ball Pan (frozen just until firm but not rock hard)
Swiss Meringue Buttercream
Yellow Fondant
Orange Fondant
Black Fondant
10″ Round Support Drum
Copper Luster Dust
Paintbrushes
18G Green Wire
Veining Tool
Craft Knife
Piping Bag
Large Round Piping Tip (#9)
STEP 1: PREPARE THE BOARD, KITTY, TAIL AND CANDY CORN
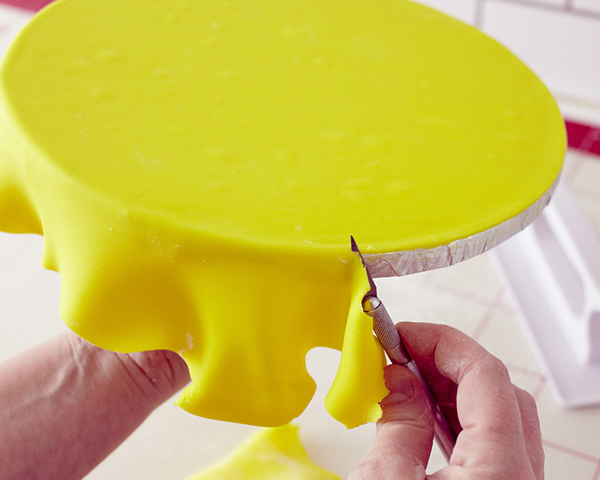
On a surface lightly coated with powdered sugar, roll the yellow fondant as thinly as possible and larger than the cake drum. Brush the top of the cake drum with a thin coating of water and place the fondant on top. Trim the excess fondant with a craft knife.
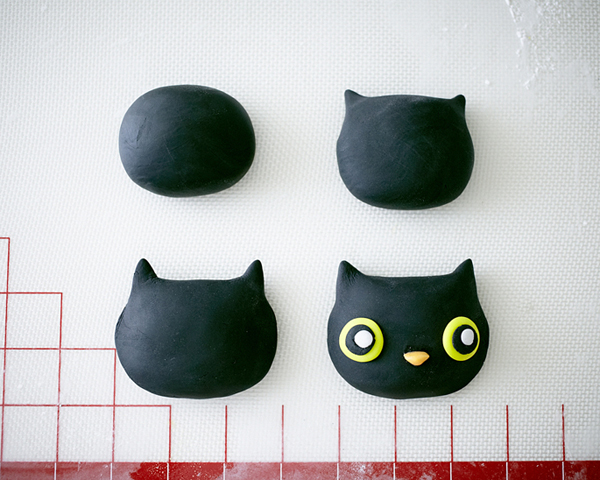
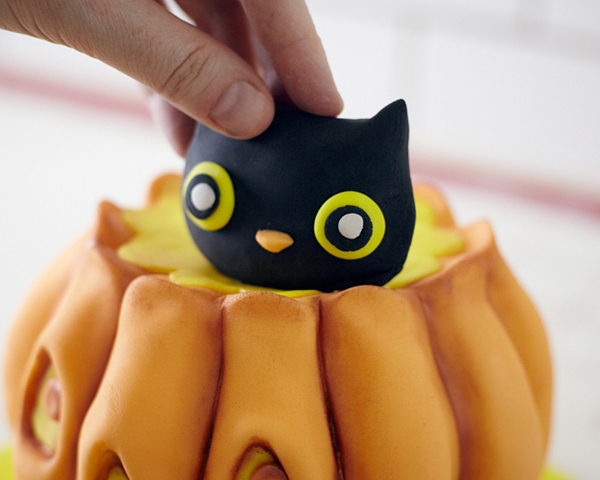
Next, prepare the kitty cat head using 2 1/2 oz. of black fondant. Start by shaping the fondant into an oval ball. Gently pinch the top edges of the oval to create ears. Use your hands to smooth the surface of the face, slightly flatten the outer edges and to taper the head into a more finessed shape.
For the eyes: Flatten tiny balls of yellow, black and white fondant into various size discs and layer them onto the face using a touch of water to adhere.
For the nose: Use a very tiny pinch of orange fondant shaped into a triangle and attach with a touch of water.
NOTE: Stand the head up to dry so that it has a flat spot on the bottom. This will make it easier to set on the cake.
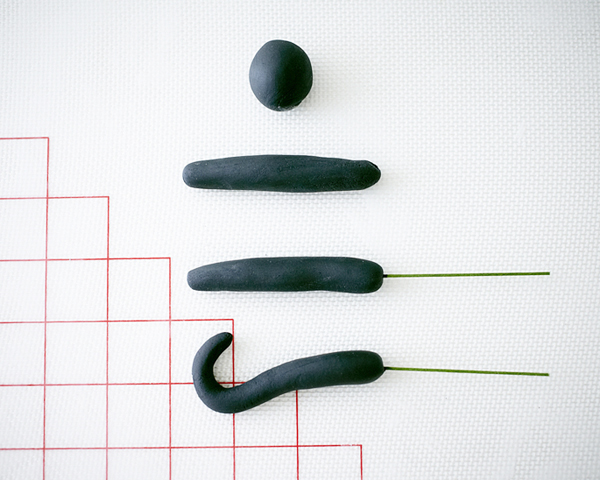
For the tail: Knead 1/2 oz. of black fondant and create a sausage shape. Continue to roll and smooth until the tail is 3″ long or so. Clip a 4 1/2″ wire and dip the end in water. Insert into the sausage, leaving 3″ exposed. Continue to thin the end of the tail and curl to add more character. Set aside to dry.
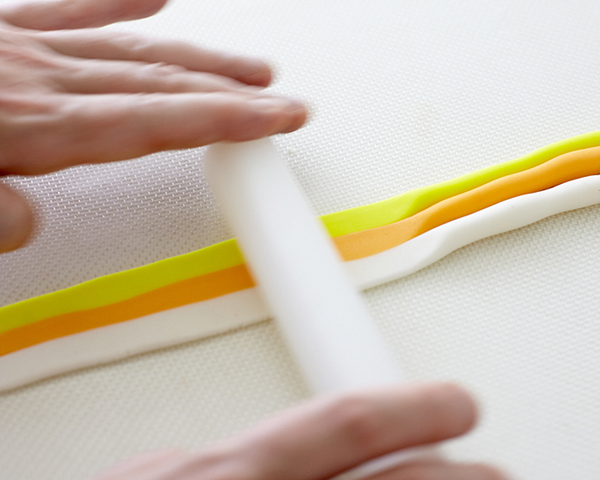
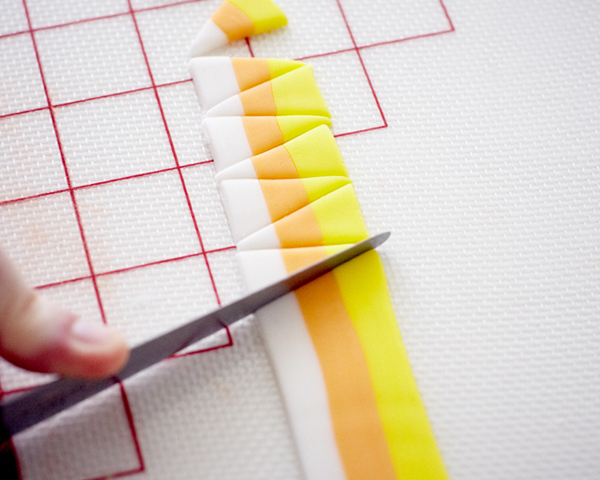
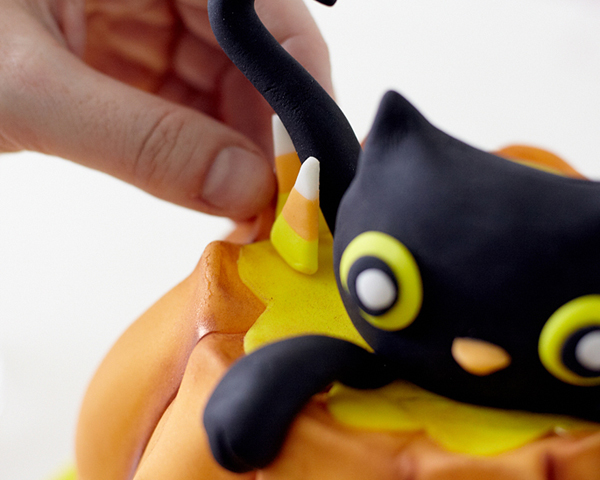
Roll out 3 ropes of fondant in orange, yellow and white. Place them next to each other and brush with some water in between to stick them together. Let them sit for a minute to adhere and then roll them out into a 1/4 inch thick strip. Use a knife to cut them into triangles to mimic candy corns.
STEP 2: ICE THE CAKE AND ADD BUTTERCREAM TEXTURE
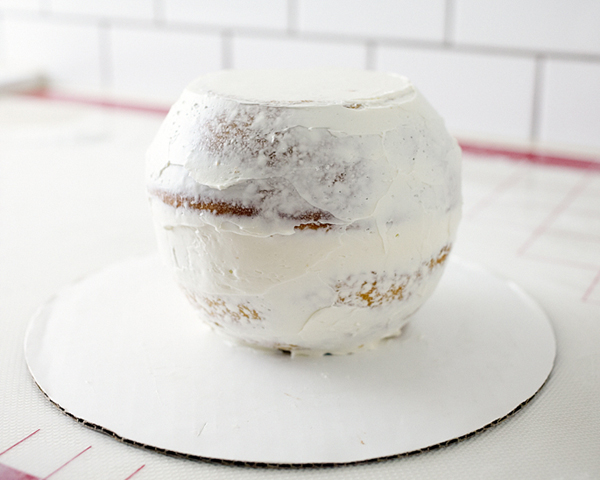
Remove the cakes from the freezer and cut a flat spot on the rounded side of each ball about 3 1/2″ in diameter. Place the cake on an extra cardboard circle and sandwich the layers with buttercream. Roughly ice the cake.
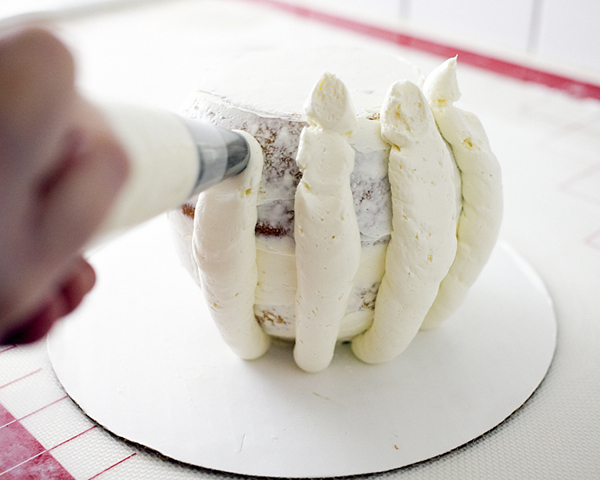
Fit a piping bag with the #9 oversized tip and fill with buttercream. Pipe evenly spaced, heavy, vertical lines on the outside of the ball, extending just past the top of the cake and leaving space in between each line. Place the cake in the fridge until firm, 20-30 minutes.
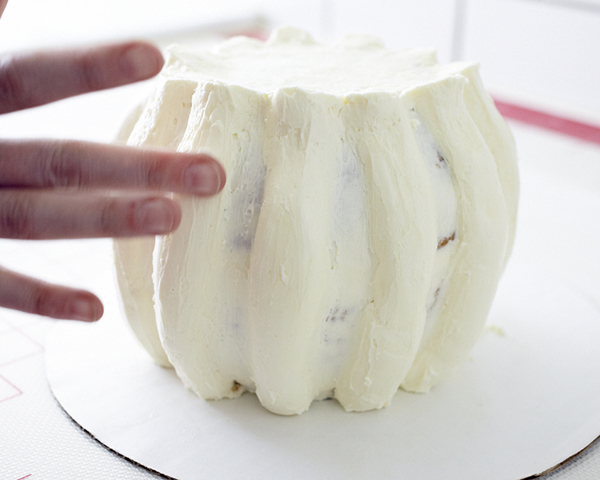
Once firm, remove the cake from the fridge. Wash your hands with hot, soapy water and dry. Then use the warmth of your fingers to smooth the buttercream, softening the ridges a bit and making the buttercream more integrated into the shape of the cake. This step may take 15 minutes or so.
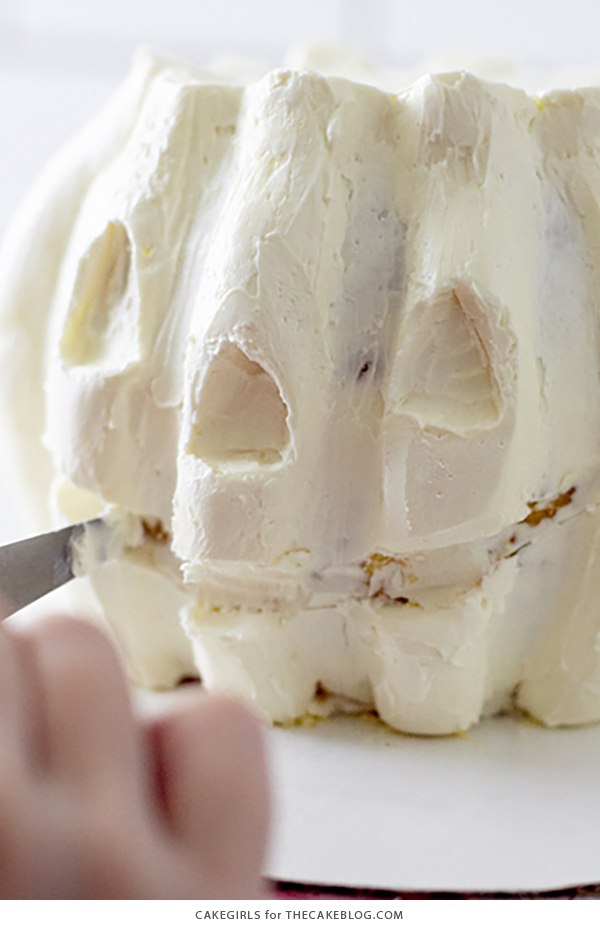
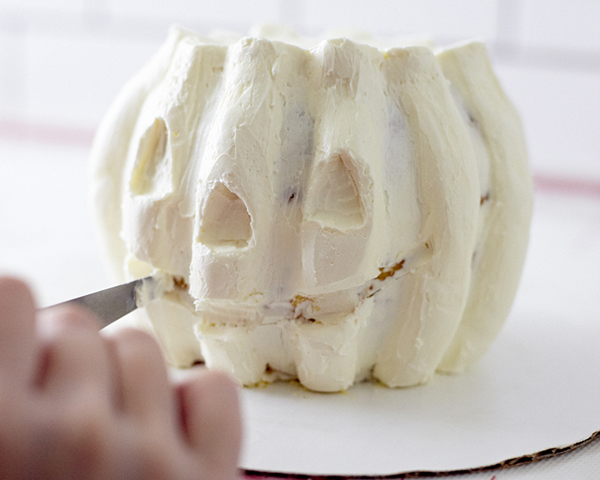
Next, use the offset tapered spatula to scrape out the eyes, nose and mouth of the pumpkin’s face. Make them proportionate to the size of the pumpkin and use your finger again to soften the edges. Place the cake in the fridge until firm.
STEP 3: COVER THE PUMPKIN IN FONDANT AND ADD DETAIL
Roll out the orange fondant 1/8″ thick and large enough to cover the pumpkin. Using your hands, drape and smooth the fondant on the cake, using your fingers to press the fondant into the creases and cavities of the cake to preserve the details. Remove any excess fondant at the bottom with a craft knife.

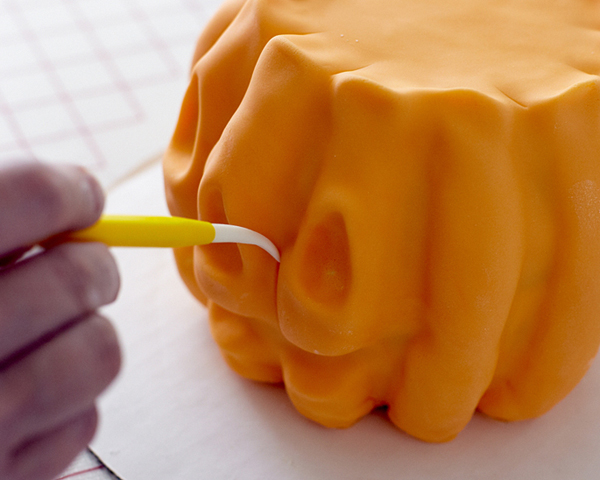
Next, using the flower leaf tool, make vertical indentations between the bumps to give some character.
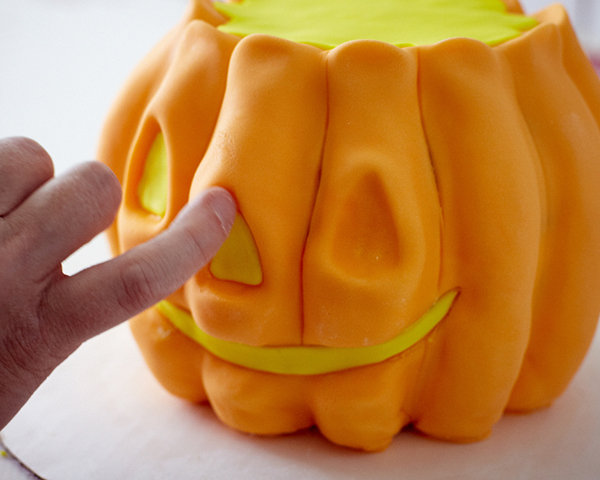
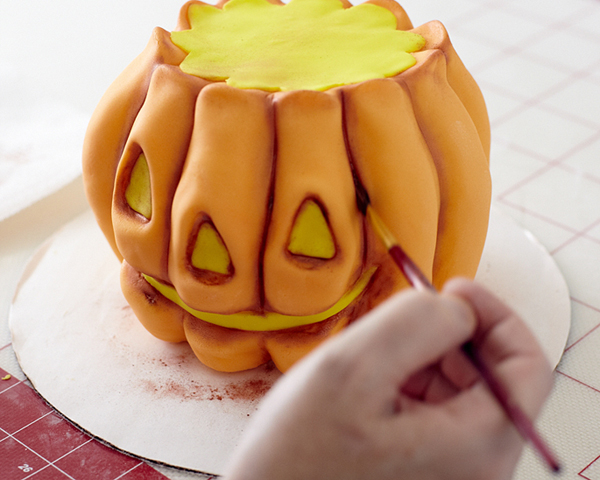
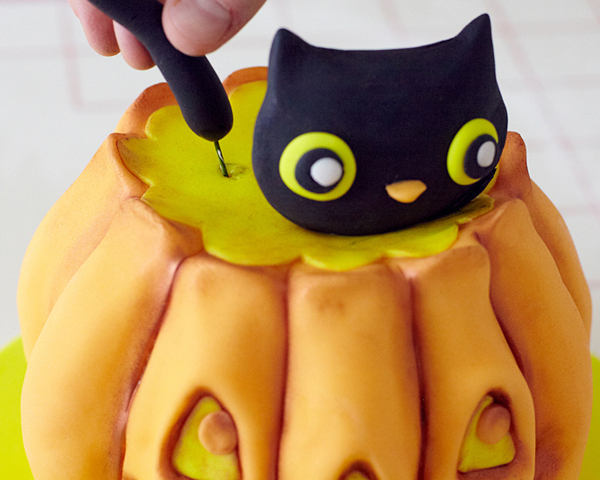
Roll out some yellow fondant and cut a circle to fit the top of the pumpkin, adhering with a little water. Next, cut out the eyes, nose and mouth for the pumpkin face, retrim to fit as necessary and adhere. Dip a paintbrush in dry copper luster dust and dab off the excess onto a paper towel. Brush onto the crevices and creases of the cake to create dramatic shading. Continue to add more layers of dust as necessary. Flatten two small balls of orange fondant and place on the cake for the eyes. Refrigerate the cake for 20 minutes or so to firm up before transferring to the fondant board.
STEP 4: FINISH AND ASSEMBLE
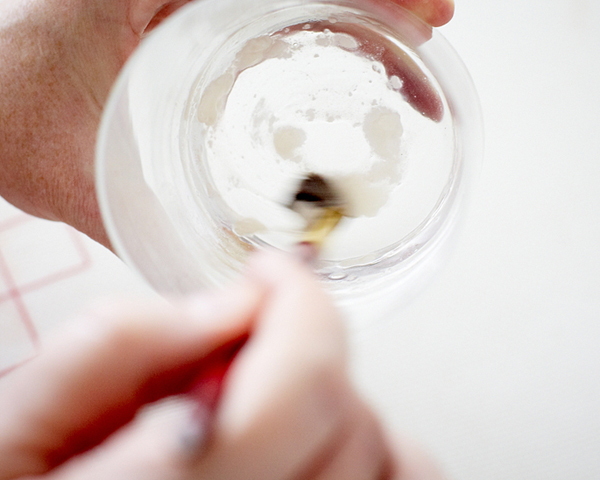
Start by using a spatula to transfer the cake to the finished board, using a little buttercream to adhere. Next, make an edible glue by taking a pea sized ball of white fondant and mashing it with a few drops of water in a cup. Continue to add drops of water until the consistency is like thick glue.
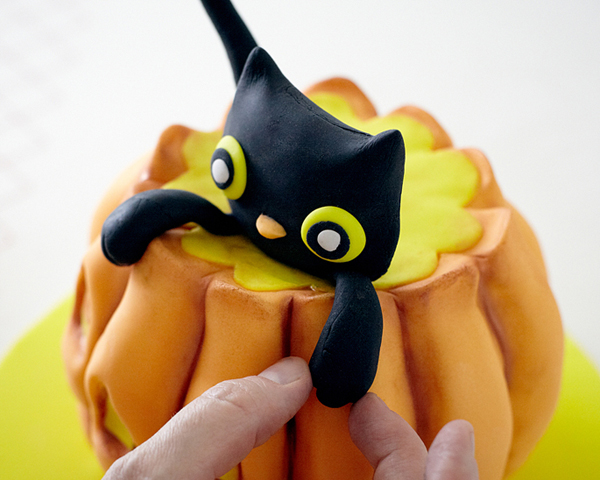
Brush some of the glue on the bottom of the cat head and adhere to the top of the cake. (Prop with wire or toothpicks while it dries if necessary.) Attach the tail in the same manner. Use two 1/2 oz. pieces of black fondant and shape them into paws and attach over the edge of the pumpkin with glue.
Finish the cake by adhering black fondant dots on the board, candy corns and a wire handle. Glue edge with ribbon.
YOU MAY ALSO ENJOY:
Black Cake Cake
Monster Eye Cake
Mini Mice Cakes
Marshmallow Spiderweb Cake
Spooky Splatter Cake


I would be making this cake for my customer….thanks to Mary and Brenda Maher…
Such a adorable cake, love the little kitty cat!
Love this adorable cake! Do you have a link to the ball pan you used for this? I’m tempted to try to make this cake for my annual Halloween party 🙂
Thanks!
Andrea
Here’s a link to the ball pan Andrea!
https://thecakegirls.com/hemisphere-sports-ball-cake-pan.html
Amazing! thanks cakegirls! looks very good I going to have to try this at halloween
that is a nice cake… easy and simple
Oh man, that looks absolutely beautiful, stunning, adorable, so many good adjectives!!
This cake looks SO awesome! Love your presentation of it.. you definitely have got lots of patience. I bet it tastes amazing too!
This is such an adorable cake. I enjoyed the step-by-step photos and instructions. Great job!
Lots of clever techniques here! Thank you for sharing.
Thank you for your beautiful blog and your generous tutorials!
How much fondant in ounces do I need?
Roughly 1.5 lbs orange, and less than 8 ounces of both yellow and black.