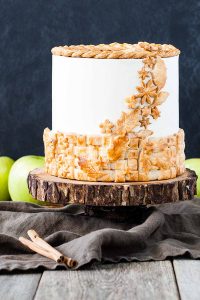
Apple Pie Cake! A layer cake recipe with hints of cinnamon and nutmeg, fresh apple pie filling, buttercream frosting and braided pie crust lattice. Created by our contributor, Olivia Bogacki.
Anyone else love fall as much as I do? It’s the best season ever. I seriously cannot wait! My husband thinks I’m crazy because I actually don’t like summer. At all. If I’m away on vacation and somewhere tropical, I like it to be sunny and hot, but otherwise I’ll take my overcast days and mild temps thankyouverymuch.
Nothing quite screams coziness like the colors of autumn, crisp air, and of course, fall baking. As such, I’m kicking off the not-quite-fall season with today’s cake. If you’ve been following along with my posts for The Cake Blog, you know I’ve been having a lot of fun coming up with creative ways to turn desserts into layer cakes. So this month I’ve tackled the Apple Pie Cake!
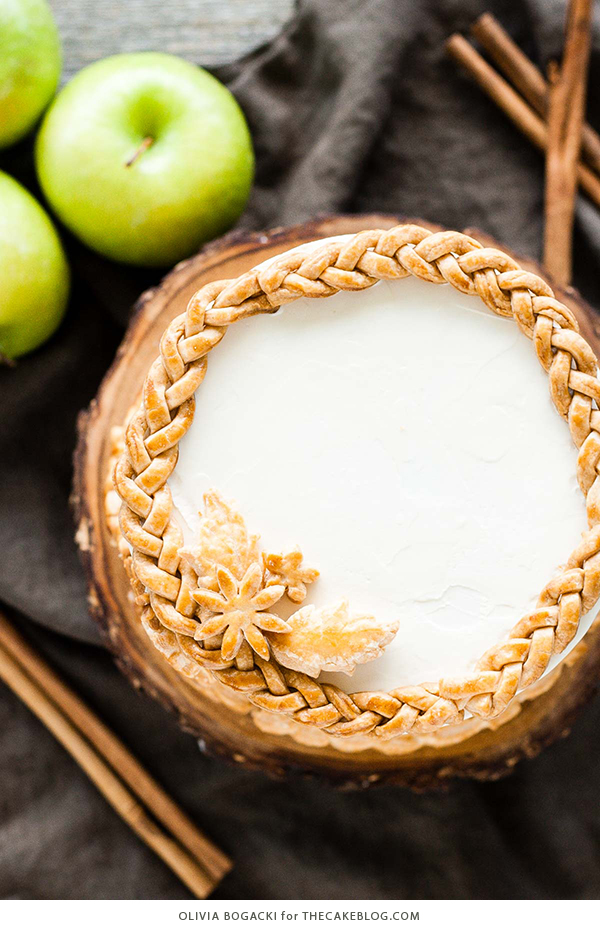
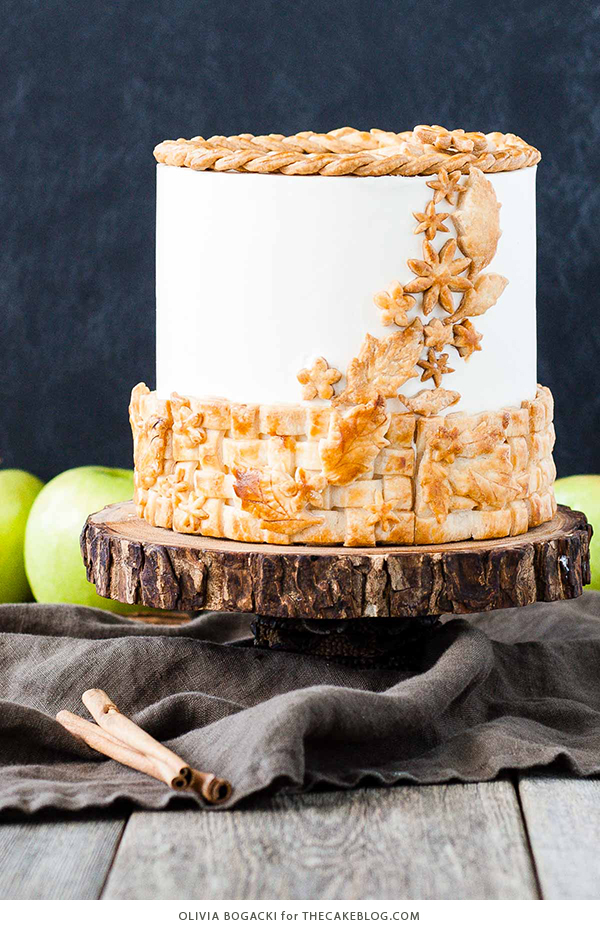
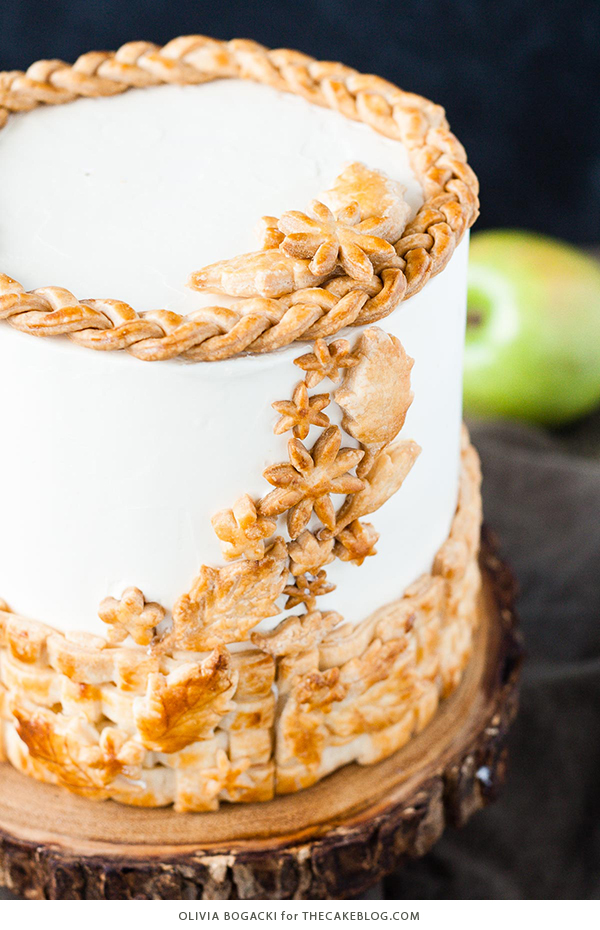
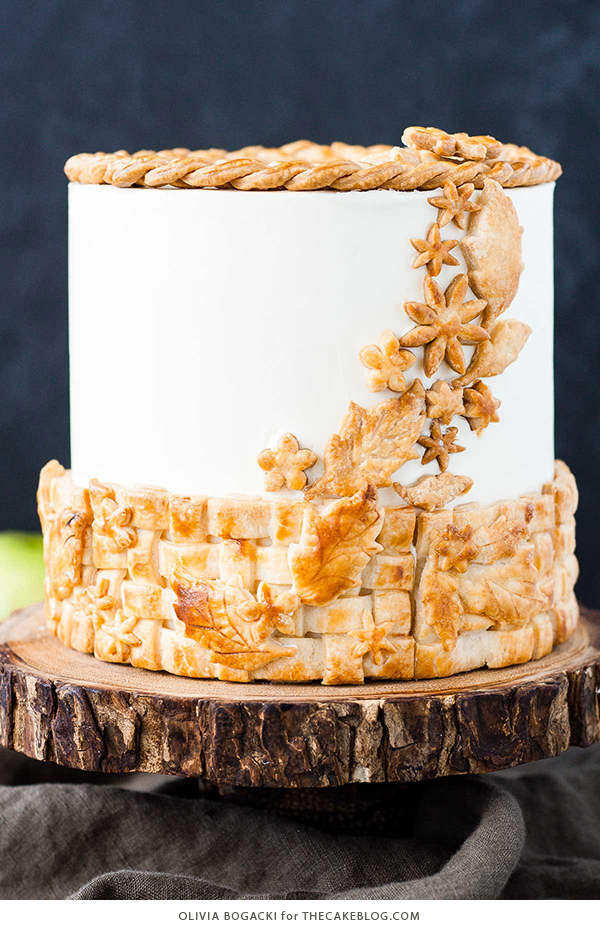
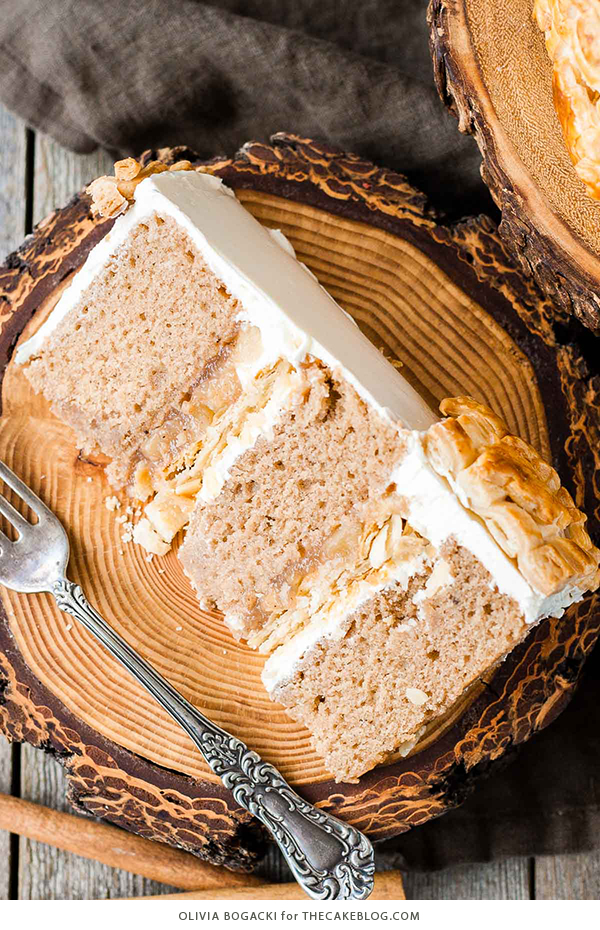
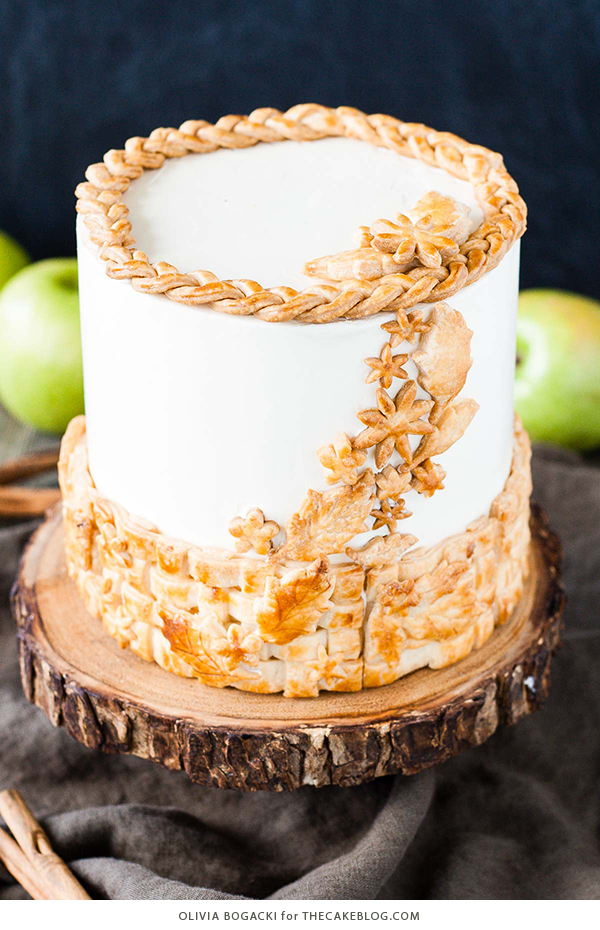
With this Apple Pie Cake, I wanted to make sure there was some element of pie crust in there, since – let’s be honest – it’s not really apple pie without it. Plus, pie crust is delicious. I added two discs of baked pie dough in between the cake layers and also added baked pie crust cut-outs as decoration. Then there’s the woven lattice that wraps around the base of the cake and the pie crust braid that encircles the top like a crown. Because every good pie-inspired cake deserves a pie crust crown!
Now I must give you a word of warning. If you plan to attempt the woven pie crust lattice, give yourself a LOT of time (and patience). It’s not the easiest thing to make and I had to MacGyver a contraption that would allow me to bake it on its side. I contemplated baking a couple of long lattice pieces along the outside of a cake ring placed onto a sheet pan, but I worried that the lattice would lose its shape as it baked and not look so pretty. So I decided to place the cake ring on its side and bake sections that way.
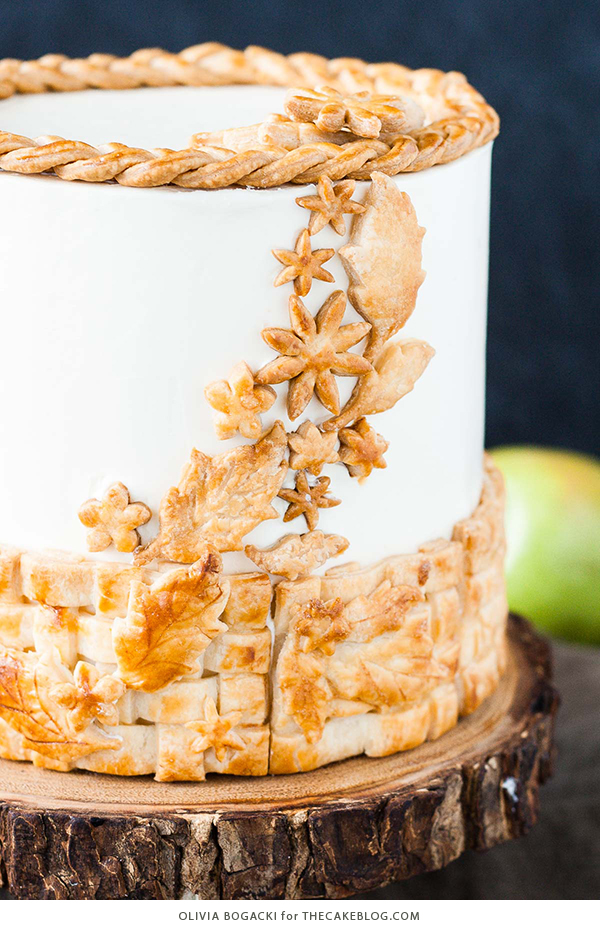
After many, many attempts, I finally had a few good sections of lattice that I could place around the cake. Some of them broke a bit when I was applying them to the cake, but you wouldn’t be able to tell. I’ve tried to detail the process as much as possible in the recipe below, so hopefully it’s clear. If you’d like a similar effect without all of the effort, you can skip the lattice and just go for the fall cut-outs and braid on top. If you’re feeling ambitious and want a showstopper, definitely go for the lattice.
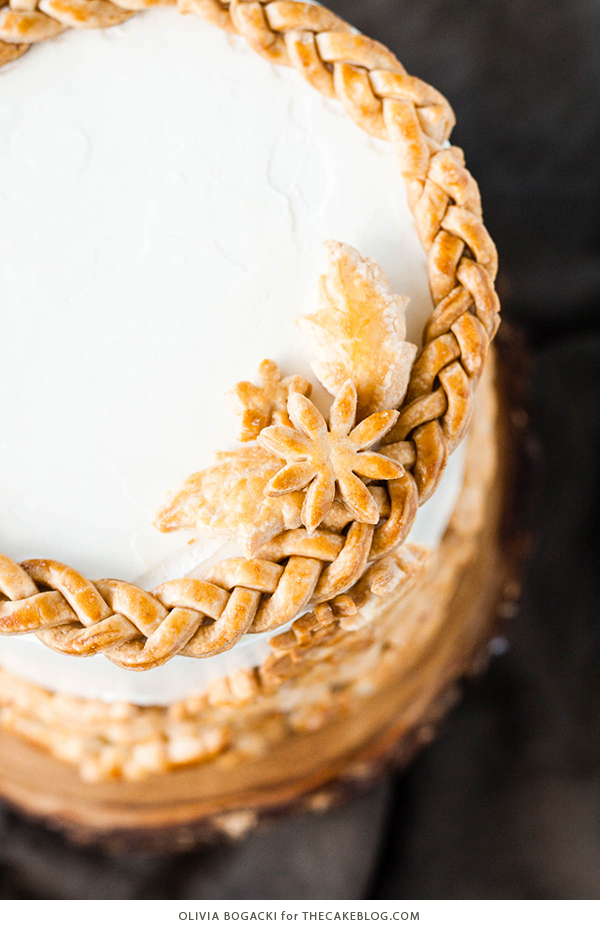
All of the effort was totally worth it. I love how this cake turned out, in both look and flavor. It tastes just like an apple pie! But better, because it’s a cake! The pie crust between the layers is a must-do in my opinion, and an easy addition that gives another dimension of flavor and texture. If you love Apple Pie (and really, who doesn’t), you will love this cake.
Apple Pie Cake
Apple Pie Cake! A layer cake recipe with hints of cinnamon and nutmeg, fresh apple pie filling, buttercream frosting and braided pie crust lattice.
- Yield: One 6” Round Cake (3 layers)
- Category: ✽ ✽ ✽ ✽ ✽
Ingredients
For the Cinnamon Brown Sugar Cake:
- 1 ½ cups all-purpose flour
- 1 ½ teaspoons baking powder
- ½ teaspoon salt
- 1 teaspoon cinnamon
- ¼ teaspoon nutmeg
- pinch cloves
- 1 ½ tablespoons cocoa powder (optional – for color)
- ½ cup unsalted butter (room temperature)
- ½ cup granulated sugar
- ½ cup light brown sugar (packed)
- 2 large eggs (room temperature)
- 1 teaspoon vanilla extract
- ¾ cup buttermilk (room temperature)
For the Apple Pie Filling:
- 2 ½ cups peeled & chopped Granny Smith apples (about 2 apples)
- 2 teaspoons lemon juice
- ¼ cup granulated sugar
- ¼ cup light brown sugar (packed)
- 2 tablespoons cornstarch
- ½ teaspoon cinnamon
- pinch nutmeg
- pinch salt
- 1 cup water
For the Vanilla Buttercream Frosting:
- 3 large egg whites
- 1 cup granulated sugar
- 1 ½ cups unsalted butter, cubed (room temperature)
- 1 teaspoon vanilla extract
For the Pie Crust Inside the Cake, Accents, & Braid:
- Two 11” store bought pie crusts (or homemade)
- 1 egg lightly beaten with a splash of milk
- Pie crust cutters
For the Pie Crust Lattice:
- Two 11” store bought pie crusts (or homemade)
- 1 egg lightly beaten with a splash of milk
- 6” cake ring
Instructions
Make the Cake:
- Preheat oven to 350F and grease and flour three 6″ cake pans, line bottoms with parchment.
- In a medium bowl, whisk together flour, baking powder, salt, cinnamon, nutmeg, cloves and cocoa powder until well combined.
- Using a stand mixer fitted with the paddle attachment, beat butter until smooth. Add sugar and beat on med-high until pale and fluffy (2-3 minutes).
- Reduce speed and add eggs one at a time, fully incorporating after each addition. Add vanilla extract.
- Alternate adding flour mixture and buttermilk, beginning and ending with flour (3 additions of flour and 2 of milk). Fully incorporating after each addition. Do not overmix.
- Spread batter evenly into prepared pans. Smooth the top with a spatula.
- Bake for approximately 30 minutes or until a toothpick inserted into the center comes out mostly clean.
- Place cakes on wire rack to cool for 10 minutes then turn out onto wire rack to cool completely.
Make the Apple Pie Filling:
- Toss chopped apples in lemon juice, set aside.
- In a medium saucepan, combine sugar, brown sugar, cornstarch, cinnamon, nutmeg and salt. Add water and stir to combine. Bring to a boil over medium heat, stirring occasionally. Cook for 2 minutes.
- Add chopped apples and bring back to a boil. Simmer until apples are tender (approximately 10 minutes). Remove from heat and cool completely before using on cake.*
Make the Vanilla Buttercream Frosting:
- Place egg whites and sugar into the bowl of a stand mixer**, whisk until combined.
- Place bowl over a pan of simmering water to create a double-boiler. Whisking constantly, heat the egg mixture until it registers 160 degrees on a candy thermometer. Carefully transfer the bowl onto the stand mixer.
- Using the whisk attachment, beat the egg white mixture on high speed for 8 to 10 minutes until the bowl is no longer warm to the touch and the meringue is fluffy, glossy and holds a stiff peak.
- Switch to the paddle attachment. With the mixer on low, slowly add cubed butter and mix until incorporated.
- Add vanilla and whip on medium-high until silky and smooth, about 3 to 5 minutes.***
Make the Pie Crust Inside the Cake, Accents, & Braid:
- Preheat oven to 400F and line a baking sheet with parchment.
- Roll out each crust and cut out two 7” circles. They will shrink a bit, so it’s important that they are larger than the 6” cake. I placed a 6” cake pan on top of the crust and used my knife to cut out a slightly larger circle.
- Re-roll the dough and cut 3 long ¼” wide strips for the braid. Trace a 6” circle onto parchment. Braid the dough and place it on the outside of the circle (again, it will shrink a bit so make it a tad bigger). Cut more strips and braid as needed until the braid goes all the way around the circle.
- Use remaining pie dough to cut out leaves and flowers if desired. Re-roll pie dough as needed.
- Transfer pie discs, leaves, braid, and flowers onto baking sheet. Using a pastry brush, lightly brush with egg wash.
- Bake for 15-17 minutes or until golden. Cool completely on pan.
Make the Pie Crust Lattice:
- Preheat oven to 400F. Place oven rack in lowest position. Place a 6” cake ring on its side on a sheet pan. Anchor it as best as possible to prevent it from rolling. I used two folded silicone baking mats around the sides. Lightly spray outside of cake ring with cooking spray.
- Roll out pie dough and cut into ½” strips. Take 4 of the longest strips and place them together. Use the other strips to create a lattice effect. I used a small brush dipped in water to help adhere the pie dough pieces to each other.
- Trim edges and cut lattice into 6” sections.
- Repeat until you have enough to go around the cake. Apply leaf and flower cutouts using the egg wash as glue if desired.
- Place a 6” lattice section on top of the cake ring. Using a pastry brush, lightly brush with egg wash.
- Bake for 15-17 minutes or until golden. Cool completely on cake round.
- Very carefully, transfer to parchment lined baking sheet.
- Repeat with remaining sections.****
Assemble the Cake:
- Place one layer of cake onto a cake stand or serving plate. Spread a thin layer of frosting on top and place a disc of pie crust on top. Using a large round tip, pipe a dam of frosting along the top of the pie crust to hold the filling.
- Top with approximately 1/2 cup of apple pie filling and spread evenly.
- Repeat with next layer and place final cake layer on top. Crumb coat the cake and refrigerate for 30 minutes.
- Frost the cake and smooth the sides and top. Apply lattice or pie crust cutouts to decorate as desired.
Notes
* If filling appears too thick while cooking, add a bit of water. I let mine sit in the fridge overnight, so it thickened up quite a bit. You can microwave it in 30 second intervals to thin it out and bring to room temperature.
** Ensure there is NO trace of egg yolks in your whites and that your mixer bowl and whisk is completely grease free or your meringue may not stiffen.
*** The buttercream may look like it’s curdled at some point. Keep mixing until it is completely smooth.
**** The lattice will be very fragile so be careful when removing from cake ring and transferring to cake. I had many, many pieces break, even the ones on the final cake (you can hide some of the broken ones in the back).
YOU MAY ALSO ENJOY:
Apple Toffee Crunch Cake
Apple & Goat Cheese Cake
Apple Crumb Cake
Baked Apple Donuts
Apple Pie Cupcakes
Pie Crust Cookies



Sounds so yummy, question on filling can it be kept at room temperature
Hi Leana! It can survive a few hours at room temperature for sure, but after that I’d store it in the fridge.
Hi Olivia ! This kind of cake can be frozen?
Hi Carolanne! It should freeze just fine. I haven’t frozen the entire cake, but I portioned it into pieces and froze those.
I’m curious if you made your own pie crust. I usually make my own but because there are a lot of steps to this I think I may just purchase the crust. Also I would assume you couldn’t freeze
leftovers due to crust/apple filling? I will be making this over the weekend as it sounds and looks absolutely beautiful.
Hi Pam! I used store-bought crust for ease. Making pie crust is not one of my favourite things to do :). I portioned the cake and froze the pieces. They should keep fine though the pie crust might soften up a bit. Please let me know how you like it!
Hi Olivia,
I just made the cake part and it’s nowhere near as thick as your picture. Mine look like pancakes! I did everything just as you said and used the exact measurements, but they’re really ugly.
I wanted to make this for a baby shower in 2 weeks, but I would need to 10x the recipe! I’m totally flummoxed.
This recipe calls for 6″ round pans, which are on the smaller side. Take a look to see what size pans you used – using a larger sized pan would result in thinner layers. Perhaps this is the culprit! 😉
Thanks for this wonderful recipe! I just made the cake today and it is delicious. However, as someone else who commented below, my batter did not leave me with the ability to make 3- 6″ round pans. I got batter enough for 2 pans that yielded two cakes roughly an inch and a half high. I would need to double or triple the batter to get a cake as high as the one in the picture. I measured everything exactly and followed the recipe (daughter was there to double check everything). Delicious nonetheless!
I know this is a super late reply but I often scale these recipes up to 10″ cakes to feed larger crowds and have found this resource invaluable for scaling recipes:
https://www.sweet2eatbaking.com/conversion-guide/#upscale-downscale-multiply-cake-recipe-ingredients-chart
For example, if you are taking this recipe and want to scale up for a 3 layer 9″ cake, multiply everything in this recipe by 2.5. For 10″ cake pans, multiply by 3. For 8″ cake pans, multiply by 2.
I usually calculate out the weight of the dry ingredients according to grams per cup; it makes it a lot easier to scale recipes.
Can this be made into cupcakes?
So many things that I love about this cake! I love the look of the crust braid on top and along the sides, I love having pie filling rather than icing between the cake layers because personally I’d rather eat all cake and no icing so I’m always trying to think of different things to fill a cake with, and I love how many cake/pie combo ideas this cake is giving me! So great!
I need enough to serve our whole family for my son’s birthday. Do you think it could work in a 9×13?
Thank you!!
wow, it’s really super cake recipe.
I love it.
Thank for sharing!!
★★★★★
Wow this cake is looking super delicious, thank you for sharing your blog
★★★★★
I made this cake for a September Birthday celebration at church. I made it in 9 inch pans and 4 layers instead of 3 and tripled the recipe. The pie crust was a little difficult to work with, but with many attempts I figured it out. Everyone loved it, I must say it was very rich and you only needed a small piece of it.
★★★★★
What is cake ring
I have not seen anything like it. It looks amazing! You are very creative.
★★★★★
Just wondering, with so many acidic ingredients in the recipe, why you didn’t use any baking soda? I’m trying to learn about what makes my cakes better and have seen that baking soda is used when there is buttermilk in the recipe. Thanks.
This recipe is really nice, I’m currently making it. The flavor of the cake is very light and delicious. I used my own vanilla buttercream recipe. Although, I agree with some of the other posts, the batter is a very small amount if you want a tall cake like the one pictured. I would double the recipe to achieve that same height. I would’ve today but I ran out of time. There’s no way the one in the picture is done with this small amount of batter for 6” cake pan.
Thanks for the recipe! 😊