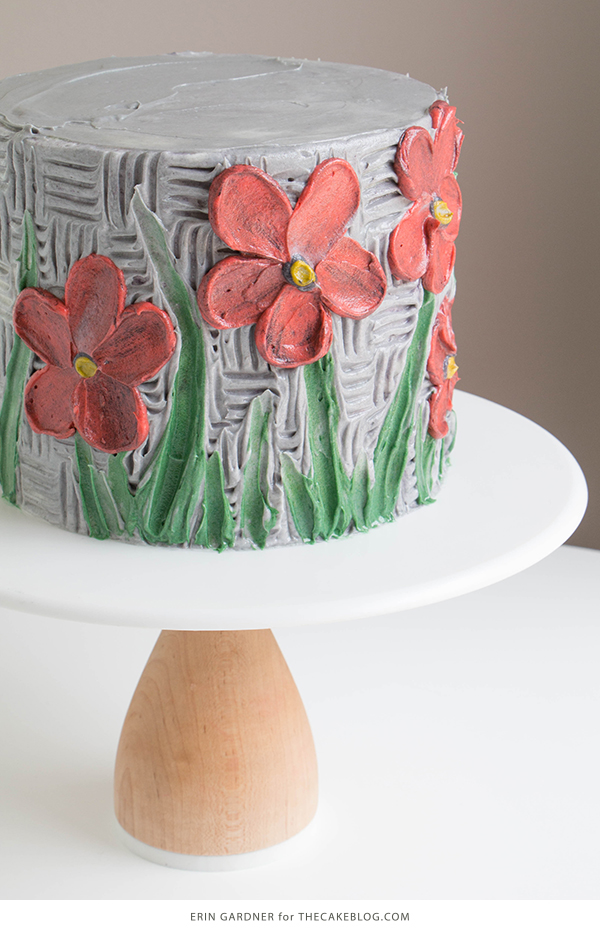
Buttercream Palette Knife Painted Cake – learn how to paint a cake using buttercream frosting, a spatula and an oil painting technique. A new cake tutorial by our contributor Erin Gardner.
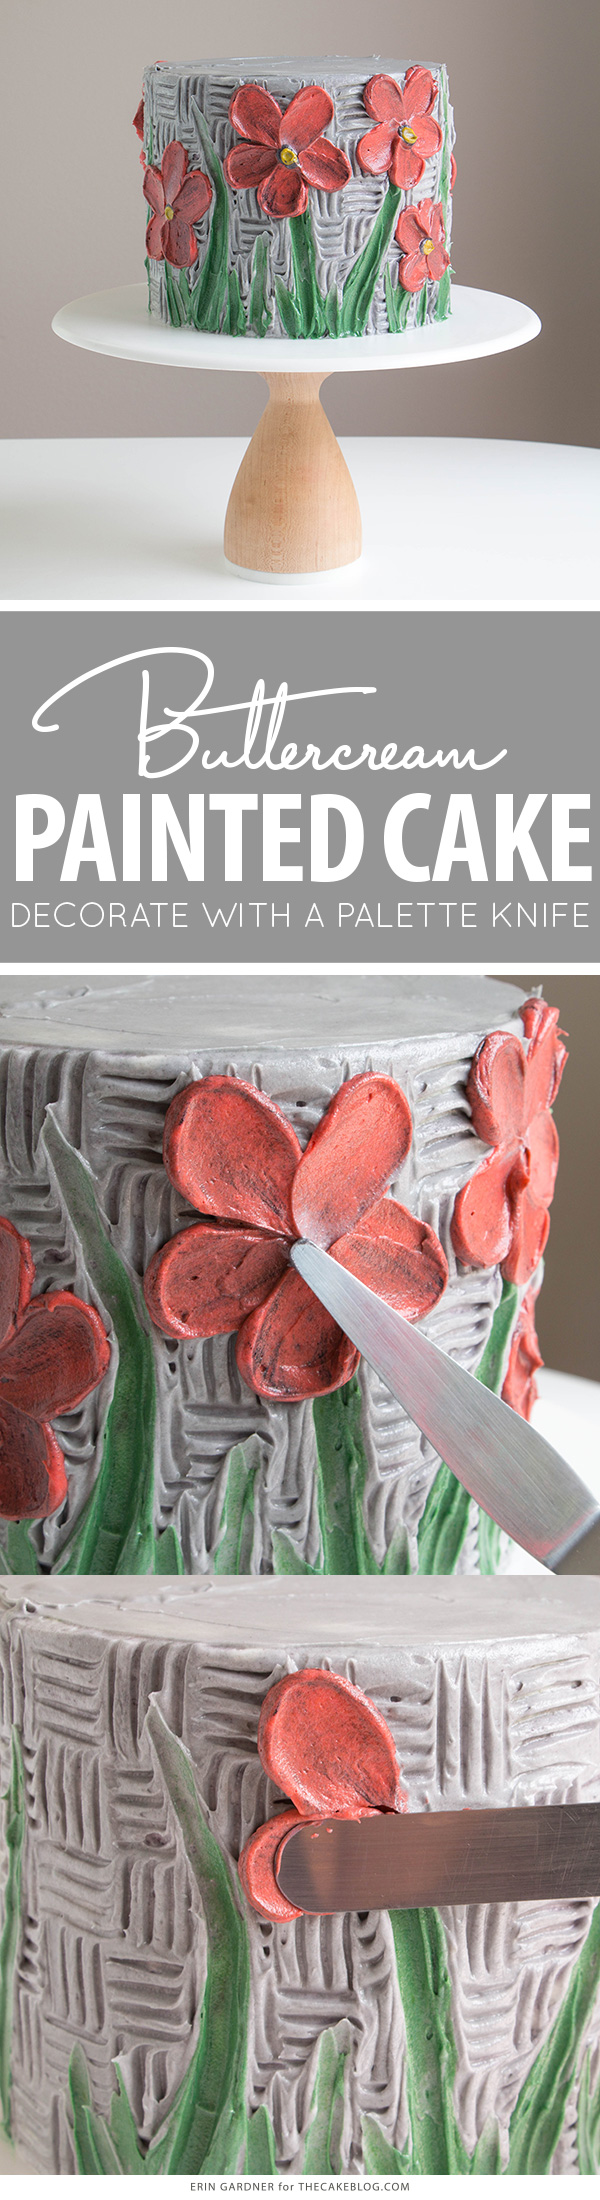
Palette knife painting is traditionally done by smearing dabs of oil based paint on canvas or wood using the blade of a palette knife. The result is a painting that is textured, dimensional, and kind of looks like buttercream! Superstar cake makers like Sweet Bloom Cakes and Queen of Hearts Couture Cakes have helped to popularize this technique within the baking community with their gorgeous floral designs.
In this post I’m tackling the trend using tools most cake decorators already have on hand – a fork, icing spatula, and that tapered spatula that came with the set that you’ve never really known what to do with. If you’re intimidated by this trend, don’t be! The whole point of this style is messy, but controlled, imperfection. It’s like a wilder, free-form, and easier to tackle version of brush embroidery. Give this technique a try and replicate my modern, stylized poppies, create bright bold florals like Queen of Hearts, or whip up oversized pastel textural blooms like Sweet Bloom Cakes.
What kind of buttercream frosting should I use for a painted cake?
Obviously, spreading and smearing can be done with any kind of buttercream! After experimenting with both Swiss Meringue Buttercream and American Buttercream, I can report that both work beautifully, but with subtle differences. SMBC will color and spread nicely, but warms up quicker and becomes a little trickier to deal with. It also develops a translucent quality as it warms up. That’s not a bad thing, just something to keep in mind as you plan out your design. I found it worked better with pastels. American buttercream stayed workable longer, but sets up thicker and retains a matte finish. I chose American buttercream for this design because I was using deep, bold colors and wanted a thicker look to the finish. Use whichever frosting accomplishes the look you’re going for.
BUTTERCREAM PALETTE KNIFE PAINTED CAKE
a tutorial by Erin Gardner
Supplies:
- 6-inch round crumb coated layer cake
- Approximately 6 cups of American Buttercream
- Black, green, red, orange, and yellow gel food coloring
- Icing smoother or large straight icing spatula
- Fork
- Tapered offset spatula
- Small icing spatula
PREP THE BASE
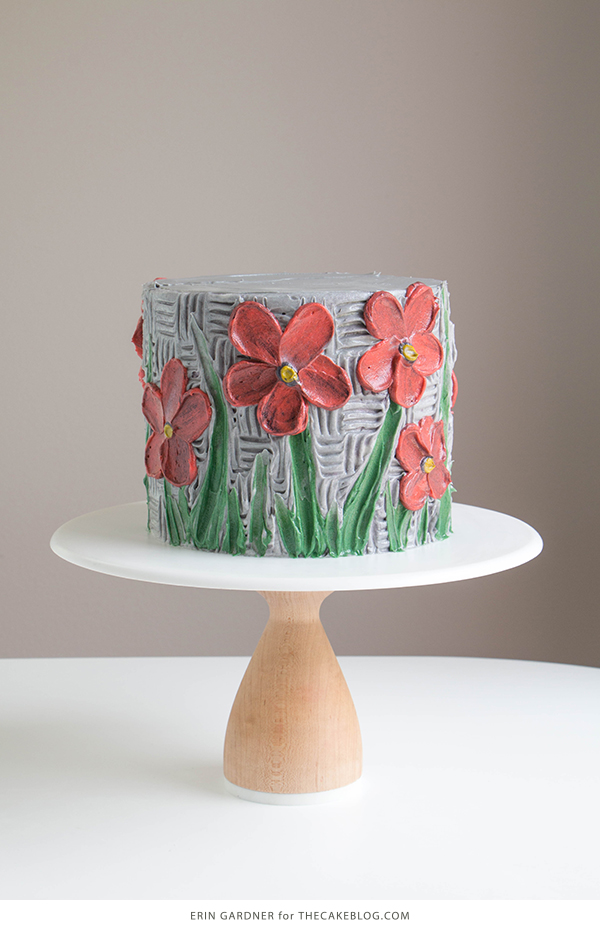
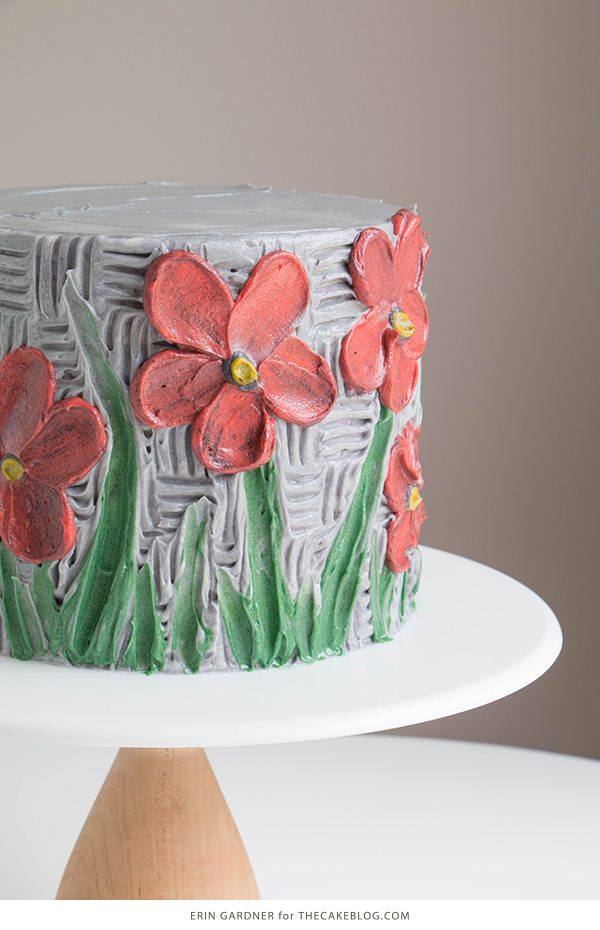
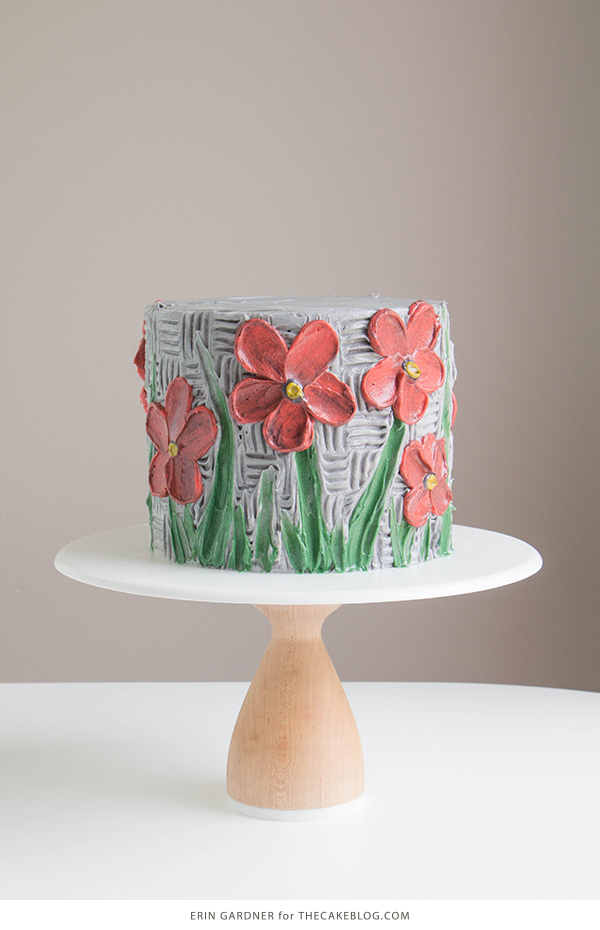
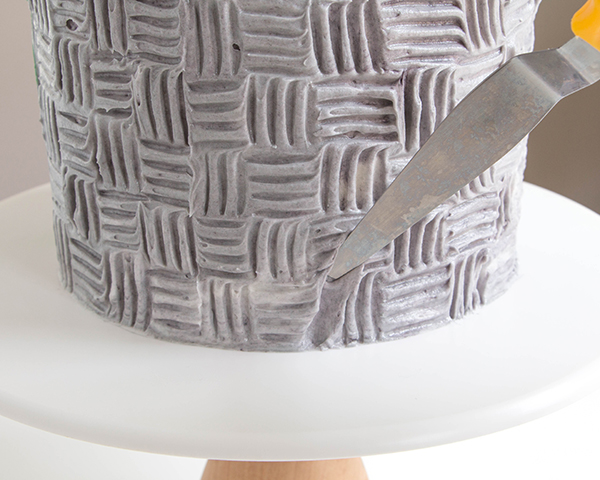
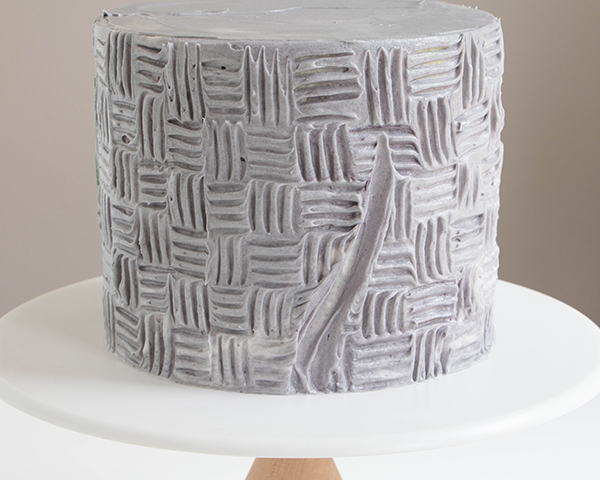
Add a few drops of black food coloring to the plain buttercream. Fold the color into the buttercream leaving lots of streaks. Use the streaky buttercream as the cake’s thicker finishing coat of buttercream. Smooth the top and sides with a large icing spatula or bench scraper until just #smoothenough. No need to worry about sharp lines here. Save the leftover buttercream for painting the flowers and leaves.

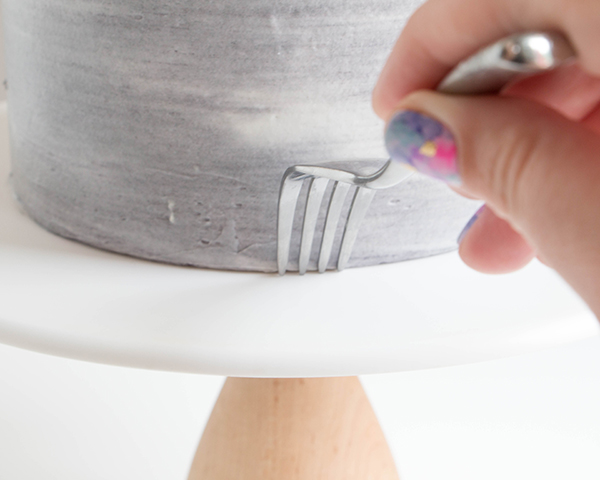
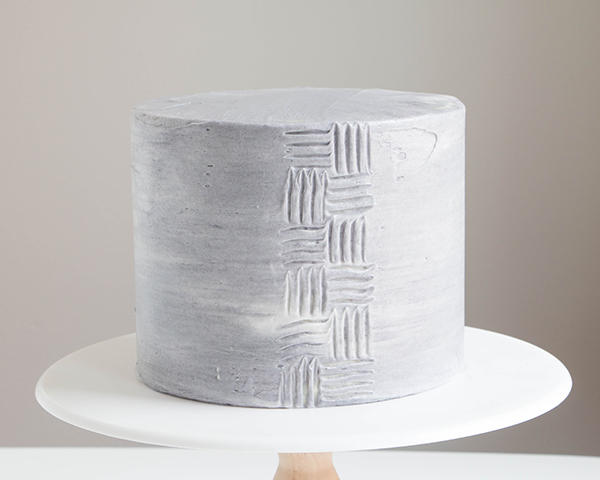
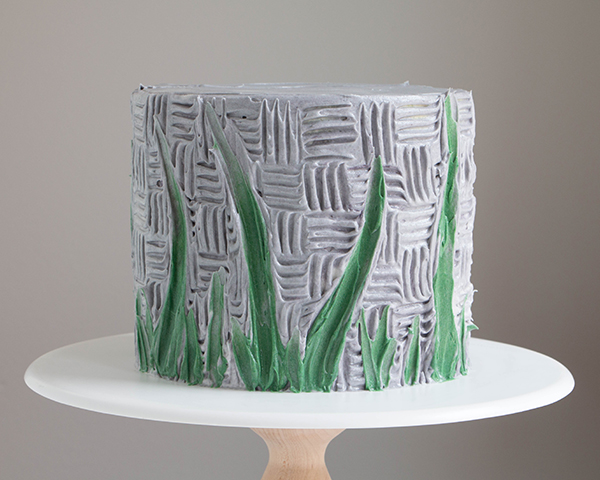
CREATE THE BACKGROUND TEXTURE
Place the tines of a fork at the base of the cake so that they just pierce the buttercream. Not so deep that they touch the actual cake. Drag the fork upwards about an inch then pull it away. Hold the tines of the fork horizontally above the first set of lines all the way to the left. Drag the fork to the right through the buttercream. Stop when you reach the other side of the first set of lines below. Repeat this pattern up the side of the cake until you reach the top. Start the next row with a set of horizontal lines opposite your first set of lines. Repeat the pattern up the side of the cake, then alternate the pattern all the way around the cake. (It’s far more complicated to write than it is to do. In a nutshell: just go back and forth.)
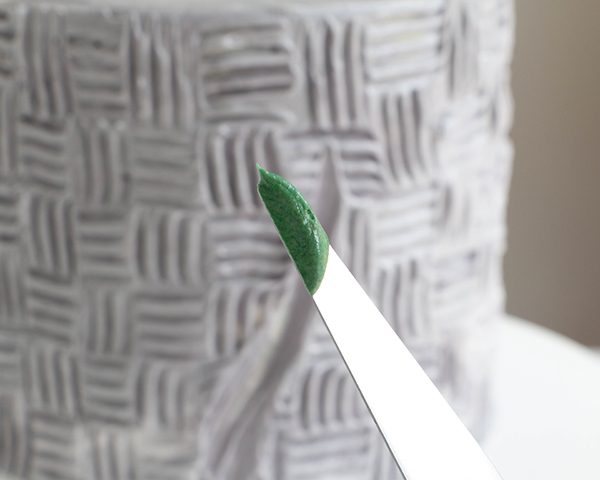
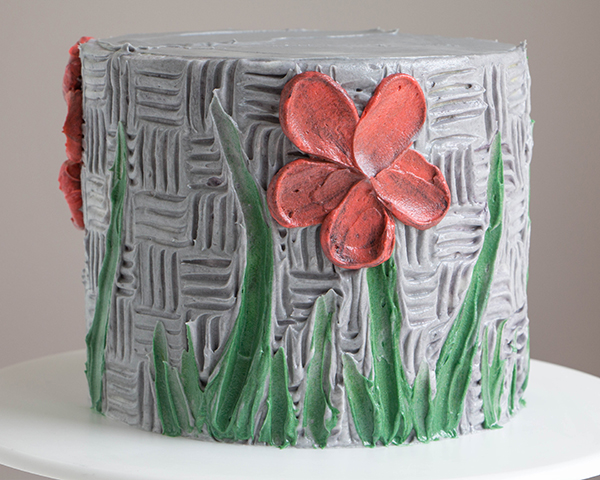
MAKE THE STEMS AND GRASS
Scoop about a cup of the leftover gray buttercream into a small bowl. Add a few drops of green food coloring. Mix the color in the same streaky way as you did the gray.
Starting at the base of the cake, drag the tip of the tapered offset spatula up through the buttercream to create the shape of a stem. Just like with the forking, pull the spatula through deep enough to create a channel, but not so deep that you hit the cake below. Go back through as many times as you need to get the shape that you like. Clean the blade of your spatula after each pass.
Dip the tip of the tapered spatula in the green buttercream. Scoop up a small dollop, then run your immaculately clean finger over the top of the blade to round the outer edge of the buttercream. This is a tiny, but vital step throughout this whole process. When you scoop up a dollop of buttercream from the bowl, the edges will naturally be a little scraggly. Smoothing over the scraggles helps keep the lines of your buttercream painting sharp, clean, and rounded. Go back over the line you created with the green buttercream. Swipe as much as you need to on to create the shape and color that you like.
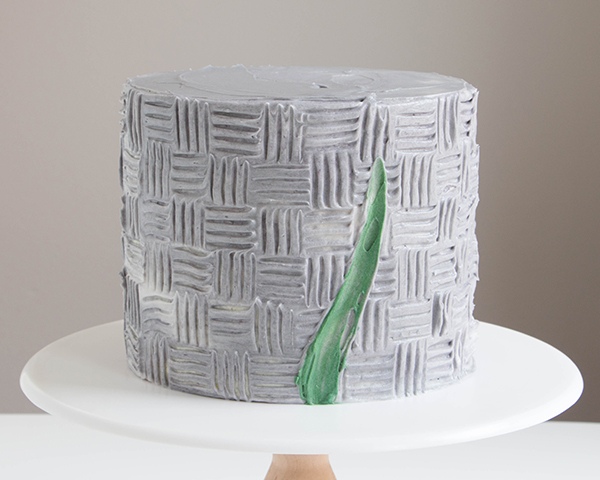
Repeat all the way around the cake.

Once your large stems are done, go back through and add tiny swipes of green up from the bottom of the cake to create blades of grass. No need to create a channel first for the small blades of grass.
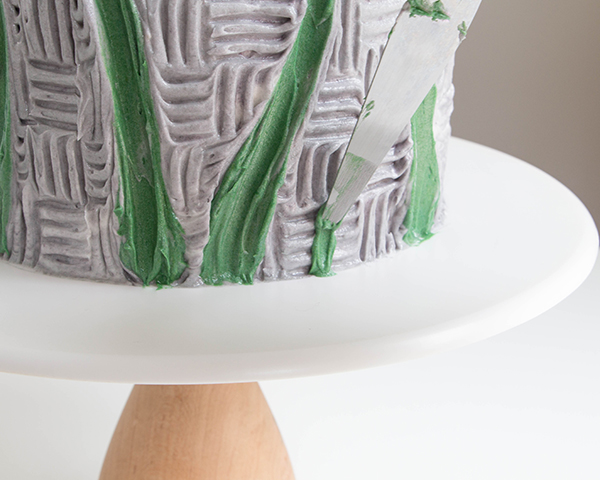
Pop the cake in the fridge for a half hour or so, just long enough to set the buttercream before you move on to the flowers.
PAINT THE FLOWERS
Place about a cup of the gray buttercream into a small bowl. Add a few drops of red and orange gel food coloring, plus a single drop of black. Leave lots of streaks as you mix the color into the buttercream. Swipe up a grape sized dollop of buttercream on the tip of a small icing spatula. Use your finger to smooth over the rounded top of the spatula.
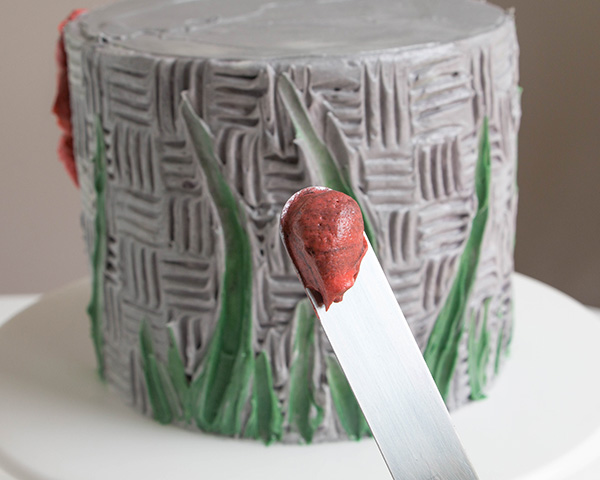
Press the dollop onto the cake using gentle pressure. Pull the spatula down and away from the cake.
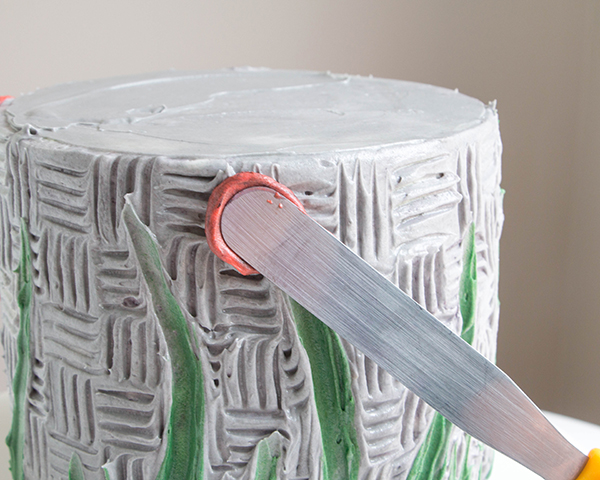


Wipe the spatula clean, scoop up another dollop, and smooth over the rounded edge. Place the spatula to the side of the first petal. Press the dollop onto the cake and pull the spatula down and away over lapping the end of the first petal.

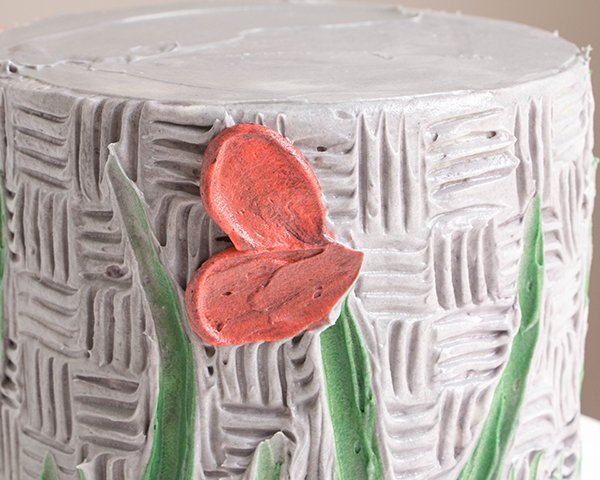
Wipe the spatula clean and repeat 3-4 more times in a circle to create a flower.
Repeat the whole process around the sides of the cake as many times as you like. Don’t concern yourself with being overly neat or precise. If the buttercream gets too soft for you at any point, just return the cake to the fridge for a few minutes.
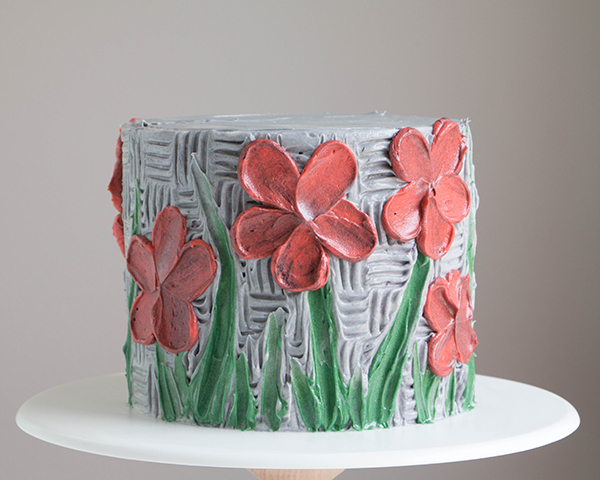
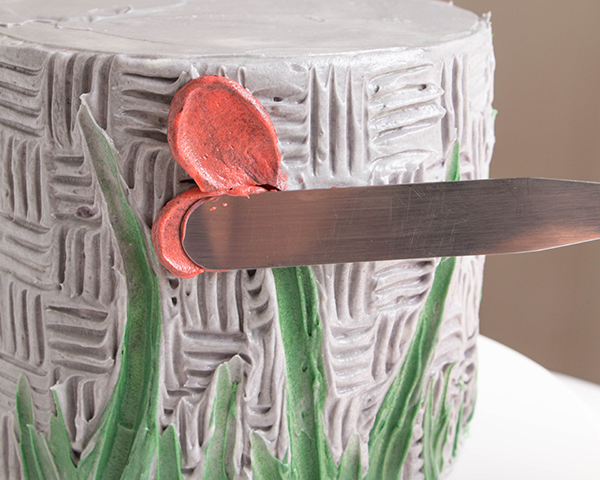
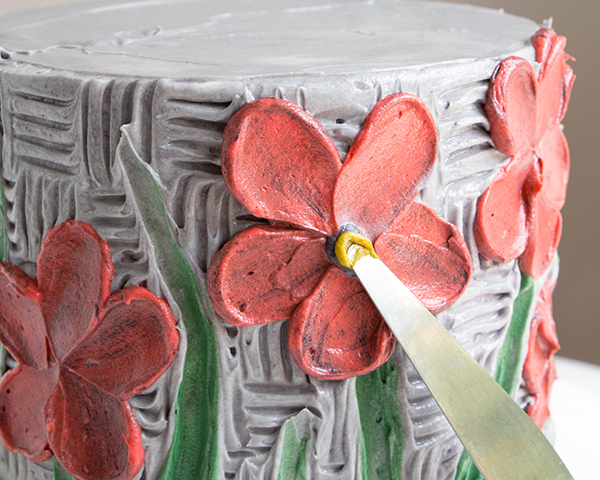
Move a few tablespoons of the gray buttercream to a small bowl. Add a few drops of black buttercream and mix until combined. Use the tapered spatula to scoop up a smaller pea-sized dollop of the black buttercream and smooth the rounded edge. Press the dollop into the center of a flower. Repeat with the rest of the flowers.
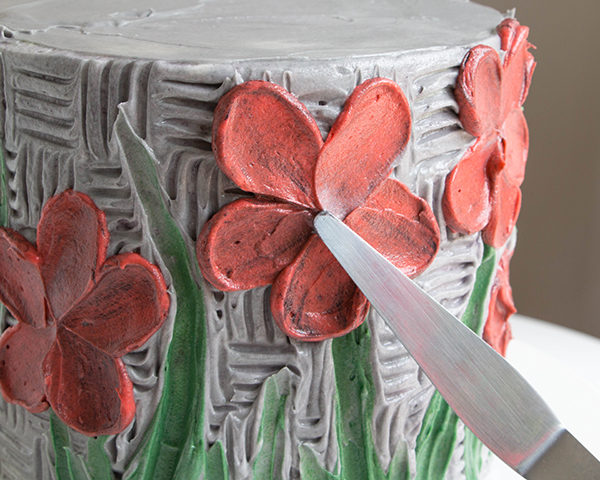
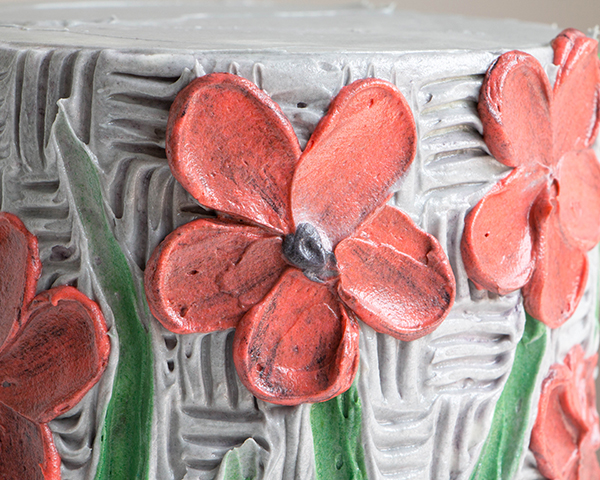
Add a few drops of yellow gel food coloring to the remaining gray buttercream and mix the color in leaving streaks behind. Use the tapered spatula to scoop up a smaller pea-sized dollop of the yellow-ish buttercream and smooth the rounded edge. Press the dollop into the middle of one of the black flower centers. Repeat with the rest of the flowers all the way around the cake.

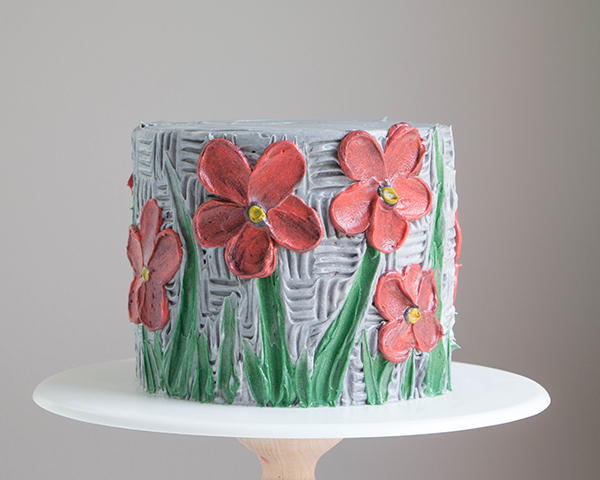
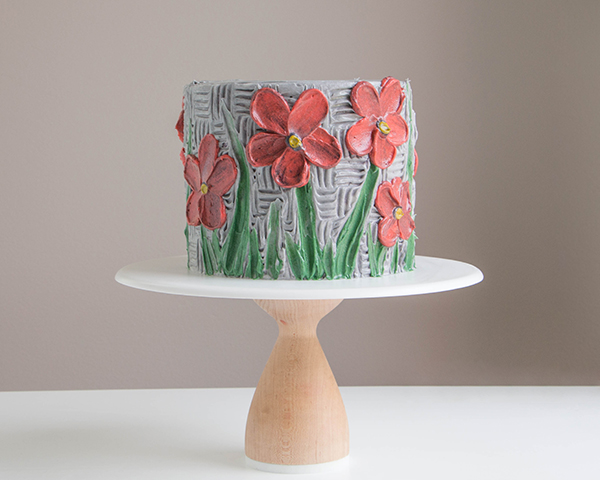
Your painted masterpiece is now complete!
OTHER PAINTED CAKES YOU MIGHT LIKE:
Chocolate Painted Cake
Stencil Painted Rose Cake
Watercolor Buttercream Painted Cake
Watercolor Heart Cake (with Video)
How to Paint a Watercolor Cake


How fun—beautiful. Looking forward to looking at the other painted cakes. Great idea.
Is it hard to colour smbc? For example if I want a deep red or deep green colour what do I need to do to achieve it ?