Our contributor, Robin Martin of Gateaux Inc. is sharing a new holiday cookie tutorial.
It’s the most wonderful time of the year…kids with rosy cheeks, snow-covered rooftops, presents under the tree, and cookies…aah, cookies…guilt-free, left out for Santa so someone has to eat them (for the sake of the kids) cookies.
If you happen to live in 1952, the above is most likely true.
We, however, live in 2014. Those rosy-cheeks are most likely attributed to a mild fever associated with the third head-cold about to make the rounds in your house. The snow-covered rooftops are accompanied by the ice-covered roads that landed you at the body shop after another fender bender, and those presents took you to three different shopping malls in search of the latest talking-bouncing-tweeting-electronic-must-have-toy of the year that no one can keep in stock. And cookies…aah, cookies. The six dozen glorious little potential works of art that turned into your worst nightmare after your cookie decorating party deteriorated into a free-for-all of sprinkles, royal icing, crying kids, and sticky, sticky adults. And if your nephew makes one more purple and orange snowman, you’re going to have to ban him from Christmas for the next few years.
So, here’s my evil little plan for you. Proceed as you must. Be super-Santa mom, but reserve one night for you. One night, after the kids are tucked away and the husband is under the spell of some sporting event on television, pull out those few pristine cookies that you kept far away from the orange and purple snowman kid. Put on some Nat King Cole, pour yourself a hot toddy, and experience a little cookie painting therapy.
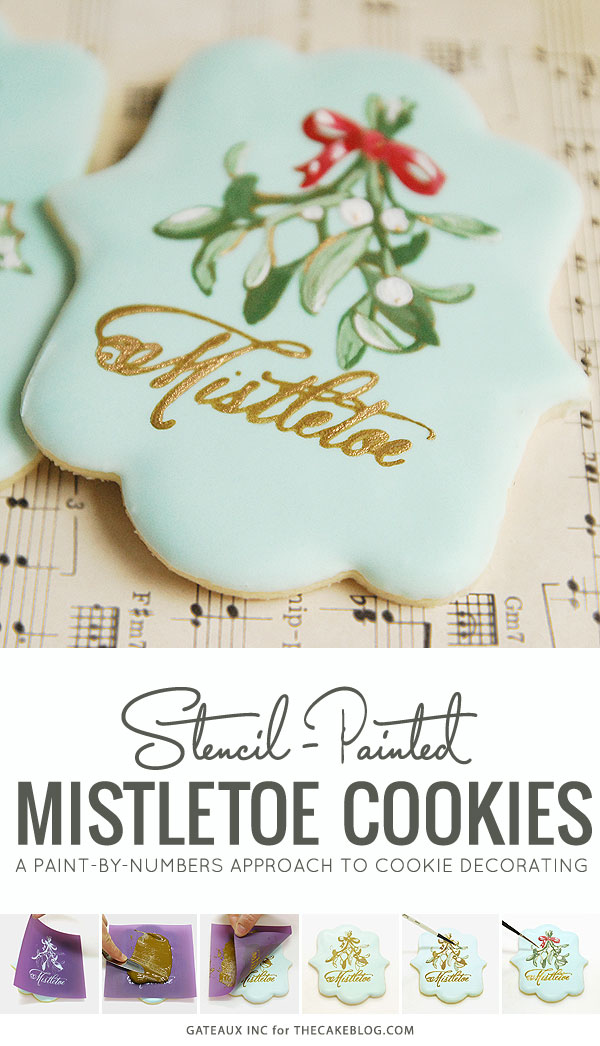
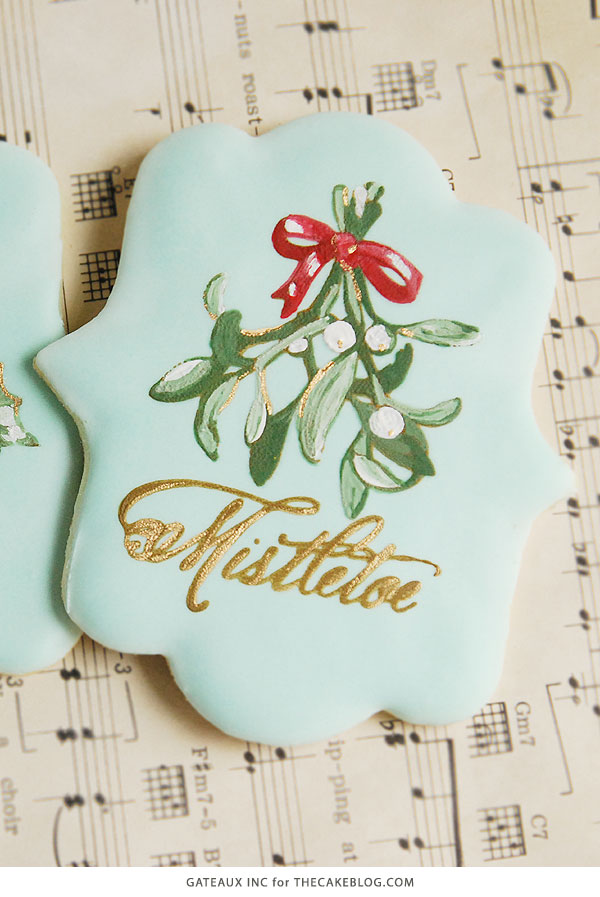
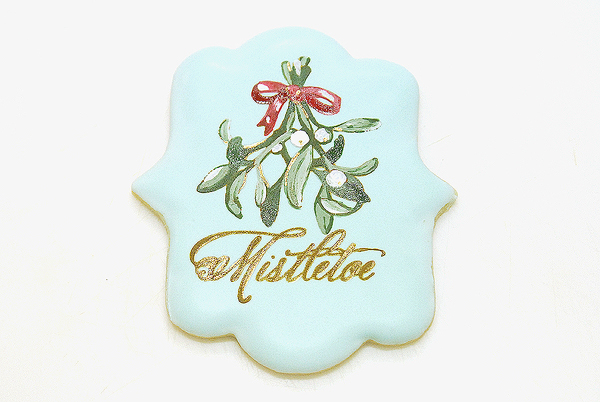
These cookies look like they took a lifetime, but they are actually as easy as those paint-by-numbers kits that you had when you were a kid.
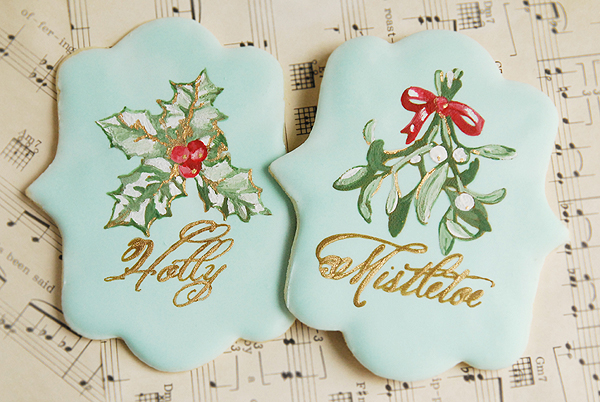
STENCIL-PAINTED MISTLETOE COOKIES
a DIY by Robin Martin
Supplies:
Mistletoe and Holly Outline Mesh Stencil Set
Cartouche Cookie Cutter
Mistletoe and Holly Petal Dust Set
Sugar Cookies
Royal Icing
Food-Use Only Paintbrush
Offset Spatula
Vegetable Oil
Center the Mesh Stencil on a cookie that has been dipped in thinned Royal Icing and allowed to set up (at least 4 hours, but you can dip the cookies a week in advance and keep them in an airtight container until you’re ready to make your move). Don’t worry, the mesh stencils come with full instructions for dipping the cookies perfectly and quickly!
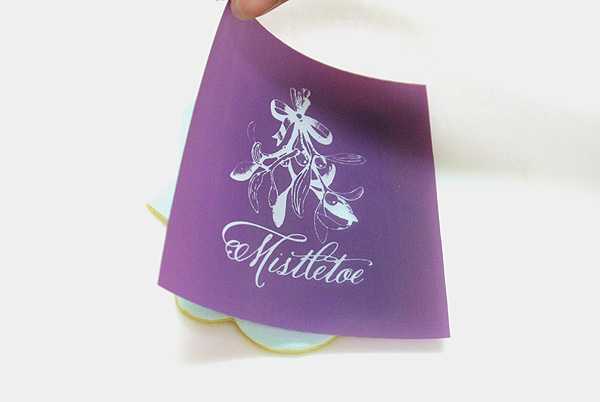
Spread thinned Royal Icing over the Mesh Stencil, then using the same spatula, remove any excess Royal Icing until you can see the pattern of the stencil again.
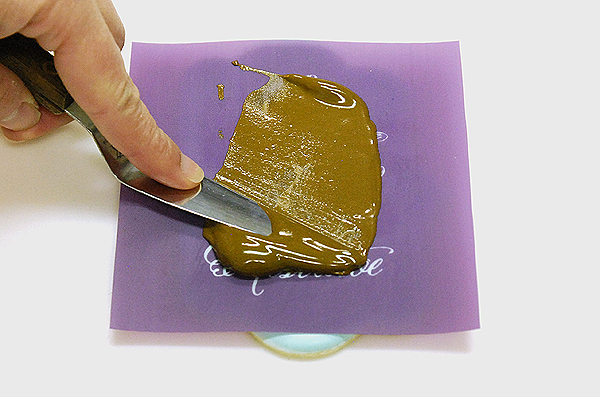
Immediately remove the Mesh Stencil
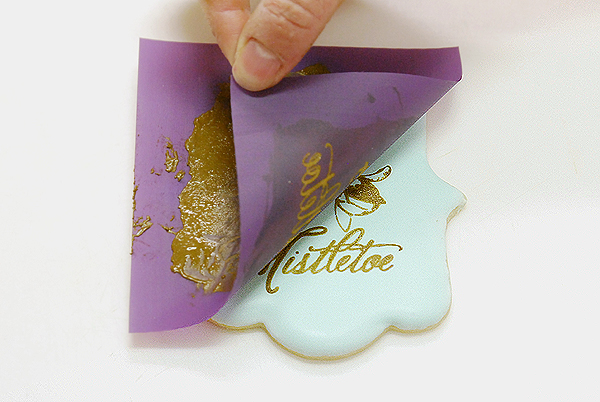
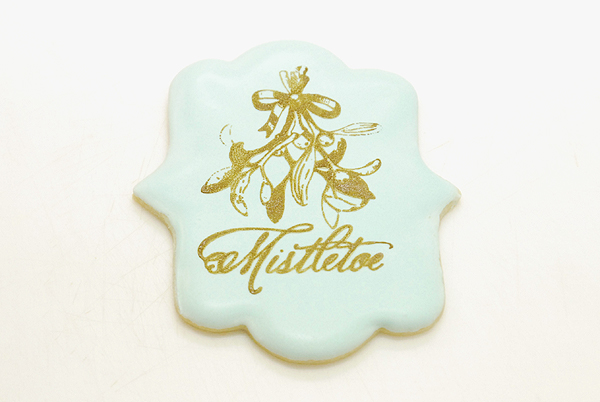
Mix White Petal Dust powdered food coloring with a bit of cooking oil until it is the consistency of oil paint. Paint the white areas of the Mistletoe design.
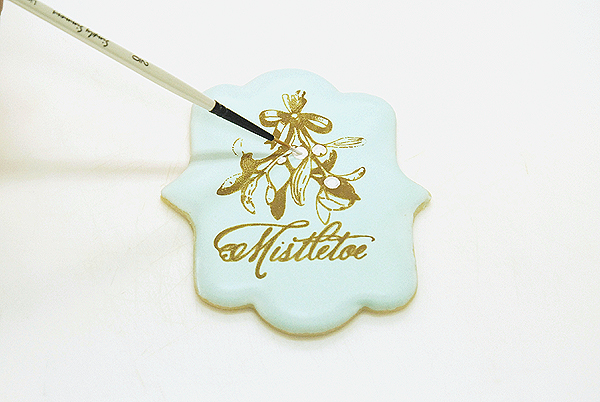
Mix Jade Petal Dust with White Petal Dust and cooking oil to create a pale green paint, then paint the pale green areas of the Mistletoe design.
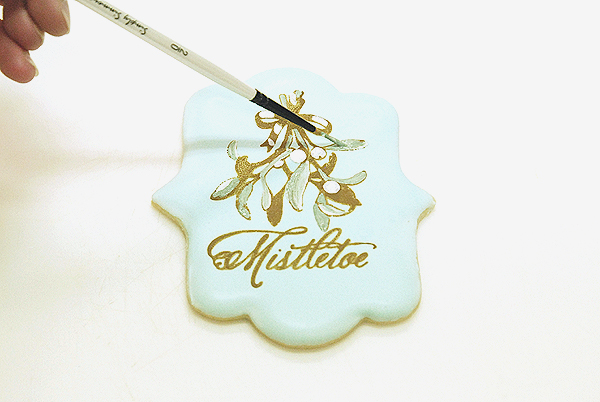
Mix Jade Petal Dust with cooking oil to create a dark green paint. Use this color to paint over the solid stenciled areas and the stenciled outlines of the leaves and branches.
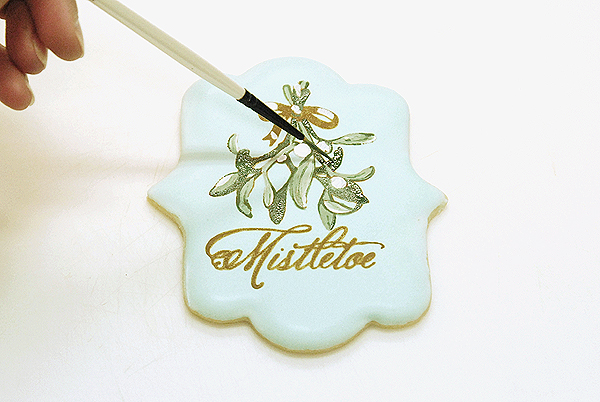
Mix Geranium Red Petal Dust with cooking oil to paint the bow. Blend the red paint into the white highlighted areas.
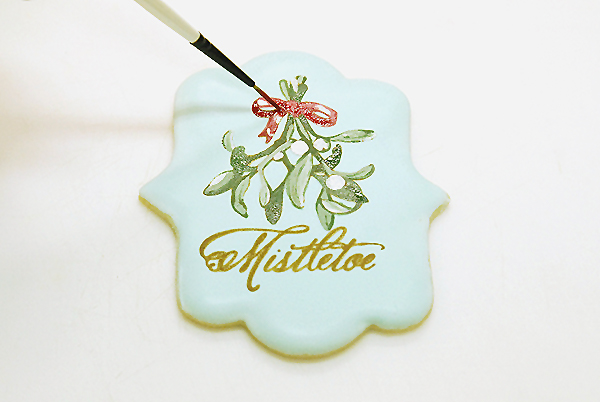
If you like, mix Gold Powder or Luster Dust with cooking oil and add dots to the Mistletoe berries and highlights to the leaves and text.
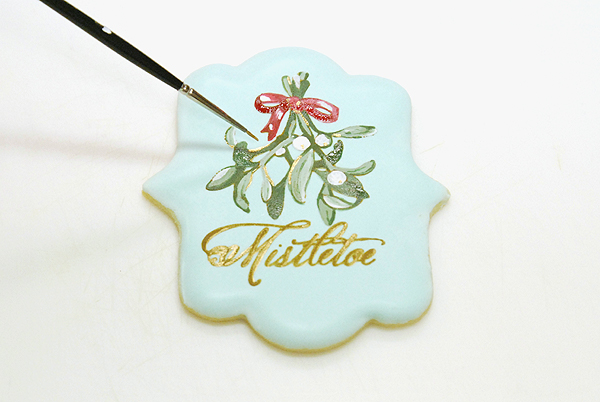
Take a moment to reflect on your artistic prowess. Paint a few more cookies, and plot out who amongst your friends and relatives get these little beauties. The fat man in red can eat the purple and orange snowmen that your nephew made, these are all yours.

VENDORS & CREDITS
Cookie Tutorial : Robin Martin of Gateaux Inc.
Supplies : evilcakegenius.com
YOU MAY ALSO ENJOY:
Winter Hat Cake
Christmas Cupcake Wreath
Igloo Cake
Chocolate Poinsettia Cake
Sugar Mistletoe
Find all of our holiday recipes and tutorials in our Christmas Gallery!



Very pretty! How did you make the gold royal icing?
I am wondering as well…
The Royal Icing is tinted a matte caramel “gold” color for the stenciling, then painted with a mixture of gold powder and vodka to highlight afterwards.
So delicate and lovely! Does the dust dry the same with oil as it does with vodka? I’m trying to wrap them and would hate for the work to smear.
Thanks Liz! The dust will dry when mixed with oil. It usually takes a couple of hours. You can speed it up by aiming a box fan at the cookies, or you can spray them with a light coat of Shell and Shine Edible Shellac to set them instantly.
Does it dry or will it smear because of the oil?
The dust will dry when mixed with oil. It usually takes a couple of hours. You can speed it up by aiming a box fan at the cookies, or you can spray them with a light coat of Shell and Shine Edible Shellac to set them instantly
how to i can get the Mistletoe and Holly Outline Mesh Stencil Set?
There is a link in the supply list above to purchase the stencil set online. Enjoy!
Thank you! Could I trouble you for instructions on how to make the gold icing over the stencil? These are beautiful!
The only comment to be answered is where to get the stencil? Really??
DO THESE. DRY OR WILL THEY SMEAR??????
HOW DO YOU MAKE THE GOLD. DUST ROYAL ICING?????
Hi there Rayne! There’s no need to yell, I simply don’t have the answers for you at this time. I will reach out to the folks at Evil Cake Genius – the creators of both the stencil and the tutorial – to see if they’d be kind enough to answer these questions for us. Thanks for your patience and understanding. Happy Thanksgiving!