
Our contributors, Mary and Brenda Maher of Cakegirls, are back with a new step-by-step cake tutorial!

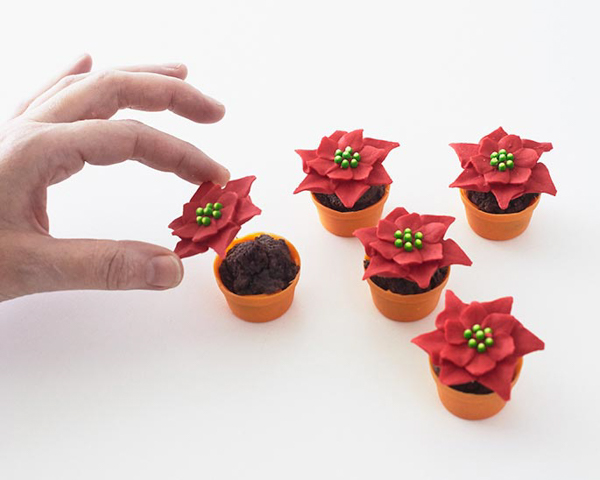
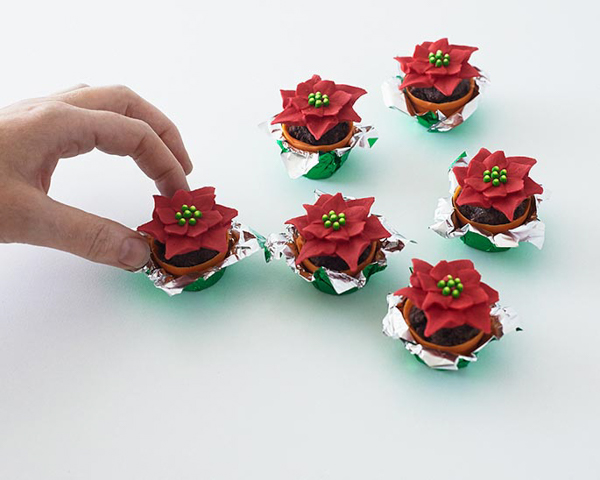
During the Holidays, there’s an abundance of parties and pot-lucks to show off your baking skills. But, in a sea of cookie trays, how can you stand out? Well, with Mini Poinsettia Cakes, of course! They’re bite size, delicious and ridiculously cute. Your friends will be tickled by these miniature versions of the real thing and have the perfect excuse to pass up the fruitcake all together. The best part is that they’re a cinch to make.
An inexpensive chocolate mold gets a layer of melted candy coating, press in some cake pop filling or crushed brownies and you’re already half way there. We’ve added ready to use royal icing poinsettia flowers to make things even easier, but if you’re a skilled piper, then by all means make homemade royal icing flowers a few days ahead to allow for drying time. The optional added touch is the crinkled candy foil wrapping, which makes these little treats look like the iconic poinsettia pots from your local garden center. So, give these mini poinsettia cakes a try and watch your guests’ eyes light up like Christmas bulbs.

MINI POINSETTIA CAKES
a tutorial by Cakegirls
Supplies:
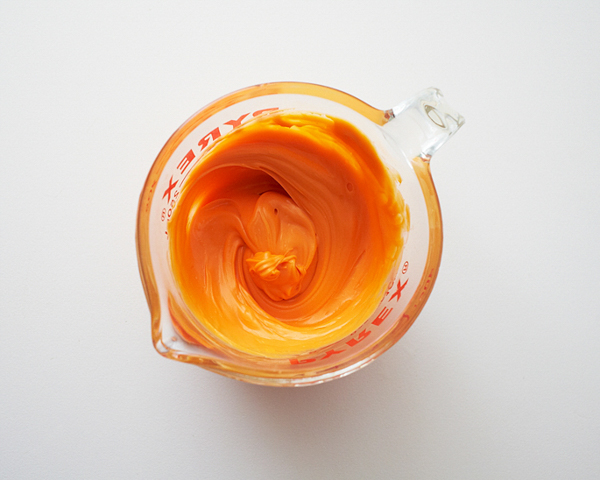
Orange Candy Coating
Mini Flower Pot Chocolate Mold
Royal Icing Poinsettias
Candy Foils
Paintbrush
STEP 1: MAKE AND FILL FLOWER POTS
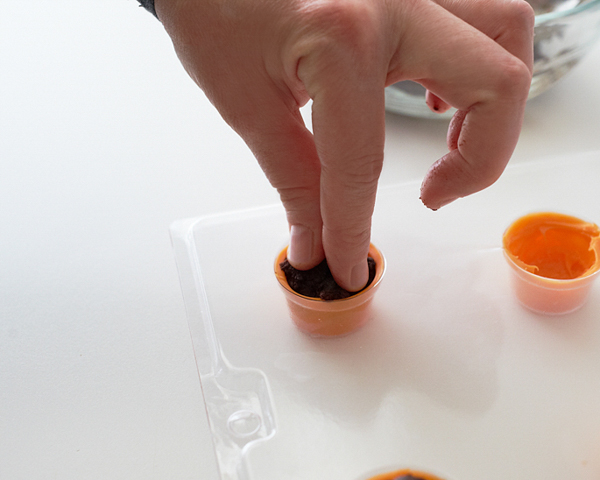
Start by crumbling your brownies into a bowl. Make sure the mixture is as fine as possible and doesn’t have a lot of lumps. You could also use chocolate cake pop filling instead of brownies.

In a microwaveable bowl, place some orange candy coating and heat on half power. Remove and stir every 30 seconds until completely melted. Do not overheat the coating or it could burn.
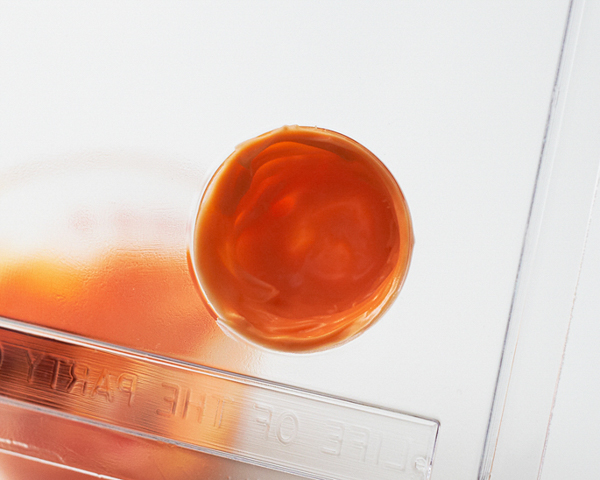
Using a paint brush, dab melted coating inside the mini flower pot chocolate mold, creating a 1/8″ shell. Once you have all the pots coated, place the mold in the fridge for 5 minutes.
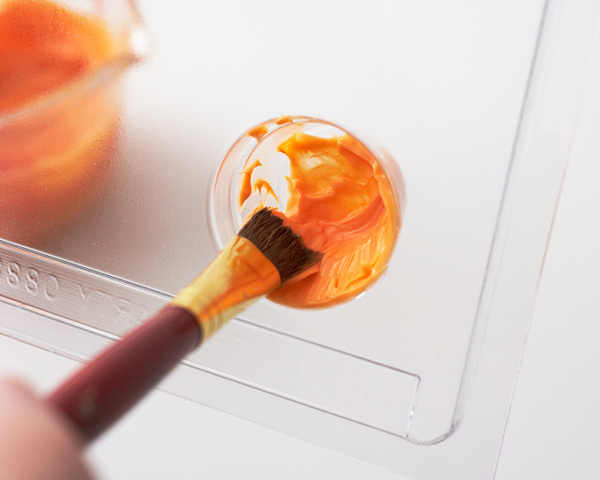
Remove the mold from the fridge and hold it up to the light. Add additional dabs of coating anywhere you think the pots might need it until they look thoroughly coated.
Fill each pot with mounded brownies, pressing firmly. Once the pots are full, place the mold in the freezer for 15 minutes. Remove the mold and carefully pop the flower pots out.
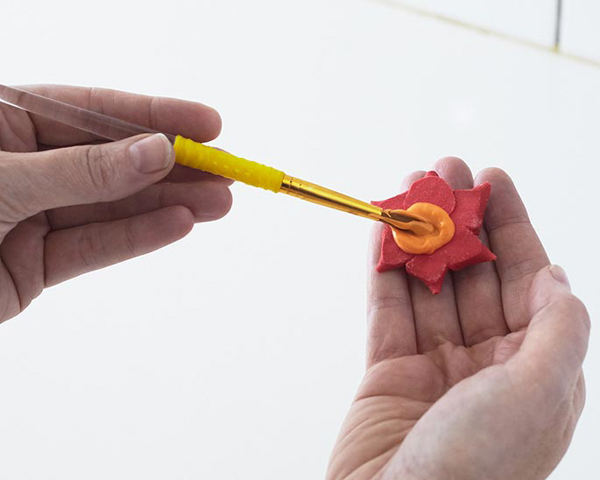
STEP 2: TOP WITH POINSETTIAS
Dab some melted coating on the back of each flower and place on top of a pot.
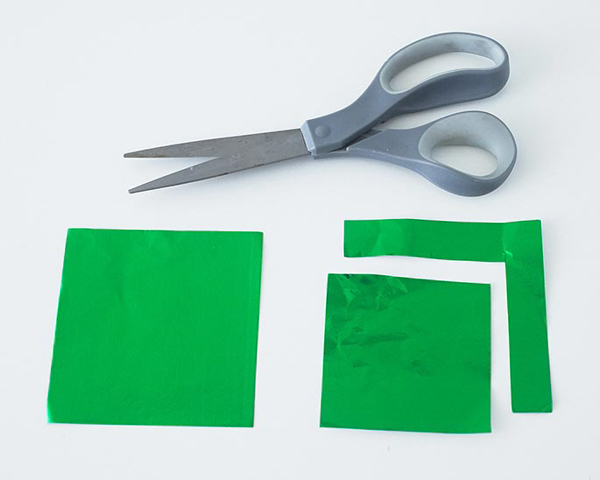
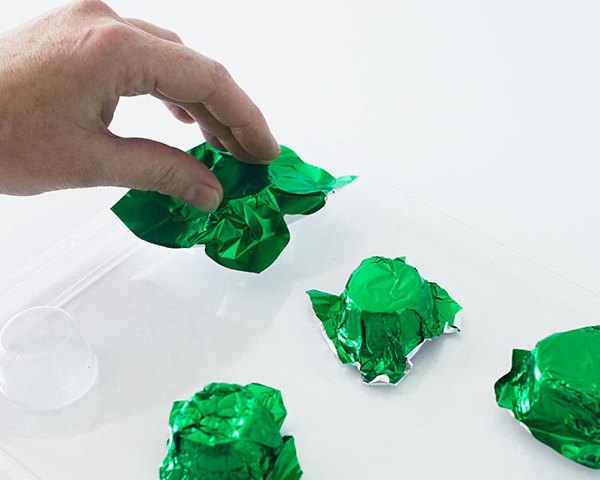
STEP 3: WRAP POTS WITH FOIL
Cut your 4″ x 4″ foil square down to a 3″ x 3″ square.
Press the foil on the back of the chocolate mold to create the molded pot shape and drop a pot into each foil.

YOU MAY ALSO ENJOY:
Winter Hat Cake
Christmas Cupcake Wreath
Igloo Cake
Chocolate Poinsettia Cake
Sugar Mistletoe


So adorable and creative!
I clicked the insta link because I was ready to scoff at your idea of “a cinch,” but these actually look really easy and are so adorable! I’ll keep an eye out for those chocolate molds now!