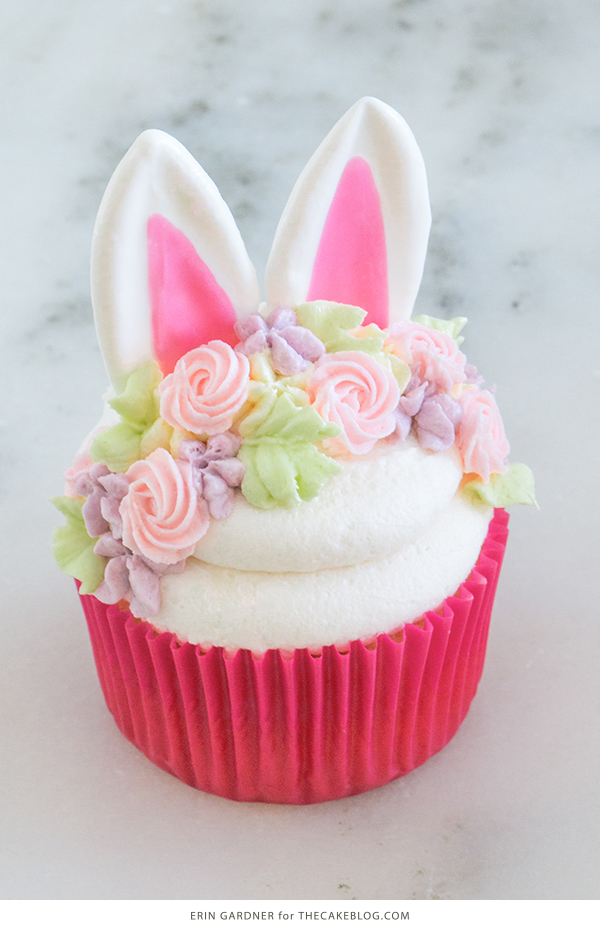
Easter Bunny Cupcakes – how to make adorable bunny cupcakes with easy chocolate ears. A new tutorial by our contributor Erin Gardner.
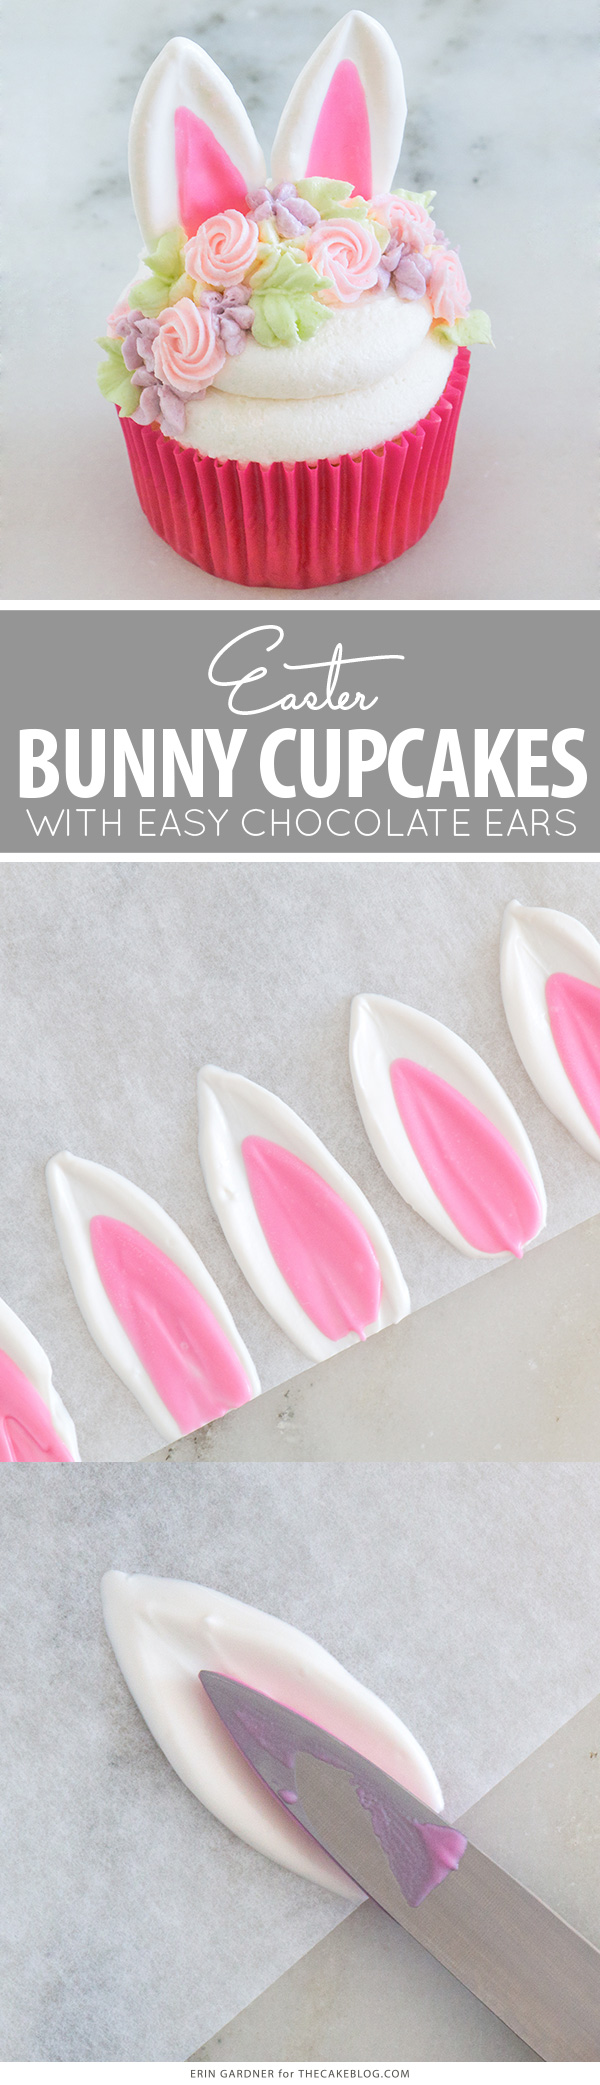
With Easter just a hop, skip, and a jump away, I decided it was time to work my magic at updating a classic – bunny ear cupcakes! I’ve seen fondant ears, marshmallow ears, and piped chocolate ears, but never smeared ears like we have right here. (Sorry, couldn’t help myself.) If you’ve been following along with my chocolate adventures for any length of time, then you’ve seen me use this technique to make all kinds of chocolate flower petals. Lucky for us, it also makes the perfect set of edible and delicious bunny ears!
Also lucky, it’s easy to whip up a ton of these in a flash well in advance of the big day. Whether you make them with coating chocolate or the real deal, they can be stored in an airtight container at room temperature for weeks at a time. I decided to go the extra mile and give my little bunnies buttercream floral headbands, but that is 100% optional. Use the ears on their own or pop on a few ready-made icing flowers from the craft store.
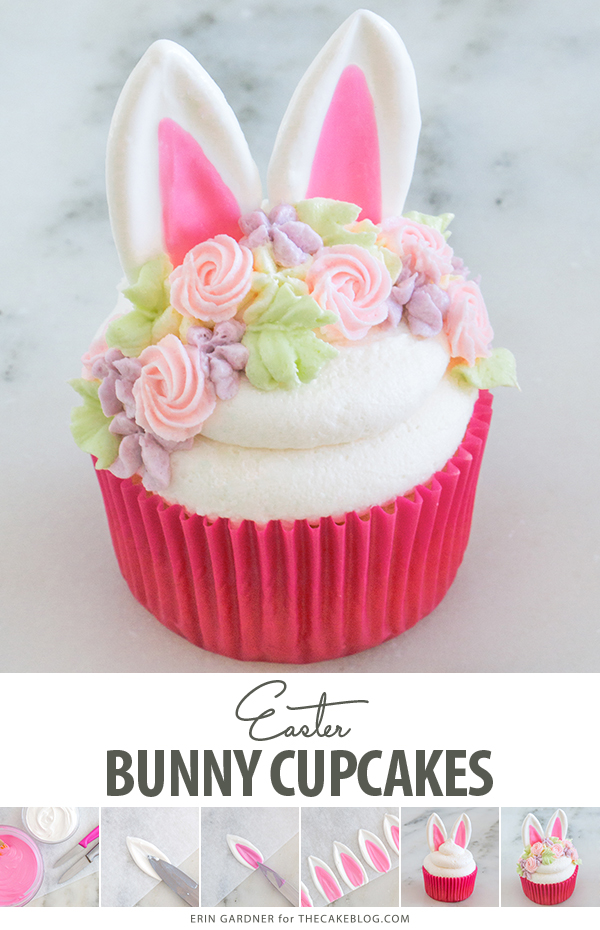
EASTER BUNNY CUPCAKES
a tutorial by Erin Gardner
Supplies:
- White coating chocolate or white chocolate
- Pink coating chocolate or white chocolate tinted pink
- 2 small knives, one thinner than the other (My large knife has an inch-wide blade and the smaller one has a half-inch blade. Tapered offset spatulas would work, too.)
- Parchment paper
- Cupcakes topped with vanilla buttercream
- 4 cups extra buttercream for flowers
- Gel food coloring in pink, yellow, purple, and light green
- Extra small star piping tip (#16)
- Small drop flower piping tips (#225)
- Small leaf tip (# 67)
Make the Bunny Ears
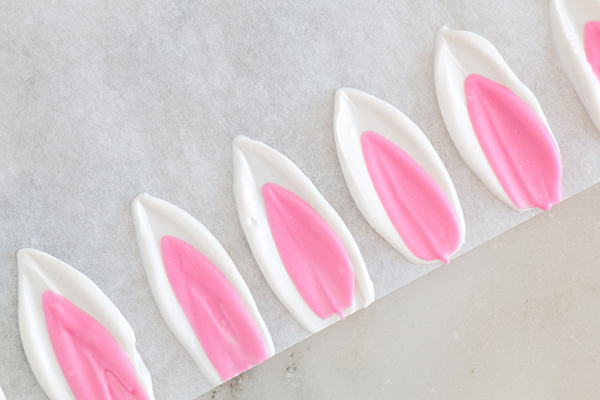
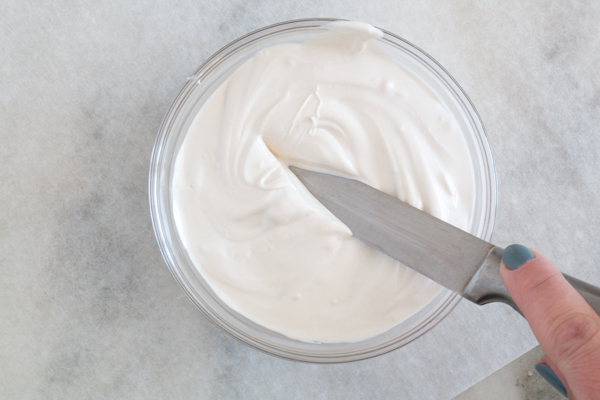
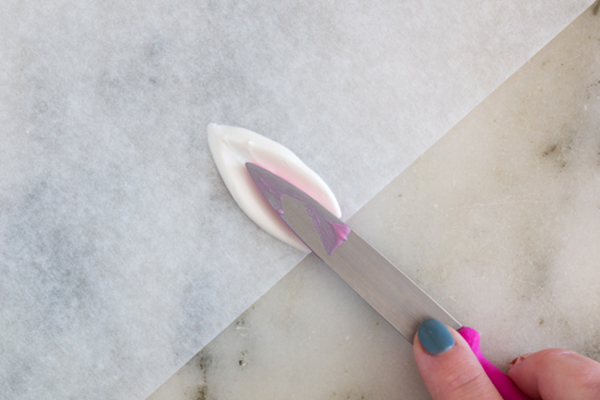
Melt the white coating chocolate in a small heatproof bowl according to the package instructions.

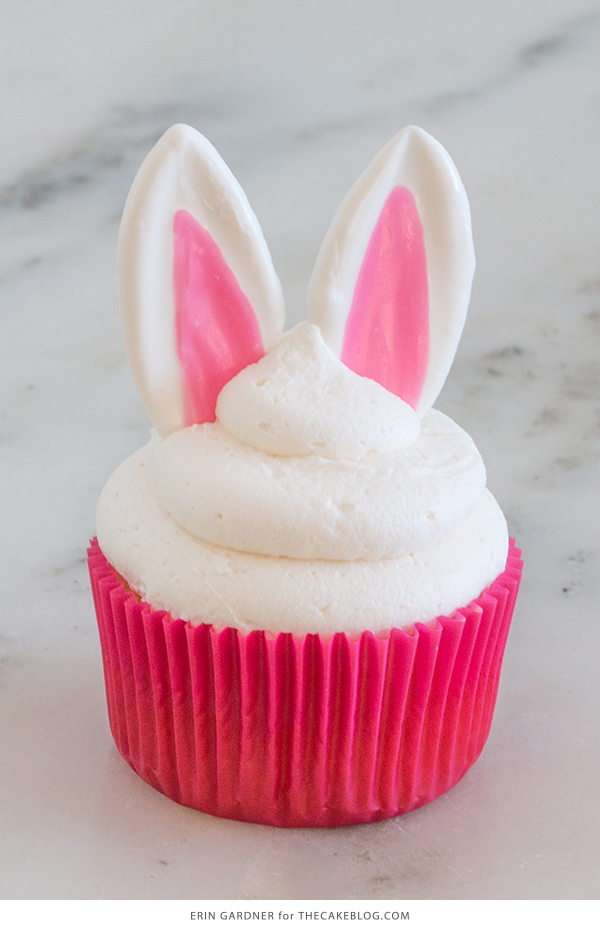
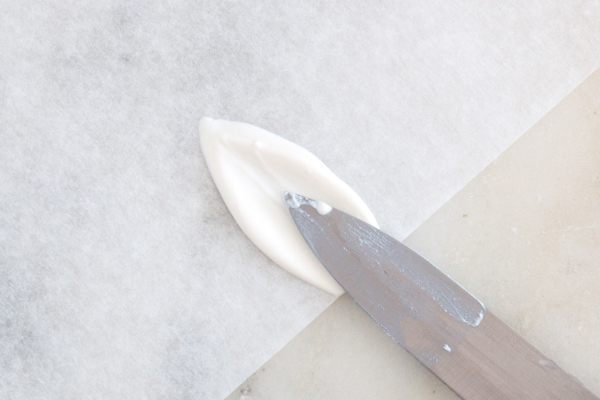
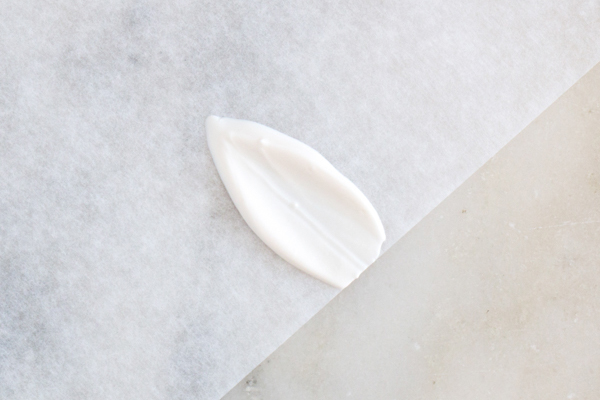
Dip the flat side of the larger knife in the melted chocolate. Scrape the back and sides of the knife clean against the lip of the bowl. Hold the coated side of the knife about 2 inches up from the edge of the paper. Gently press the melted chocolate onto the paper, pulling the knife down and away.

Repeat to make as many sets of bunny ears as you’ll need. Always make a few extra in case of breakage.
Melt the pink coating chocolate in a small heatproof bowl following the package instructions. Dip the flat side of the smaller knife in the melted chocolate. Wipe the back and sides clean against the lip of the bowl. Smear the pink chocolate, just as you did with the white, down the middle of one of the white ear backs, making sure to leave a perimeter of white around the pink middle.
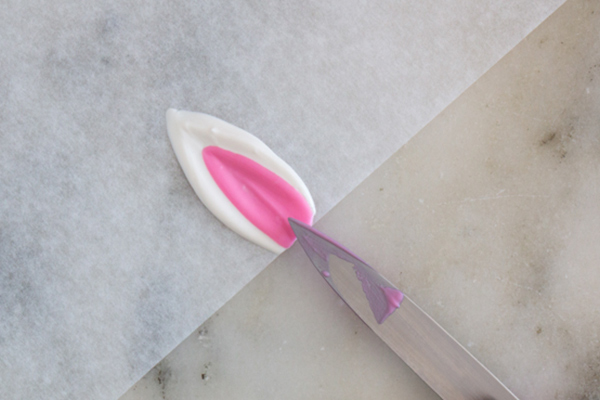
Repeat with the rest of the ears. Allow the ears to completely harden before using, about 5 minutes.
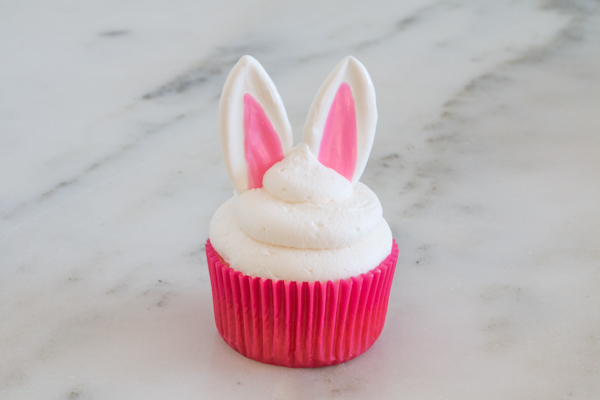
Assemble the Bunny Cupcakes
Press the hardened bunny ears into freshly piped buttercream.
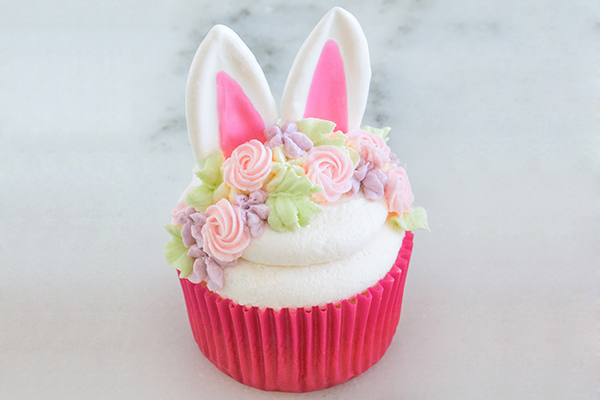
Divide the extra buttercream evenly into 4 small bowls. Tint three of the bowls pink, yellow, and purple, respectively, for the flowers (or in whatever flower shades you like). Tint the last bowl green for the leaves. The colors and flower styles you use for your little bunny headband are totally up to you, but I chose to fill a bag fitted with a small star tip with pink buttercream, the yellow and purple in bags fitted with small drop flower tips, and the green in the bag fitted with the small leaf tip.
Pipe a line of drop flowers, rosettes, and leaves in front of the ears. Repeat with the rest of your cupcakes and enjoy!
MORE EASTER DESSERTS TO MAKE:


These are adorable! ❤️
What tip did u use for the white buttercream to cover the cupcake?
You’ll want to use a large round piping tip like an Ateco 808 or Wilton 1A.
Hello
Will you be moving you cake photography class to a new place now the bluprint is closing